6-12
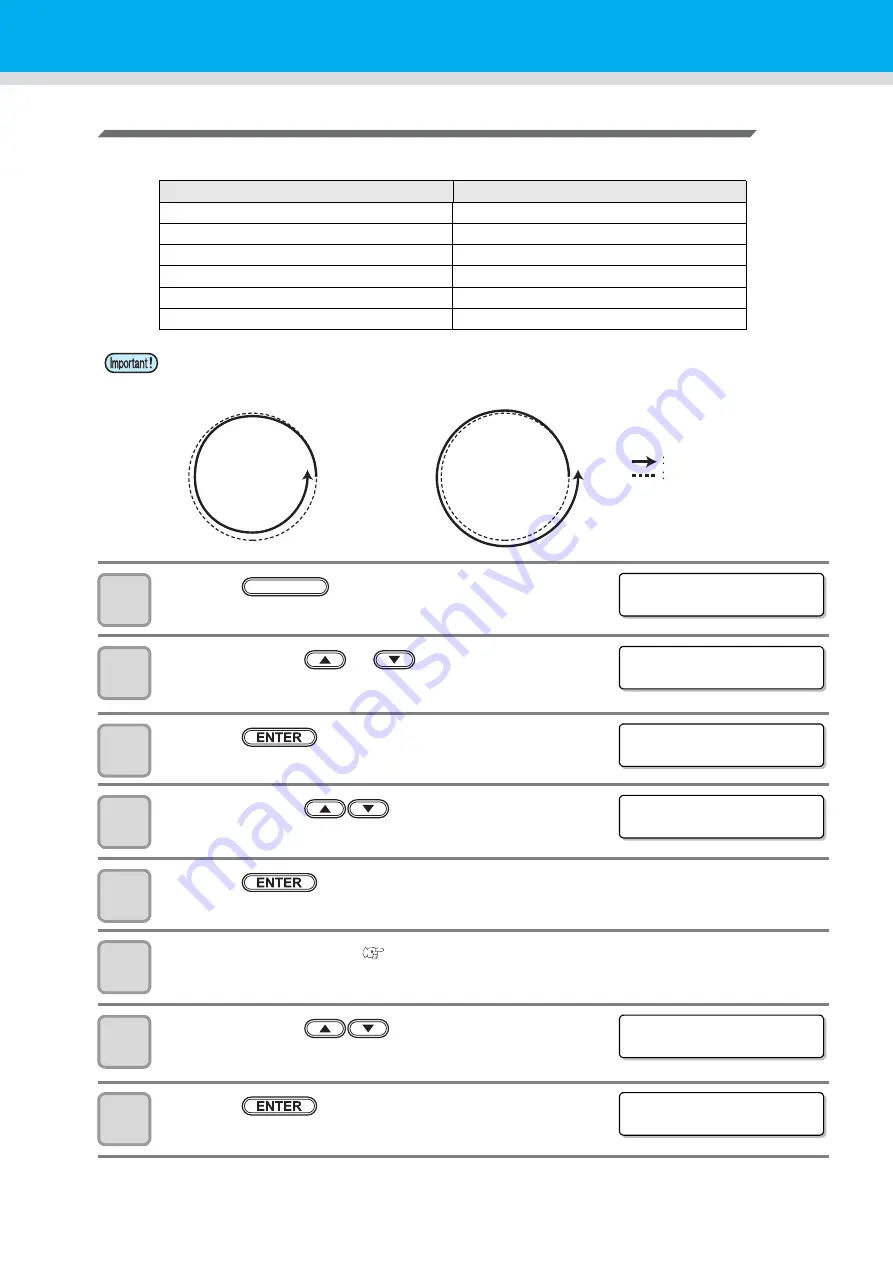
Circle
Correction
The unit can conduct correction for five circles of different radius.
1
Press the
key in the local mode.
2
Press the jog key
or
to select [TOOL
ADJUST] .
3
Press the
key.
4
Press the jog key
to select tool.
• Set value: REC.CUTTER1~2,
CUTTER, ROLLER1~3
5
Press the
key.
6
Attach the selected tool (
7
Press the jog key
to select [CIRCLE
ADJUST].
8
Press the
key.
Circle type for correction
Set values
Radius (R) ≤ 5 mm
- 20° ~ + 20°
5 mm < Radius (R) ≤ 10mm
- 20° ~ + 20°
10 mm < Radius (R) ≤ 20mm
-9.8° ~ + 9.8°
20 mm < Radius (R) ≤ 50mm
-9.8° ~ + 9.8°
50 mm < Radius (R) ≤ 100mm
-9.8° ~ + 9.8°
100 mm < Radius (R)
-9.8° ~ + 9.8°
• In some cases, this cannot be corrected by the CAD system.
• First, set arc
correction to Enable.
If arc
correction is not set to Enable, this offset will not be applied to the drawing (cut).
Locus
Direction of cutting
< FUNCT I ON >
SE T UP
[ ENT ]
FUNCTION
< FUNCT I ON >
TOOL AD J US T
[ ENT ]
< TOOL SE L T ECT >
TOOL : B : REC . CUT T ER 1
< TOOL SE L T ECT >
TOOL : B : REC . CUT T ER 1
< REC . CUT T ER 1 AD J >
C I RC L E
AD J US T [ ENT ]
< C I RC L E
AD J US T >
R < 5
:
0 . 0 º
Summary of Contents for CFL-605RT
Page 7: ...vi ...
Page 14: ...xiii ...
Page 48: ...2 8 1 Put the workpiece on the cutting panel 2 Press ...
Page 68: ...2 28 ...
Page 138: ...4 22 ...
Page 168: ...6 24 ...
Page 169: ...D202786 14 30062016 ...


