


78
8.
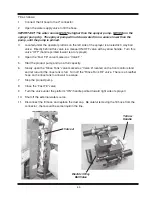
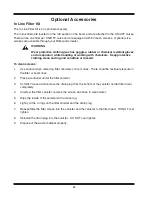
Before reinstalling the canister to the filter head, lubricate the canister o-ring with clean engine
oil. Reinstall the canister and hand tighten only.
9.
Connect the bypass hose to the bottom of the filter, open the bypass and agitation valves.
Open the emergency shut off valve at the bottom of the product tank.
10.
Start the sprayer pump with water in the tank and check for leaks.
11.
This procedure also applies to sprayer equipped with the standard filter.
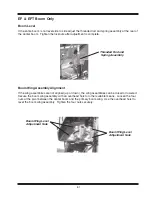
Sprayer Tips
Refer to the information found on page 25 “Spray Tip Wear” for tip cleaning.
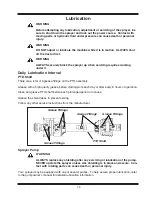
Storing and Winterizing
Storing your sprayer properly during the off season will help reduce the time needed to get the
sprayer ready for the next spraying season. If at all possible, store your sprayer in a dry building to
protect it from the harmful effects of the weather. Ultraviolet light in the sun’s rays softens and
weakens rubber used for hoses and tires.
WARNING
Wear protective clothing (such as goggles, rubber or chemical resistant gloves
and a respirator) while handling or working with chemicals. Keep protective
clothing clean and in good condition or discard.
IMPORTANT: It is very important that you thoroughly clean the sprayer inside and out.
Cleaning the Inside of the sprayer
1.
Add about 50 gallons of clean water along with a Neutralizing agent into the sprayer product
tank. Refer to “Cleaning the Sprayer” in this manual.
2.
Start the product pump and run at rated volume.
3.
Open and close ALL valves on the sprayer to ensure you have clean water through the entire
system.
NOTE:
The pressure gauge hose is supplied from the rear of the sprayer and is a “dead end” circuit.
The following procedure is recommended for cleaning.
a. With the sprayer pump turned off, carefully remove the pressure line from the bottom of the
pressure gauge.
b. Hold the end of the hose above a bucket and have an assistant start the sprayer pump
momentarily at an idle ONLY. Leave run at idle until clean liquid comes out of the hose.
Be careful of any “splash back” in the bucket.
c. Stop the sprayer pump and reattach the hose to the gauge.
4.
Spray liquid out through the boom at a proper location. Manually drain as much water as
possible. Dispose of liquid properly.
5.
Check entire sprayer for worn or damaged components. Replace as necessary.
Summary of Contents for 500 BW
Page 6: ......
Page 31: ...27 Spray Tip Wear...
Page 38: ...34 TeeJet Air Induction Spray Tips At Various Speeds And Pressures 20 Inch Tip Spacing...
Page 94: ......
Page 96: ...2007 by Miller St Nazianz Inc...