
17
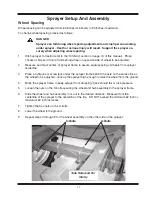
Electric Sprayer Controls
Note:
Refer to the separate control box owner’s manual for detailed installation instructions.
1.
Turn OFF all switches.
2.
Install control box in the tractor cab in a location where it can be used easily and is readily
visible.
3.
Determine best routing for control cable and pressure tube. Be sure the cables and/or tubes
DO NOT interfere with any moving parts on tractor or sprayer.
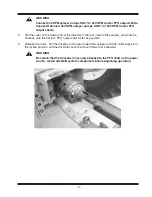
4.
Install Mounting bracket
5.
Make tractor connections for power input, ground and pressure tubing if so equipped.
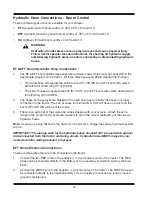
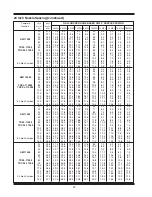
TeeJet Controller (Standard):
a. Connect the 2 RED wires to the 12 volt power source (positive).
b. Connect the 2 BLACK wires to a ground point on the tractor (negative).
c. Connect the single BLUE wire to the tractor headlight system. The BLUE wire powers the
light in the pressure gauge and does not turn OFF with the control box switch. DO NOT
connect directly to a power source that does not disconnect when the tractor is shut OFF.
d. Using the pressure tube coupler and fittings, connect the tube in the control wiring harness
to the tube in the extension wiring harness. Install the coupler outside the tractor cab in
case it would leak.
A gauge isolator (Part No. 07.17961) is available to use in place of the pressure tube
coupler. If it is installed outside the tractor cab, it prevents chemicals from entering the
tractor cab. It also protects the control box
gauge when liquid nitrogen is sprayed.
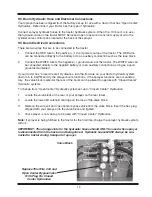
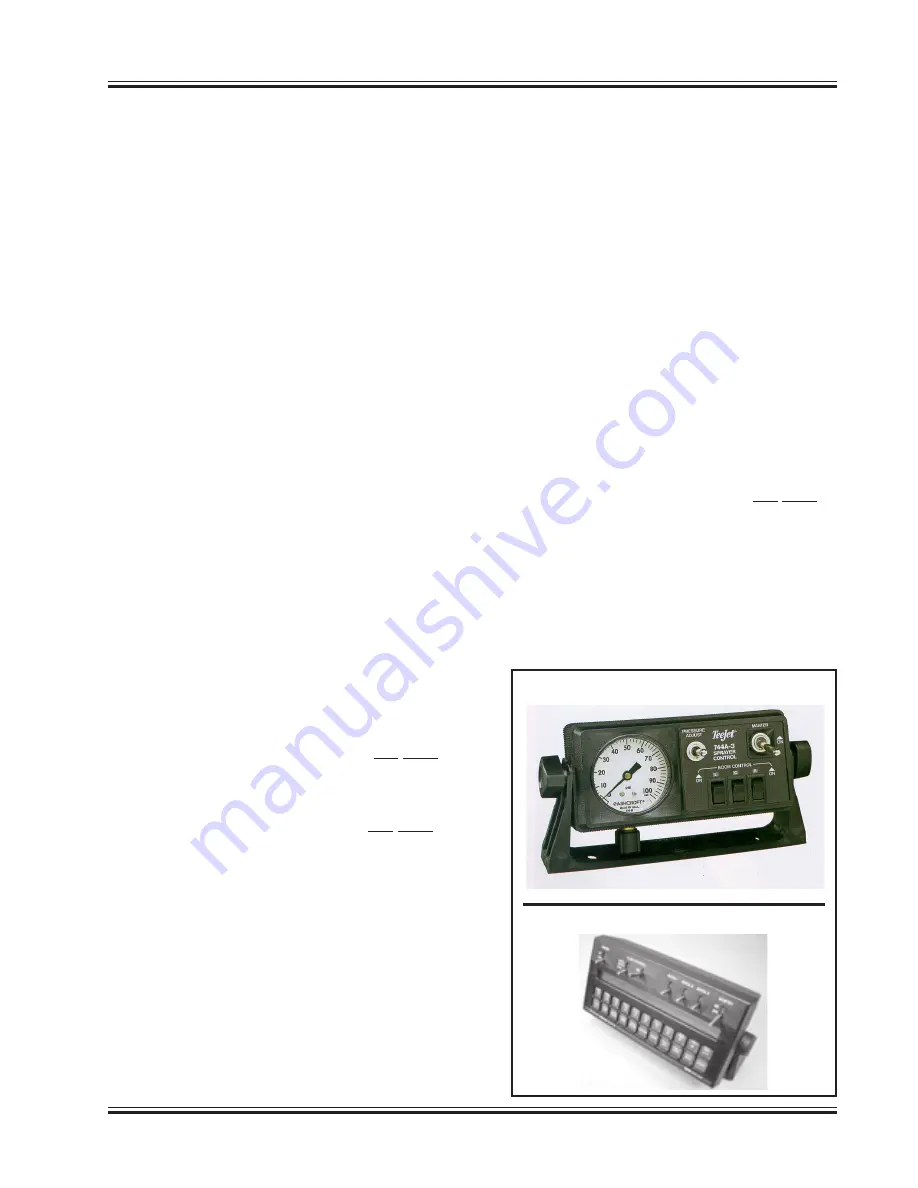
Raven Rate Controller (Optional):
a. Connect the RED wire directly to the
battery (12 volt - positive). DO NOT con-
nect to a remote power source.
b. Connect the WHITE wire directly to the
battery (12 volt - ground). DO NOT con-
nect to a remote ground source.
c. The rate controller is normally pre-pro-
grammed from Miller for your sprayer, but
you should verify that the programming
matches your sprayer specifications. It is
very important that the radar gun input
number is correct - refer to the Raven
owner’s manual.
6.
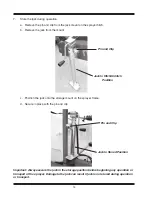
Complete the final assembly and make the final
connections. Test system to make sure it is
working properly.
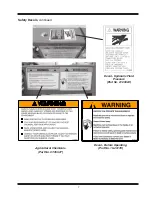
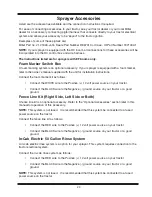
TeeJet Controller (Standard)
RAVEN Rate Controller (Optional)
Summary of Contents for 500 BW
Page 6: ......
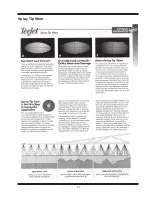
Page 31: ...27 Spray Tip Wear...
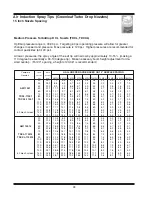
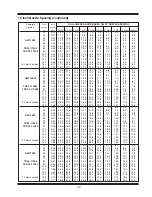
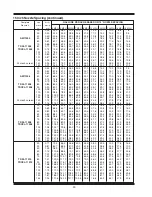
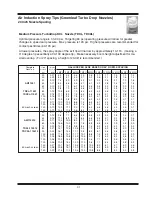
Page 38: ...34 TeeJet Air Induction Spray Tips At Various Speeds And Pressures 20 Inch Tip Spacing...
Page 94: ......
Page 96: ...2007 by Miller St Nazianz Inc...