13
OCR button: Click the Scan To button and
hold down the mouse until the Options menu
appears, then select OCR. The document text
is scanned, converted, and saved in text file
format.
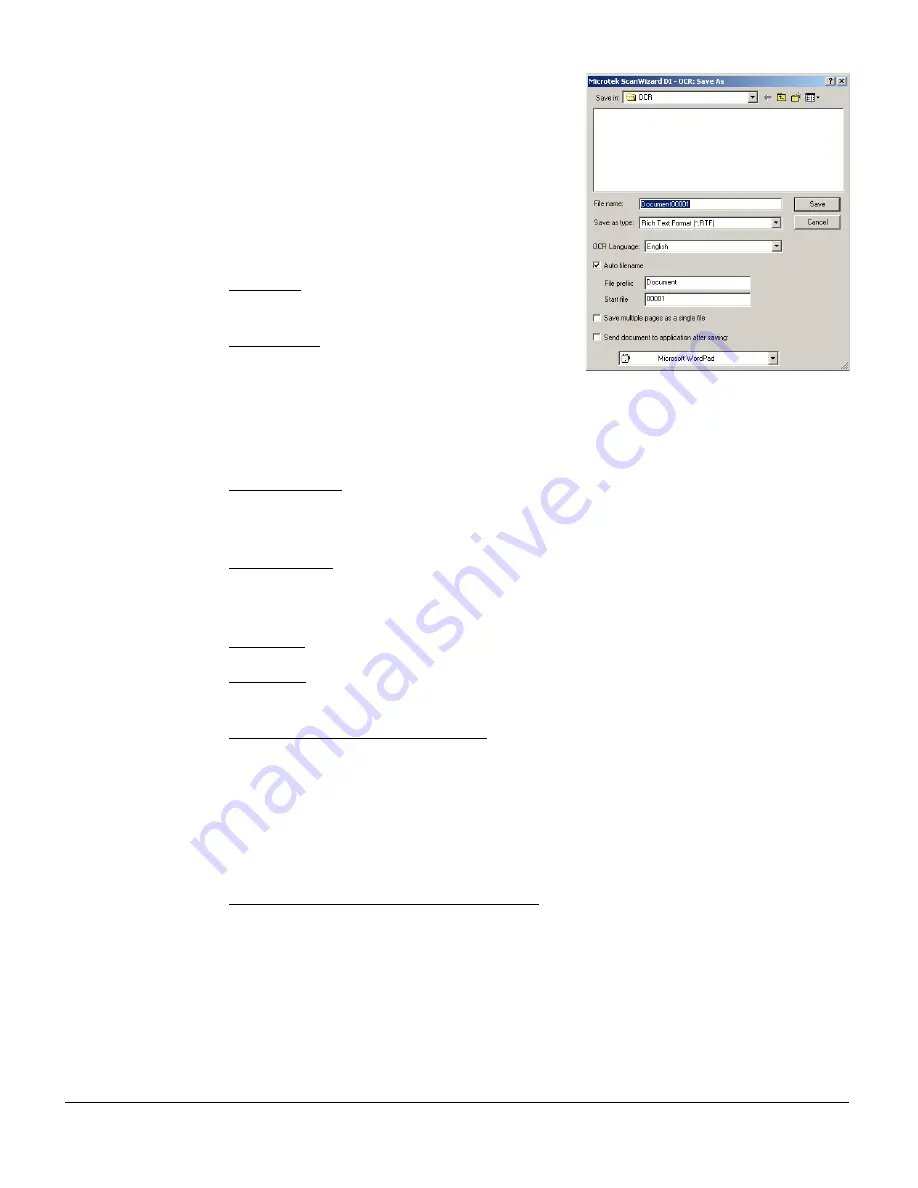
When the “OCR: Save As” dialog box appears,
key in a file name, then select .rtf, .txt, .xls,
.htm, and .pdf as the export file format.
File name: This is the file name to store
documents.
Save as type: This menu box lets you select a
file format when saving a file; RTF is the
default file format. If RTF is selected, the
scanned images will be automatically identified
as “Document00001.rtf”, “Document00002.rtf”,
etc. You can change the default root file name to uniquely label your scan jobs.
OCR Language: This refers to the language in which the original text document is
written. Supported options include English, French, German, Italian, Spanish, and
Chinese.
Auto filename: If Auto filename is checked, the file name consists of the file prefix,
plus the file serial number. If unchecked, no file serial number is appended to the file
name.
File prefix: This edit box lets you enter a root file name. “Document” is the default.
Start file #: This edit box lets you enter a starting number to be appended to the file
name. “00001” is the default.
Save multiple pages as a single file: Allows you to save scanned pages to a single
file. You can enable this option if the output page file format is RTF, TXT. When
enabled, ScanWizard DI will prompt you to place the next page as you scan from the
scanner bed. Then click the Continue button to scan; or click the Close button to
save multiple pages as a single file. If you scan through the ADF, the scanning
originals are sequentially scanned until paper out; when finished, all the scanned
pages are saved as a single file.
Send document to application after saving: If this option is checked, the scanned
document is sent to your selected application. The applications in the drop-down
window include WordPad, Word, Excel, IE, and Acrobat. By default, the application
is “Microsoft WordPad”.
Make sure the check box “Send document to application after saving” has been
checked. Choose your Word processing application from the options, then click the
OK button. The saved file can now be opened from your chosen application, and is
ready to be edited.
OCR
Summary of Contents for ArtixScan DI 2010
Page 1: ......


