background image

System Configuration

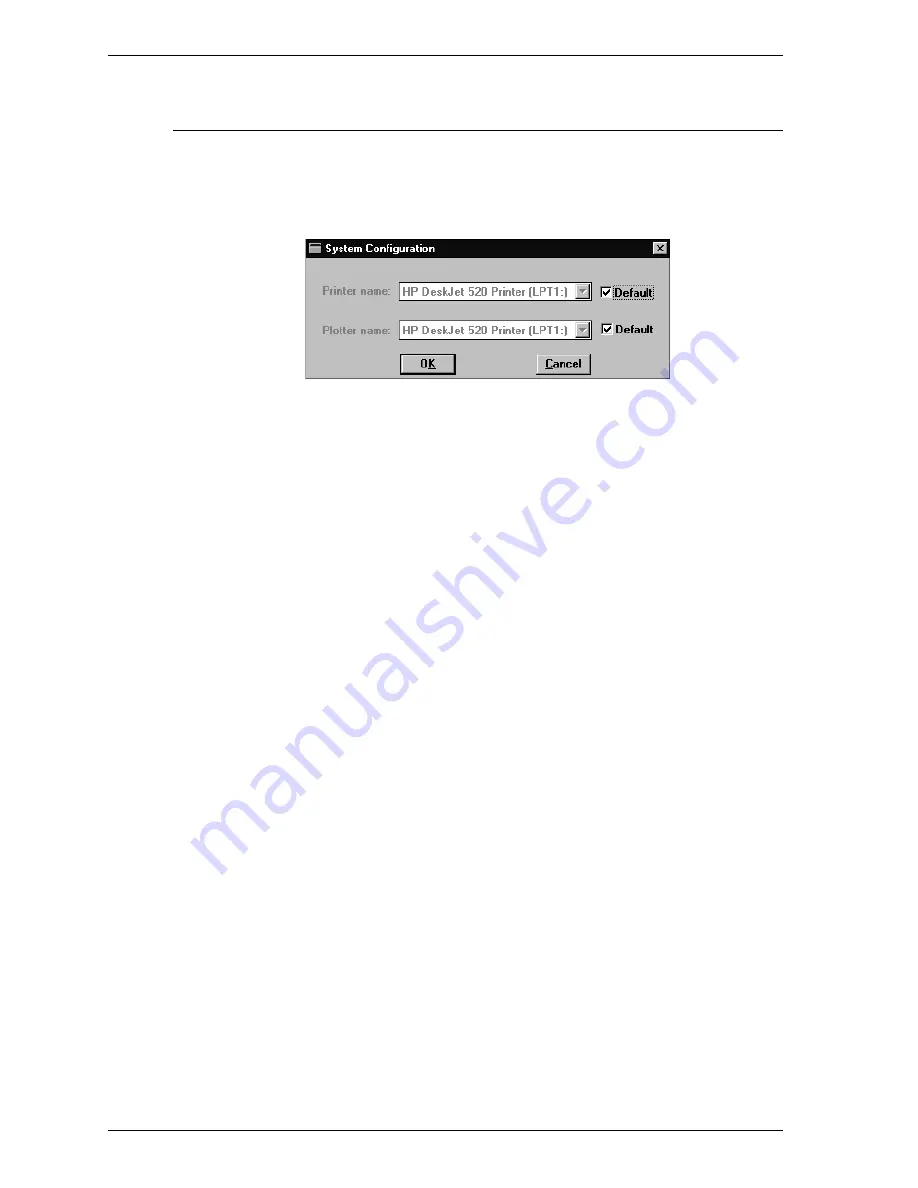
This option allows you to specify the printer to be used for reports. When you se-
lect this option, the following dialog box is displayed.

Printer name

The printer names are shown as they appear in
the Operating System Print Manger.

Select Default if you wish to use the default
printer as designated in the Print Manager.

If you wish to use another printer, click on
Default to remove the checkmark. Then choose an-
other printer from the drop-down list.

Plotter

A plotter is not used with the SmartPrep 065.

Options Menu

SmartPrep

3-36

Aug 98

Summary of Contents for SmartPrep 065

Page 1: ...SmartPrep 065 Operator s Manual V2 02 065 42801 01 March 2002...

Page 2: ...ritics Instrument Corporation 2002 All rights reserved The software described in this manual is furnished under a license agreement and may be used or copied only in accordance with the terms of the a...

Page 3: ...tain products sold by MICROMERITICS are the products of reputable manufacturers sold under their respective brand names or trade names We therefore make no express or implied warranty as to such produ...

Page 4: ......

Page 5: ...Front Panel Controls and Indicators 2 1 Rear Panel Controls 2 3 Menu Structure 2 4 Main Menu 2 4 Windows Menu 2 5 Help Menu 2 5 Creating Sample Information Files 2 6 Basic Format 2 6 Advanced Format...

Page 6: ...ll 3 12 Print 3 13 List 3 14 Exit 3 16 SmartPrep Menu 3 17 Show Status 3 18 Start Degas 3 20 Configuration 3 21 Reports Menu 3 22 Log Report 3 23 Options Menu 3 24 Option Presentation 3 25 Restricted...

Page 7: ...5 ORDERING INFORMATION APPENDICES Appendix A Forms Appendix B Error Messages SmartPrep Table of Contents Oct 01 iii...

Page 8: ......

Page 9: ...CHAPTER 1 INSTALLATION Organization of the Manual Conventions Description Specifications Unpacking and Inspeciton Installation...

Page 10: ......

Page 11: ...riptions of the SmartPrep system components and accessories that may be ordered from Micromeritics Appendix A Forms Contains a form used to record degas conditions Appendix B Error Messages Lists the...

Page 12: ...and status indicators show the current state of the heating stations The SmartPrep has two serial ports One port is used to connect the SmartPrep to the control module You may use the other port to co...

Page 13: ...0 o C for temperaures between 100 and 300 o C 15 o C for temperatures over 300 o C Soak Time 0 to 999 minutes in 1 minute increments Ramp and Soak Cycles Up to 5 ramp and soak cycles Ramp Rate From 5...

Page 14: ...report the condition to the carrier immediately Equipment Return Micromeritics strives to ensure that all items arrive safely and in working order Occasionally due to circumstances beyond our control...

Page 15: ...proceed to Step 4 If the regulator has a 1 4 in outlet attach the reducer fitting to the outlet of the regulator shut off valve Figure 1 2 Connecting Gas Bottle to the Regulator 4 Tighten the regulato...

Page 16: ...ten the fitting Then check the pressure again 9 Open the regulator shut off valve The pressure should stabilize after about five minutes If it does not gas is probably leaking at the brass reducer fit...

Page 17: ...the next SmartPrep You may connect up to four SmartPreps in this manner 14 Install the power supply filter as follows a Insert the tip of a flat head screwdriver or similar object into the grill of t...

Page 18: ...each flex ible tube by pressing the flexible tube completely over the barbed end of the gas delivery tube Place the delivery tubes in the storage cavities behind the heating stations Figure 1 5 Attach...

Page 19: ...ed it may take longer to print reports Installing the Software The SmartPrep 065 software can be used in one of two modes As an embedded program in the Micromeritics TriStar 3000 analysis system softw...

Page 20: ...om the Start menu 3 Enter the name of the drive designator followed by setup For example a setup 4 Select several informational screens are displayed On any of these screens you may select to terminat...

Page 21: ...ll these files you may access the files in the same manner as other screen saver files 6 Select File names are displayed as the SmartPrep files are loaded Insert the SmartPrep 065 Standalone diskette...

Page 22: ...o update your software configuration You must exit all applications associated with SmartPrep before running the Setup program 1 Insert the SmartPrep Setup diskette into a diskette drive 2 Choose one...

Page 23: ...the number of SmartPrep units connected to the control module and the communication port to which the first SmartPrep is connected then select 10 After the configuration process is complete a message...

Page 24: ...r This option is used to enter the SmartPrep se rial number into your system and is performed at the factory before ship ment Therefore you will not have to use this option Advanced functions operate...

Page 25: ...he control module to which you connected the ca ble then select 4 A message is displayed indicating that the process will begin click 5 After the configuration process is complete a message is display...

Page 26: ......

Page 27: ...nu Structure Creating Sample Information Files Preparing Samples for Degassing Inserting and Removing Heating Station Adapters Degassing Samples Performing an Automatic Degas Operation Monitoring a De...

Page 28: ......

Page 29: ...tation When the gas pressure is set to 15 psi 103 kPa and a valve is fully opened the gas flow rate will be approximately 100 cm3 min You may check the flow rate by inserting the gas delivery tube in...

Page 30: ...low 30 o C and the actual temperature is below 60 o C the station is idle and is not hot Cooling The yellow Cooling light comes on when the set point temperature of the station is less than 30 o C and...

Page 31: ...gure 2 2 Rear Panel Power On Off Switch Place the switch in the up position On to turn on the degasser Place it in the down position Off to turn off the degasser Power On Off Switch SmartPrep Rear Pan...

Page 32: ...er 3 SmartPrep Allows you to start a degas operation monitor a degas operation and display the system configuration Chapter 3 Reports Allows you to start and cancel reports Chapter 3 Options Allows yo...

Page 33: ...Resizes all open windows and arranges them in a stacked fashion The active window is positioned on top of the stack Arrange Icons Arranges all minimized icons in an orderly manner The Windows menu al...

Page 34: ...predefined degas conditions files Advanced This format enables you to enter or edit sample information and degas conditions files If you wish you may also specify default values for sample informatio...

Page 35: ...choose a degas conditions file If you have an existing sample information file containing the options you wish to use for this file select to choose the file and copy the options 6 Select then Replac...

Page 36: ...dialog box is displayed 2 Accept the next sequenced file number or enter a new name in the File name field 3 Select The following message is displayed File name does not exist Do you wish to create it...

Page 37: ...Soak Temperature Temperature Ramp Rate and Soak Time Refer to Degas Con ditions in Chapter 3 for a more detailed description of this dialog box 9 After you have entered all degas conditions select the...

Page 38: ...on the drying oven used for heating the sample tubes and filler rods if used and set the temperature to 110 o C 2 Check the reservoir of the ultrasonic cleaning unit to make sure it is clean 3 Use 5 g...

Page 39: ...brush 7 Rinse the sample tubes and filler rods thoroughly with hot water Then rinse them with isopropyl alcohol or acetone using a waste container to collect used solvent If isopropyl alcohol or acet...

Page 40: ...ack Bake in a drying oven for two hours 10 Remove the sample tubes from the oven and allow them to cool 11 Wipe a rubber stopper with a lint free cloth 12 Label the sample tube and stopper for identif...

Page 41: ...e a sample weighing container onto the balance Tare the balance and al low it to stabilize at zero 0 Do not touch the sample with bare hands while performing the next six steps Doing so could affect t...

Page 42: ...tube set containing the sample and record the weight as sample plus sample tube weight before degas The weight recorded at this step is the weight prior to degassing Degass ing will reduce the weight...

Page 43: ...ASAP 2000 2010 and TriStar 3000 sample tubes consti tute an isothermal shield which enables you to insert and remove them safely us ing the adapter handle The isothermal shield helps maintain uniform...

Page 44: ...Model TriStar 3000 ASAP 2000 ASAP 2010 Gemini Bulb Tube Gemini Straight Wall Tube 1 4 3 8 or 1 2 in Stem 1 in Bulb P N 065 25815 00 3 8 in Stem 3 4 in Bulb P N 065 25811 00 3 8 in Stem P N 065 25812 0...

Page 45: ...per part of its stem Hold the isothermal type of adapter by its handle Failure to observe these precautions may result in severe burns Do not place your fingers inside the heating stations the station...

Page 46: ...eating station Alternately you may insert the sample tube in the heating station then place the adapter over the sample tube in the station Figure 2 9 Inserting Adapter used with TriStar 3000 and ASAP...

Page 47: ...s and hold the sample tube by the upper part of its stem Hold the isothermal type of adapter by its handle Failure to observe these precautions may result in severe burns 1 Holding the stem of the sam...

Page 48: ...ooling rack after you remove them from the heating stations Do not place adapters near any combustible material or touch them with your fingers Do not place a hot adapter on an unprotected surface suc...

Page 49: ...n kit when removing adapters The adapters may become hot enough to cause severe burns Do not place your fingers inside the heating stations the stations may be hot enough to cause burns Inserting Adap...

Page 50: ...g heating station adapters 1 Press the extended portion of the adapter removal tool then insert it into the adapter until it touches the bottomof the heating station illustrated here out side of the h...

Page 51: ...s used with Gemini Sample Tubes 4 Place the adapter in a cooling rack see Figure 2 11 Place heating station adapters in a cooling rack after you remove them from the heating stations Do not place adap...

Page 52: ...heck the flow rate Use a precision flow meter or Insert the gas delivery tube into a beaker of water and observe the amount of bubbles caused by the gas flow as you adjust the control knob Inserting G...

Page 53: ...the gas delivery tube Figure 2 16 Inserting Gas Delivery Tube Into Sample Tube 3 Insert the stopper loosely into the sample tube The stopper helps prevent cool moist air and dust from entering the tu...

Page 54: ...e 2 17 Inserting Sample Tube Into Heating Station 5 Repeat Steps 4 and 5 under Setting the Gas Flow Rate and Steps 1through 4 above to insert additional sample tubes Degassing Samples SmartPrep 2 26 A...

Page 55: ...rt degas operations on up to six heating stations 2 Select the button next to the desired sample station to select a sam ple information file If you wish to remove a sample information file select 3 T...

Page 56: ...represented in the Degas Port area of the dialog box You may select only one heating station at a time 1 Click on the port you wish to use for the degas operation 2 Press The degas operation begins an...

Page 57: ...ion in this chapter For each sample station the following information is displayed Sample The name and path of the sample information file being used Status The current degas status as described below...

Page 58: ...menu 2 The following dialog box is displayed 3 Press for the desired heating station the heating station must be Idle The following dialog box is displayed 4 Enter the setpoint for the heating station...

Page 59: ...ASAP 2000 and 2010 sample tubes refer to TriStar 3000 ASAP 2000 and ASAP 2010 Sample Tubes earlier in this chapter 2 Press a stopper into the sample tube and place the sample tube in a rack to cool 3...

Page 60: ......

Page 61: ...CHAPTER 3 SMARTPREP MENUS File Menu SmartPrep Menu Reports Menu Options Menu...

Page 62: ......

Page 63: ...ile menu contains options which allow you to manage sample information and degas conditions files Description Listed below are brief descriptions of the File menu options Detailed descrip tions follow...

Page 64: ...all open files Close Closes the file in the active window Close All Closes all open files Print Prints the contents of a sample information or de gas conditions file List Generates a list of certain i...

Page 65: ...next sequenced file name generated by the SmartPrep program For degas conditions files the file name displayed includes the wild card and the following extension DEG Use one of the following methods...

Page 66: ...e specified range of dates Analyzing Files currently being used for an analysis applies only when used as an embedded program No Analysis Files that have not been used for a degas operation or an anal...

Page 67: ...n degas conditions Degas conditions can also exist as a separate file This feature allows you to use the degas conditions as many times as you wish Sample information files are presented in two format...

Page 68: ...ously defined degas conditions files Choose the degas conditions file you wish to use Allows you to copy all parameters of an existing sample file into the file you are creating An Open File dialog bo...

Page 69: ...n and the name of the person or department submitting the sample for degas You may omit either of these fields from appear ing on the dialog by selecting Omit when entering defaults refer to Sample De...

Page 70: ...ntered Closes the dialog box The following message is displayed if you have changed the current file and have not saved the changes file name has been changed Save changes be fore closing Choose one o...

Page 71: ...ength 40 alphanumeric characters at least one character is required Allows you to copy the values of an existing de gas conditions file into the file you have open When you select this button an Open...

Page 72: ...amount of time the sample will soak Range 0 to 10 000 minutes Default 10 minutes Select a row highlight the row then press this button to insert a row above the one selected Select a row highlight th...

Page 73: ...Save As enables you to save the file in the active window under a new name Saving the file under a new name allows you to make modifications without changing the original file When you select Save As...

Page 74: ...he changes and close the dialog box Cancel to leave the dialog box open allowing you to edit the file further Close All Close All enables you to close all open files under their current names The fol...

Page 75: ...file name Status Files Directories Refer to Open in this chapter for a description of these list boxes Settings Copies Click on the up and down arrows to select the number of copies you wish to print...

Page 76: ...nditions Select the type of file you wish to list A dialog box similar to the following is displayed File name If you select only one file from the Files list box the name is copied to this field If y...

Page 77: ...ation Choose one of the following File to store the listing in a file When you choose File the File name field is enabled so that you can enter a name or accept the de fault Printer to send the listin...

Page 78: ...odified file is open the following message is displayed Choose one of the following Select to save changes and exit the SmartPrep program Select to abandon changes and exit the SmartPrep program Selec...

Page 79: ...ailed de scriptions follow this section Unit The number of SmartPreps in your system as de fined during setup is displayed on a drop down menu Select the unit you wish to use Show Status Enables you t...

Page 80: ...the name and path of the sample infor mation file being used Status Displays the current degas status as described be low 1 Idle 2 Stage n of n Ramping to nnno C at nno C min 3 Stage n of n Soaking nu...

Page 81: ...s conditions file or to perform a manual degas operation The following dialog box is displayed Enter the set point for the heating station and press Range 20 to 450o C Default Current set point temper...

Page 82: ...ons The description of the degas conditions file con tained in the sample information file is displayed If you wish to select a different file click the down arrow to display a list of degas condition...

Page 83: ...nfiguration Displays the number of the port Comm Port cur rently used to control the analyzer the SmartPrep unit number and the serial number of the selected analyzer Software Version Displays the sof...

Page 84: ...to Print in this chapter for field descrip tions The files list in the dialog box contains files with a status of Prepared or Preparing A sample report is shown on the next page Cancel reports Select...

Page 85: ...Log Report The following is a sample log report produced by the SmartPrep program SmartPrep Reports Menu Aug 98 3 23...

Page 86: ...Detailed descriptions follow this section Option presentation Allows you to display the sample information file dialog box in either Basic Avanced or Restricted format Report Enables you to select the...

Page 87: ...format Displays the Basic format dialog box refer to Basic on the following page Disables the push button thus restricting users from switching to Advanced format and editing parameters Disables the f...

Page 88: ...sociated degas conditions file in a single dialog box Allows you to select a different predefined degas conditions file Allows you to switch to Advanced format and edit parameters Refer to Basic Sampl...

Page 89: ...ion and degas conditions files in a tabbed index format allowing users to edit sample information and degas conditions Allows you to switch to Basic format if desired Refer to Advanced Sample Informat...

Page 90: ...eports Font Style Use the up and down arrows to scroll through the list of font styles Click on the style you wish to use for reports Size Use the up and down arrows to scroll through the list of font...

Page 91: ...layed Sequence Enter a default sequence number or name for sample information files This is the name that ap pears in the File name field when you select File Open Sample Information The name you spec...

Page 92: ...aracters You may include the automatically generated file name as part of the identification by using the symbol where you want the sequence number to appear Length 42 alphanumeric characters For exam...

Page 93: ...uence Enter a default sequence number or name for sample information files This is the name that ap pears in the File name field when you select File Open Sample Information The name you specify is in...

Page 94: ...r Length 42 alphanumeric characters For example if the sequence number is 000 001 enter the sample identification as follows Lab 25 The resulting sample identification for the first sample information...

Page 95: ...or Submit ter prompt from the dialog box click on the Omit box to the right of the field Comments Enter default comments if desired Allows you to copy all parameters of an existing sample file into th...

Page 96: ...haracters at least one character is required Allows you to copy the values of an existing de gas conditions file into the file you have open When you select this button an open file dialog box is disp...

Page 97: ...lt 10o C per minute Soak Time Enter the amount of time the sample will soak Range 0 to 10 000 minutes Default 10 minutes Select a row highlight the row then press this button to insert a row above the...

Page 98: ...ter names are shown as they appear in the Operating System Print Manger Select Default if you wish to use the default printer as designated in the Print Manager If you wish to use another printer clic...

Page 99: ...ou select this option the following dialog box is displayed The directory you select here is the directory to which the program will go to ob tain the files for the Degas conditions drop down list Whe...

Page 100: ......

Page 101: ...CHAPTER 4 MAINTENANCE...

Page 102: ......

Page 103: ...emove and replace it with a new one A supply of filters is provided in the accessories shipped with the SmartPrep Refer to Ordering Information in Chapter 5 when reordering is required 1 Insert the ti...

Page 104: ...layed 4 Click for Port 1 Note that this push button changes to 5 Observe the liquid in the beaker If there is a steady stream of bubbles the flow rate is appropriate If the bubbles are sparse and erra...

Page 105: ...CHAPTER 5 ORDERING INFORMATION...

Page 106: ......

Page 107: ...hot fittings 060 25803 00 Gas delivery tube set of six 065 25807 00 Flexible tubing external 6 required 065 25808 00 Flexible tubing internal 6 required 004 27015 00 Dust filter for rear panel packag...

Page 108: ......

Page 109: ...APPENDIX A FORMS...

Page 110: ......

Page 111: ...FORMS This appendix contains a form that you may use to enter degas information You may remove the form and make copies as needed A 1...

Page 112: ......

Page 113: ...______________________ Temperature Set Point 2_______________________ Soak time 2 _________________________________ Temperature Set Point 3_______________________ Soak time 3 _________________________...

Page 114: ......

Page 115: ...APPENDIX B ERROR MESSAGES...

Page 116: ......

Page 117: ...software error occurred when the file was accessed Action C Contact your service representative Cause D The name specified contains one or more invalid characters Action D Enter a valid DOS filename r...

Page 118: ...n copied into the directory and you know the name of the file you wish to access 34 File file name Subset number wrote wrong amount of data Cause An internal processing and or hardware error has occur...

Page 119: ...ing directory specified in the INI file is invalid The di rectory may have been deleted or moved to a different location Action The installation directory will be substituted The next time you open a...

Page 120: ...use The highlighted field contains an invalid entry Action Check the entry and correct the error 116 An entry is REQUIRED for this field Cause This field requires a valid entry for you to proceed Acti...

Page 121: ...ntinue to receive this error message Record the name of the sample file in which the problem occurred 122 Sequence number must contain at least 3 digits Cause You tried to enter a sequence number that...

Page 122: ...e drive containing the file 185 Error Logger cannot be initialized Error code number Program will exit Cause An internal processing and or hardware error has occurred Action Contact your service repre...

Page 123: ...vice representative 198 Print job name has been cancelled due to insufficient disk space De lete unnecessary files and restart the report Cause The disk drive does not have enough space for the tempor...

Page 124: ...ion of the SmartPrep Unit d S N s is invalid Cause The controller software running on the designated instrument is invalid Action Use the SmartPrep Setup program to download the proper con troller sof...

Page 125: ...ry again 503 File name cannot be analyzed It is currently being edited Cause You are trying to start a degas operation using a file that is open for editing Action Finish editing the file save and clo...

Page 126: ...diting Action Select Yes to save the changes and proceed with the degas op eration select No to cancel the degas operation and continue ed iting the Sample Information file 508 Cannot open sample info...

Page 127: ...INDEX...

Page 128: ......

Page 129: ...tions automatic operation for TriStar 3000 V1 00 2 28 completing 2 31 monitoring 2 29 3 18 performing automatic operation 2 27 3 20 performing manual operation 2 30 Delivery tubes See Gas delivery tub...

Page 130: ...ation 2 27 selecting for TriStar 3000 V1 00 2 28 selecting temperature 2 15 2 30 3 19 See also Heating station adapters Help menu 2 5 Humidity 1 3 I Installation gas bottle 1 5 gas delivery tubes 1 8...

Page 131: ...es 2 14 preparing for degassing 2 10 weighing 2 13 2 14 2 31 Save All command 3 12 Save As command 3 11 Save command 3 11 Sequence number 3 29 Serial ports 1 2 1 14 connecting devices 1 6 entering in...

Reviews: