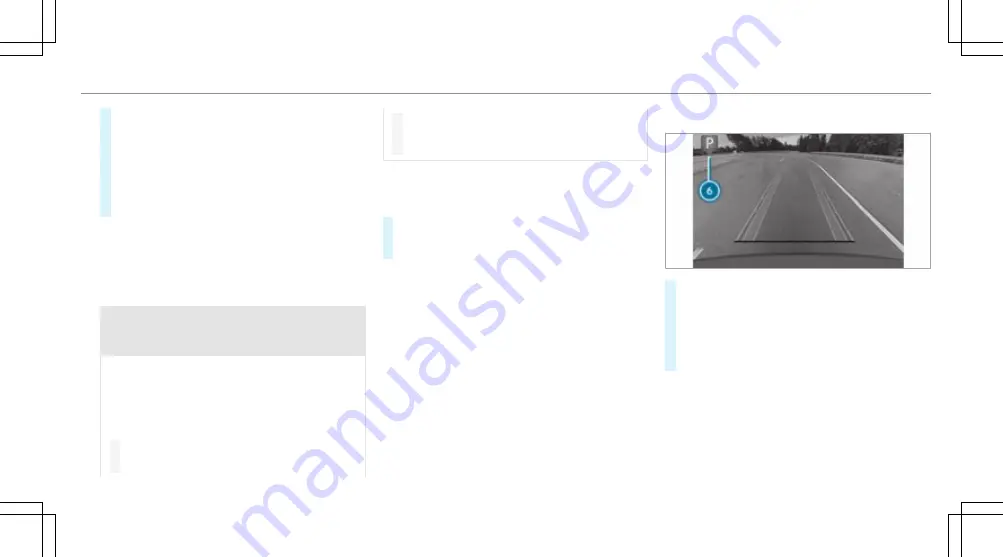
#
Vehicles with 360° Camera: to change the
parking direction, tap the selected parking
space again.
#
To start the parking procedure: press button
1
again.
The vehicle drives into the selected parking
space.
The turn signal indicator is switched on automati-
cally when the parking procedure begins. You are
responsible for selecting the turn signal indicator
in accordance with the traffic conditions. If neces-
sary, select the turn signal indicator accordingly.
&
WARNING Risk of accident due to vehicle
swinging out while parking or pulling out
of a parking space
While parking or exiting a parking space, the
vehicle swings out and can drive onto areas of
the oncoming lane.
This could cause you to collide with objects or
other road users.
#
Pay attention to objects and other road
users.
#
Where necessary, stop the vehicle or
cancel the parking procedure with Active
Parking Assist.
On completion of the parking procedure, the
Active Parking Assist finished
display message
appears.
#
Secure the vehicle against rolling away. When
required by legal requirements or local condi-
tions: turn the wheels towards the kerb.
%
You can stop the vehicle and change the
transmission position during the parking pro-
cedure. The system then calculates a new
vehicle path. If no new vehicle path is availa-
ble, the transmission position can be changed
again, or the process can be cancelled.
Immediate parking via the
Camera views
menu
#
Select the
Camera views
menu.
#
When the vehicle is stationary and in transmis-
sion position
k
, and symbol
6
appears in
the camera image: press button
1
again.
The parking procedure is initiated for the
detected parking space.
%
The parking space and parking direction can-
not be changed in immediate parking.
Exiting a parking space with Active Parking Assist
Requirements:
R
The vehicle is equipped with a 360° Camera.
Driving and parking 299
Summary of Contents for EQS 350
Page 9: ...Left hand drive vehicles with central display 6 At a glance Cockpit central display...
Page 11: ...Left hand drive vehicles with MBUX hyperscreen 8 At a glance Cockpit MBUX Hyperscreen...
Page 13: ...Standard driver s display 10 At a glance Indicator and warning lamps standard...
Page 17: ...14 At a glance Overhead control panel...
Page 19: ...16 At a glance Door operating unit and seat adjustment...
Page 21: ...18 At a glance Control settings in the rear passenger compartment...


