28
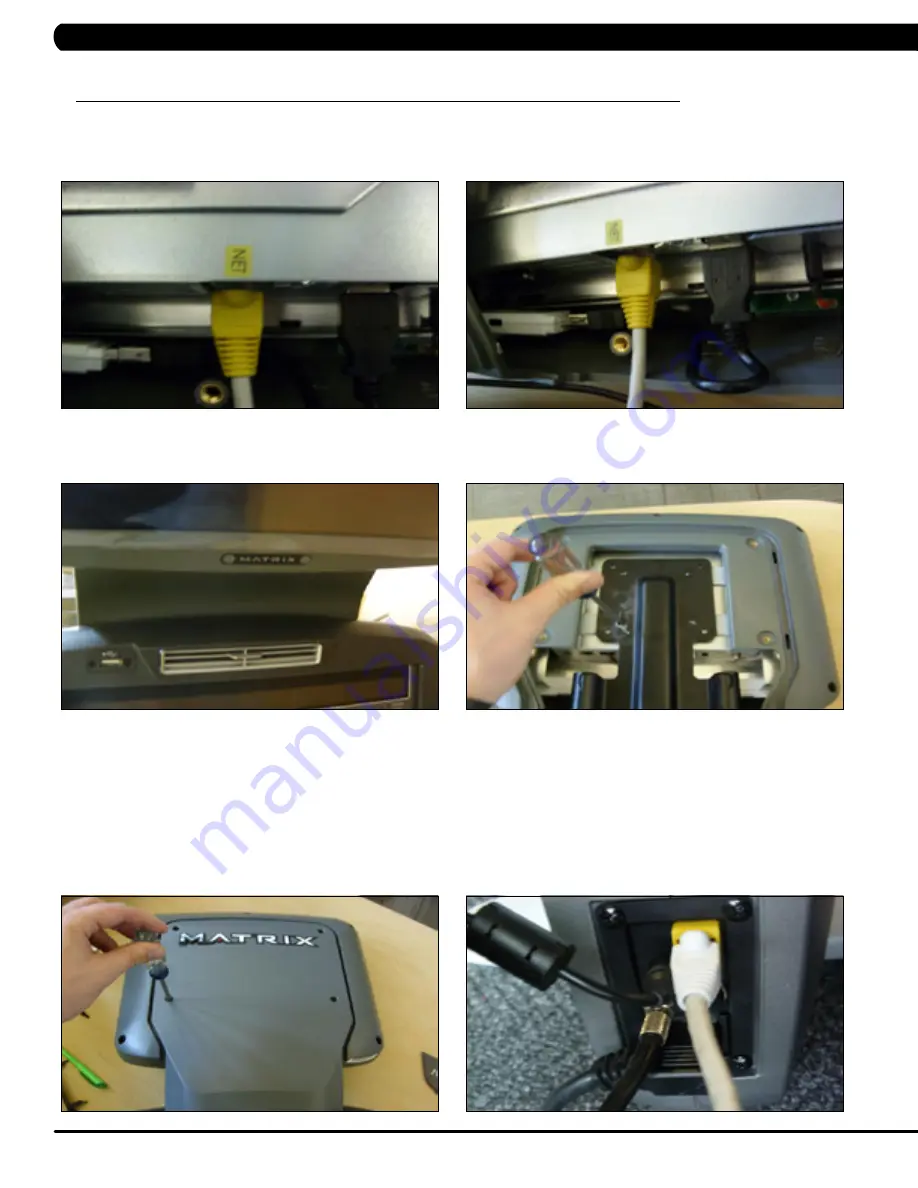
20) If the system is wired, plug the net wire (yellow) from the console into the Net port in the back of the PCTV (Figure T). If the system is wireless,
skip this step.
21) If the PCTV will be using a wireless signal, plug the dongle into the back of the TV and mount the USB flash drive to the console plastic
using double sided foam tape (Figure U).
22) Put the TV into place on the TV bracket being sure to tuck the tabs of the plate installed during Step 16 into the console plastic to create a
seamless look (Figure V).
23) Mount the TV to the TV bracket using 4 screws sent with the TV (Figure W).
24) Put the back cover onto the TV and secure with 4 screws (Figure X).
25) Plug a network wire (if using a PCTV not using wireless), power wire and a coax cable with a signal strength of 10 Hz to the port on the front
of the unit (Figure Y).
26) Enter Engineering Mode by pressing the INCLINE DOWN and SPEED DOWN keys at the same time and toggling to Engineering, then press
ENTER.
27) Toggle to Audio Source and push ENTER. Toggle to PCTV and push ENTER. This will ensure the audio from the PCTV can be heard through
the treadmill headphone jack.
28) If the sound is too quiet or too loud, toggle to Volume Control, and push ENTER. When the screen says Output Default push ENTER again.
The volume range can be adjusted.
29) Press and hold the PAUSE or STOP key for 3 - 5 Seconds to return to normal operation.
30) A channel scan should be done using the instructions included in the TV owner's manual.
FIGURE t
FIGURE U
FIGURE V
FIGURE W
FIGURE X
FIGURE Y
BRACKEt INStALLAtIoN & CoNSoLE SEtUP
3.4
PCtV BRACKEt INStALLAtIoN & CoNSoLE SEtUP - 5x UNIVERSAL LAM CoNSoLE
- CoNtINUEd


