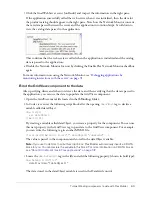


Tutorial: Binding components to data with Flex Builder
73
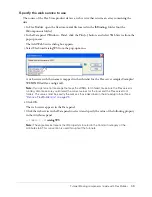
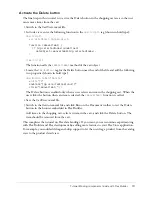
Activate the Delete button
The final step in this tutorial is to active the Delete button in the shopping cart area so the user
can remove items from the cart.
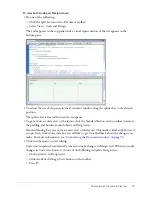
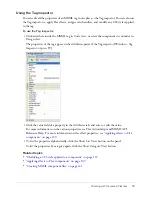
1.
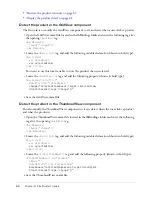
Switch to the CartView.mxml file.
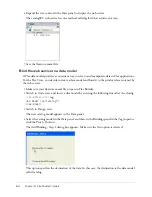
2.
In Code view, enter the following function in the
<mx:Script>
tag (shown in bold type):
<mx:Script>
var dataObject:ShoppingCart;
function removeItem() {
if (dg.selectedIndex!=undefined)
dataObject.removeItemAt(dg.selectedIndex);
}
</mx:Script>
The function calls the
remoteItemAt
method of the cart object.
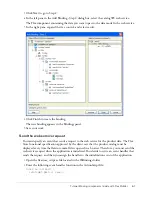
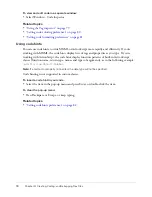
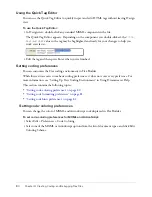
3.
Locate the
<mx:Button>
tag for the Delete button near the end of the file and add the following
two properties (shown in bold type):
<mx:Button label="Delete"
width="75"
enabled="{dg.selectedItem!=null}"
click="removeItem()"
/>
The Delete button is enabled only when a user selects an item in the shopping cart. When the
user clicks the button when an item is selected, the
removeItem()
function is called.
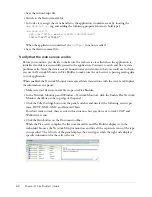
4.
Save the CartView.mxml file.
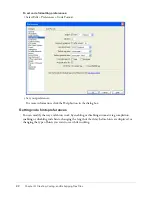
5.
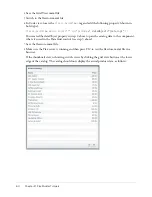
Switch to the flexstore.mxml file and click Run on the Document toolbar to test the Delete
button in the browser embedded in Flex Builder.
Add items to the shopping cart, select an item in the cart, and click the Delete button. The
item should be removed from the cart.
This completes the tutorial on Flex data bindings. If you want, you can continue experimenting
with Flex Builder and Flex development by adding more features to your Flex Store application.
For example, you could add drag-and-drop support to let the user drag a product from the catalog
view to the product detail view.
Summary of Contents for FLEX BUILDER-USING FLEX BUILDER
Page 1: ...Using Flex Builder...
Page 116: ...116 Chapter 4 Building a Flex User Interface Visually...
Page 144: ...144 Chapter 6 Working with Data...
Page 154: ...154 Appendix A Basic Flex Concepts...


