


Tutorial: Building custom components with Flex Builder
51
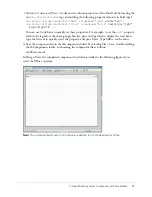
5.
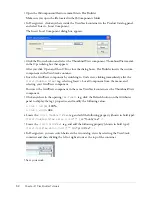
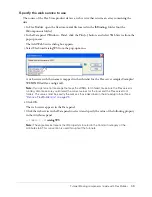
Insert a Label component by clicking to the right of the Checkout button in the ControlBar
container, clicking the Label button on the Insert bar, and specifying the values for the following
properties in the Attributes panel:
■
Common > text
:
Total: $
■
Common > styleName
:
price
6.
Save your work.
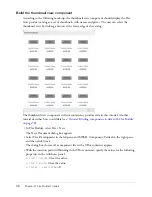
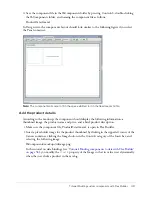
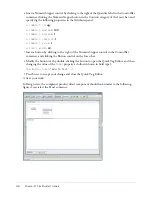
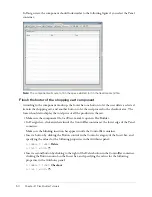
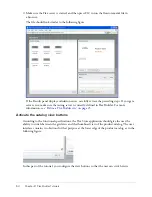
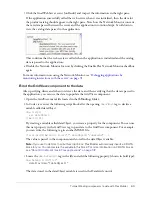
In Design view, the CartView component should look similar to the following figure if you select
the Panel container:
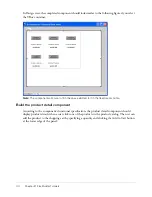
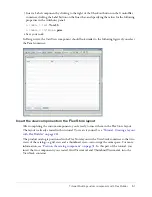
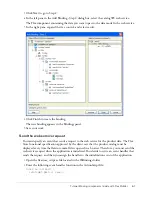
Insert the view components in the Flex Store layout
After completing the custom components, you’re ready to insert them in the Flex Store layout.
The layout is already created in this tutorial. To create it yourself, see
“Tutorial: Creating a layout
with Flex Builder” on page 26
).
The product catalog is positioned in the Flex Store layout with a ViewStack container so that two
views of the catalog—a grid view and a thumbnail view—can occupy the same space. For more
information, see
“Position the catalog component” on page 31
. In this part of the tutorial, you
insert the two components you created, GridView.mxml and ThumbnailView.mxml, into the
ViewStack container.
Summary of Contents for FLEX BUILDER-USING FLEX BUILDER
Page 1: ...Using Flex Builder...
Page 116: ...116 Chapter 4 Building a Flex User Interface Visually...
Page 144: ...144 Chapter 6 Working with Data...
Page 154: ...154 Appendix A Basic Flex Concepts...


