D i g i t a l 8 • B u s
4
Introduction
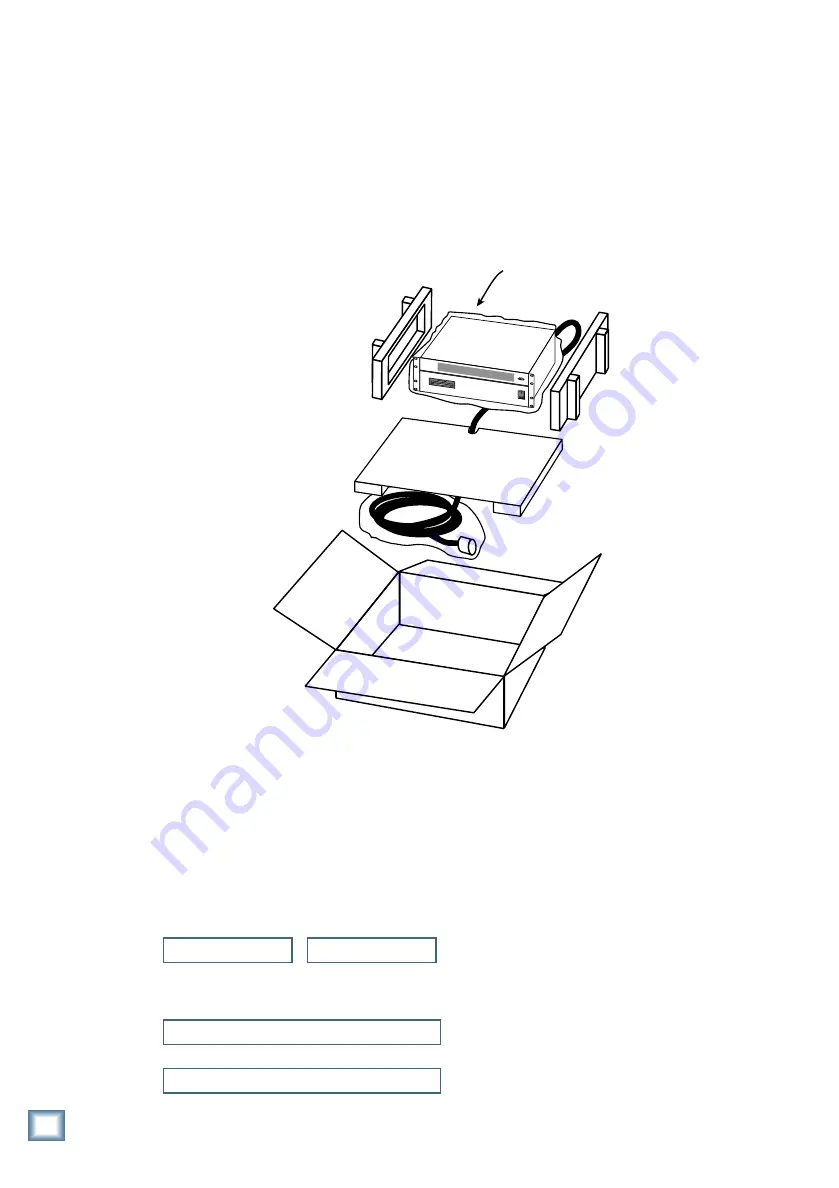
Figure 2. Unpacking the Remote CPU
The Remote CPU
• Use a sharp knife to cut the tape on the top
of the box.
• Open the flaps to expose the Remote CPU
inside.
• Lift the Remote CPU up and out of the
packing box. The foam blocks will come
with it, and the bottom tray will lift up also.
The DC Power Cable is coiled up underneath
the bottom tray.
• Set the Remote CPU on a flat surface, like the
floor next to the packing box, or a table top.
right side
foam
left side
foam
remote cpu
in plastic bag
connection cord
in plastic bag
bottom tray
remote cpu
box
ON
OFF
POWER
Take a moment now to fill out the
Product
Registration Card
located in the back of the
Digital 8•Bus Owner’s Manual. Mailing it in will
automatically put you on our mailing list so you
can get updated information, so do it today.
Also, write the serial numbers of your
Digital 8•Bus console and Remote CPU here
so you’ll always have them.
Console
Remote CPU
Purchased at:
Date Purchased:
• Remove the DC Power Cable from the
bottom tray.
• Remove the foam blocks from the sides of
the Remote CPU.
• Remove the plastic bag from around the
Remote CPU, and the plastic bag from
around the DC Power Cable.


