215620
164
Revision A
%
$
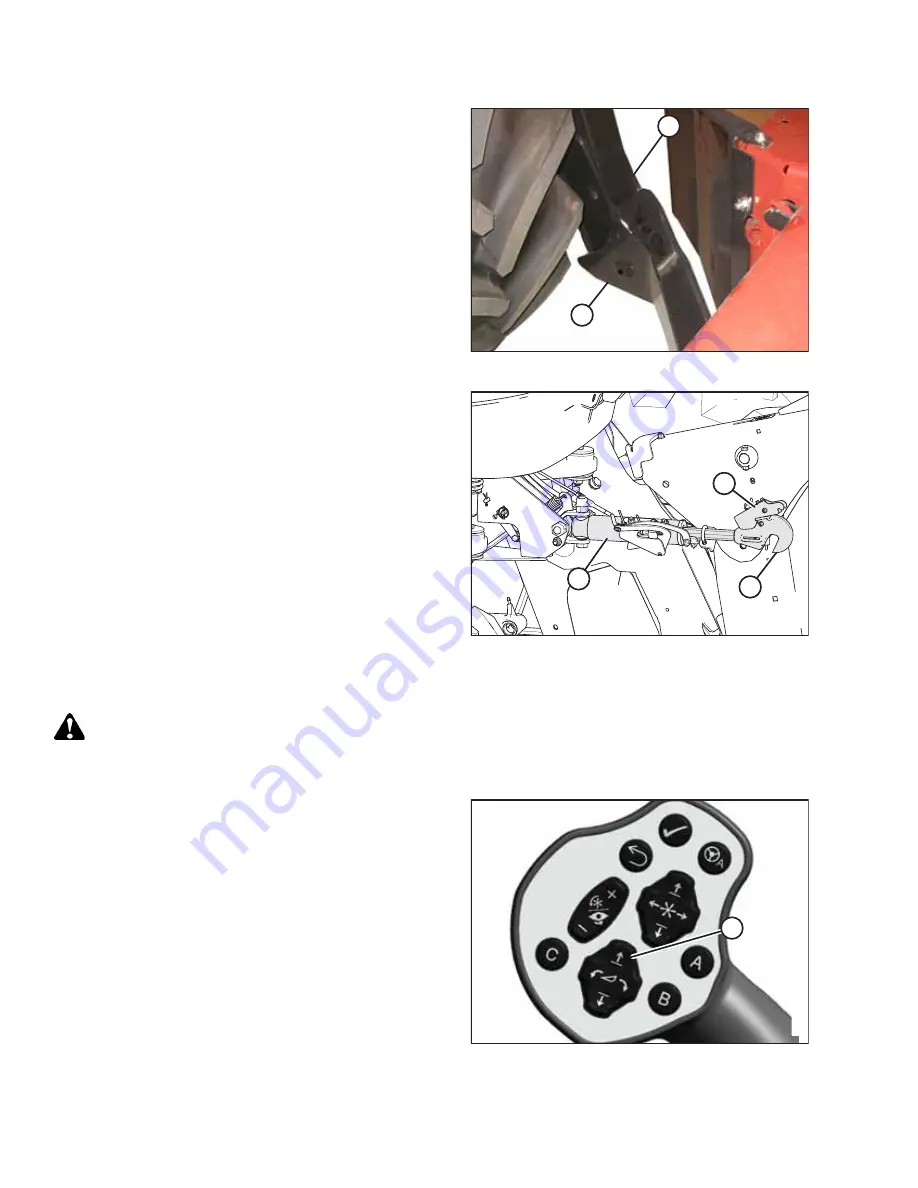
Figure 5.87: Header Support
9.
Slowly drive the windrower forward until windrower
feet (A) enter header supports (B). Continue to drive
forward slowly until the feet engage the supports and the
header is nudged forward.
10. Ensure that the lift linkages are properly engaged in the
header legs.
$
%
&
Figure 5.88: Center-Link
11. Adjust the position of center-link cylinder (A) with the
switches on the GSL until hook (B) is above the header
attachment pin.
IMPORTANT:
Hook release (C) must be down to enable the self-locking
mechanism. If the release is open (up), then manually push
it down after the hook has engaged the header pin.
12. Lower center-link (A) onto the header with the REEL DOWN
switch on GSL until it locks into position. When this
happens, hook release (C) will be in the down position.
Refer to Figure
for an illustration of the GSL
controls.
13. Ensure that the center-link is locked onto the header by
pressing the REEL UP switch on the GSL. Refer to Figure
for an illustration of the GSL controls.
DANGER
Ensure that all bystanders have cleared the area.
14. Start the engine.
$
Figure 5.89: GSL
15. Press HEADER UP switch (A) to raise the header to its
maximum height.
16. If one end of the header does
NOT
fully rise, rephase the
lift cylinders as follows:
a.
Press and hold HEADER UP switch (A) until both
cylinders stop moving.
b.
Continue to hold the switch for 3
–
4 seconds. The
cylinders are now phased.
17. Shut down the engine, and remove the key from
the ignition.


