215593
70
Revision A
4.9.4
Adjusting Conditioner Roll Tension
The conditioner roll tension is maintained by two tension springs providing pressure for conditioning of the crop. These
springs also allow the rolls to open to allow passage of small solid objects without damage to the rolls.
DANGER
To avoid bodily injury or death from unexpected start-up or fall of a raised machine, always stop engine and remove
key before leaving the operator
’
s seat, and always engage safety props before going under the machine for any reason.
1.
Lower the header to the ground.
2.
Shut down the engine, and remove the key from
the ignition.
$
%
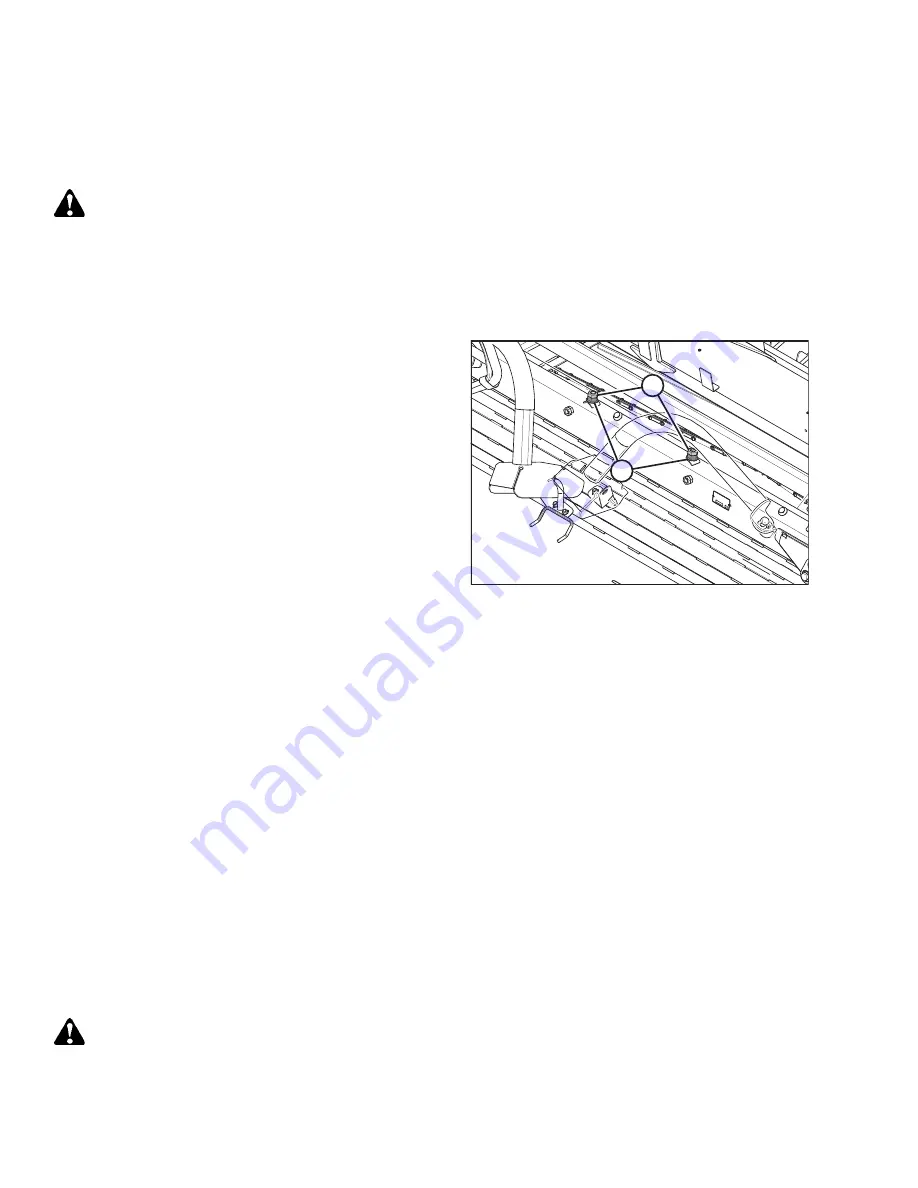
Figure 4.36: Conditioner Channel
3.
Locate adjustment nuts (B) on top of the conditioner
channel.
4.
Loosen jam nuts (A).
5.
Turn adjusting nut (B) clockwise to increase tension, and
counterclockwise to decrease tension.
6.
Adjust nuts (B) on both sides equal amounts.
7.
Tighten jam nuts (A).
4.9.5
Forming Shields
The position of the forming shields controls the width and placement of the windrow.
The position of the forming shields should be based on the following factors:
•
Weather conditions (rain, sun, humidity, wind)
•
Type and yield of crop
•
Drying time available
•
Method of processing (bales, silage, green-feed)
A wider windrow will generally dry faster and more evenly, resulting in less protein loss. Fast drying is especially important
in areas where the weather allows only a few days to cut and bale.
Where weather conditions permit or when drying is not critical (for example, when cutting for silage or green-feed), a
narrower windrow may be preferred for ease of pick-up.
Adjusting Forming Shield Height
The height of the forming shield affects the shape and consistency of the windrow. A heavy crop will require the forming
shield to be set near the highest position and a lighter crop needs the forming shield to be lower.
DANGER
To avoid injury or death from unexpected start-up of the machine, always stop the engine and remove the key from
the ignition before leaving the operator
’
s seat for any reason.
Summary of Contents for HC10
Page 10: ...215593 viii Revision A Index 167 Predelivery Checklist 173 TABLE OF CONTENTS...
Page 18: ......
Page 84: ......
Page 100: ......
Page 103: ......
Page 104: ...215593 94 Revision A 6 3 Lower Roll and Frame Assembly...
Page 106: ...215593 96 Revision A 6 4 Upper Roll Assembly 0...
Page 108: ...215593 98 Revision A 6 5 Cover and Supports 0 0 0 0 0 0...
Page 110: ...215593 100 Revision A 0 0 0 0 0 0 REPAIR PARTS...
Page 112: ...215593 102 Revision A 6 6 Hydraulic Motor Mounts and Tensioner Motor MD 159661...
Page 114: ...215593 104 Revision A REPAIR PARTS...
Page 116: ...215593 106 Revision A 6 7 Hydraulic Motor Mounts and Tensioner Motor MD 159648...
Page 118: ...215593 108 Revision A REPAIR PARTS...
Page 120: ...215593 110 Revision A 6 8 Belt Drive and Shield Motor MD 159661...
Page 122: ...215593 112 Revision A 6 9 Belt Drive and Shield Motor MD 159648...
Page 124: ...215593 114 Revision A 6 10 Hydraulic Completion Package Motor MD 159661...
Page 126: ...215593 116 Revision A REPAIR PARTS...
Page 128: ...215593 118 Revision A 6 11 Hydraulic Completion Package Motor MD 159648...
Page 130: ...215593 120 Revision A REPAIR PARTS...
Page 132: ...215593 122 Revision A 6 12 Gears and Roll Coupling Assembly New With Washer MD 30441...
Page 134: ...215593 124 Revision A 6 13 Gears and Roll Coupling Assembly Old With Washer MD 130688...
Page 136: ...215593 126 Revision A 6 14 Forming Shields...
Page 138: ...215593 128 Revision A 6 15 Feed Deck and Pan 0 1...
Page 140: ...215593 130 Revision A 0 1 REPAIR PARTS...
Page 142: ...215593 132 Revision A 6 16 Mounting Brackets...
Page 144: ......
Page 156: ......
Page 158: ......
Page 168: ......
Page 184: ......
Page 185: ......


