81
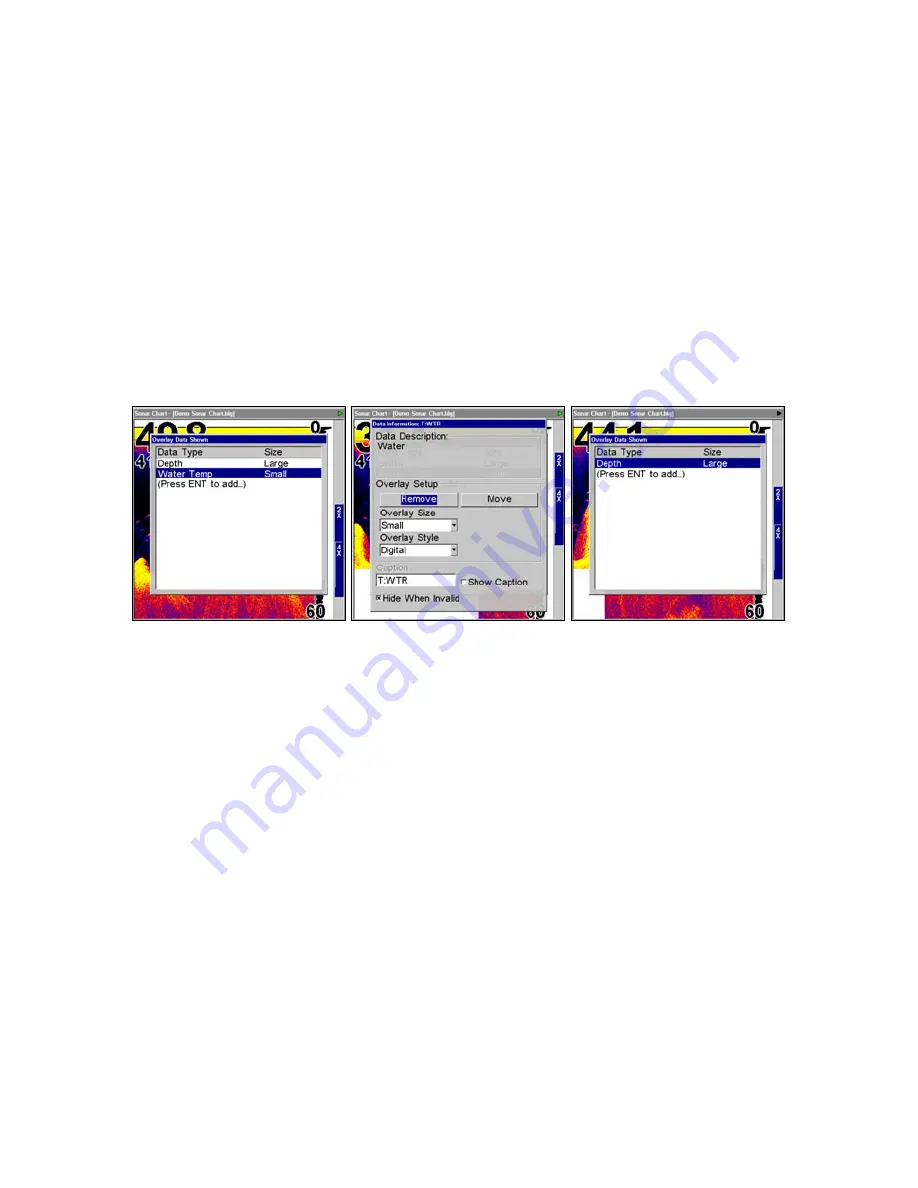
To remove overlaid data:
1. While on the Page that shows the item or items you want to remove,
press
MENU
|
↓
to
O
VERLAY
D
ATA
|
ENT
.
2. You'll see a list of the overlay data currently displayed. Select the
item you want to remove from your display and press
ENT
|
ENT
to re-
move the data. To remove another item, select the item and press
ENT
|
ENT
.
3. When you have finished removing all the items you want from the
screen, press
EXIT
to return to the page display.
NOTE
You can also remove data directly from the Data Viewer menu by un-
checking the data option you would like to remove.
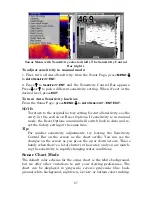
Overlay Data Shown with Water Temp selected (left). Remove button
highlighted (center). Water Temp has been removed from Overlay
Data Shown menu (right).
To move overlaid data:
You may find it useful to rearrange data that is floating in your display
window.
1. From one of the Map Pages, press
MENU
|
↓
to
O
VERLAY
D
ATA
|
ENT
.
2. You'll see a list of the overlay data currently displayed. Select the
item you want to move and press
ENT
|
→
to
M
OVE
|
ENT
.
3. The data begins to flash on your screen. Use any combination of
→
,
←
,
↑
and
↓
to move the data to a new location on the screen.
4. When satisfied, press
EXIT
|
EXIT
.
NOTE:
The Customize command and the Overlay Data command both use
the same information categories. The difference between the two
commands is that Customize changes only the data boxes on a
Summary of Contents for LMS-520C
Page 10: ...viii Notes ...
Page 22: ...12 Notes ...
Page 56: ...46 Notes ...
Page 114: ...104 Notes ...
Page 202: ...192 Notes ...
Page 216: ...206 Notes ...
Page 246: ...236 Notes ...


