17
3. Open a web browser and connect to the default NDB IP address
http://10.0.0.100 to open the NDB configuration page. If the NDB was previously
reconfigured to a different IP address, connect to that IP address instead. NDBs
must be powered ON for the NDB configuration page to appear.
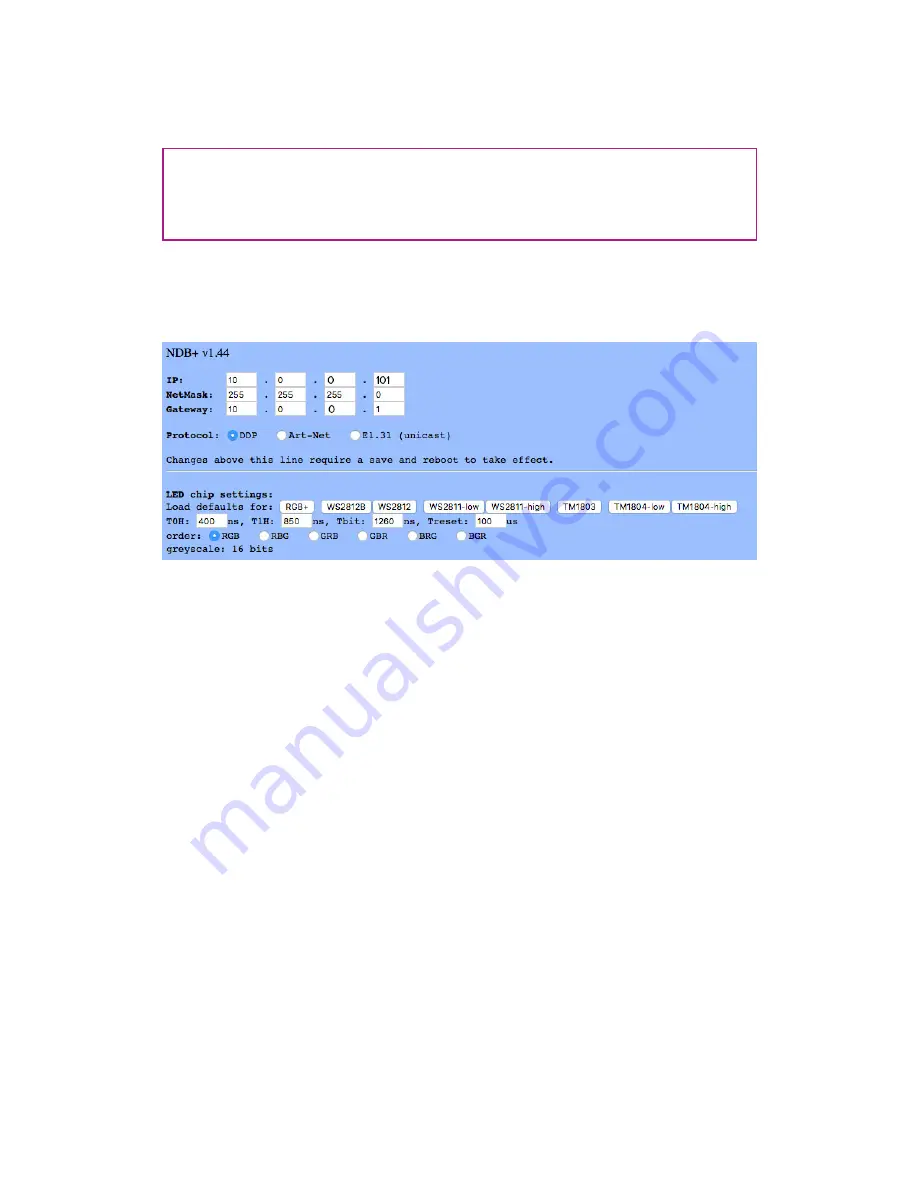
4. Enter a new, unique NDB IP address. Using the sequence 10.0.0.101, 10.0.0.102,
10.0.0.103, etc. is recommended for each NDB, but anything from 10.0.0.0 -
10.0.0.254 works. Keep the netmask set to 255.255.255.0, and the gateway to
10.0.0.1 (Fig.7)
5. Select DDP as the protocol, and under LED chip settings, load defaults for
RGB+. To use any of the other protocols listed, please
contact Limbic Media for
support.
6. Refer to steps 5-9 under
Set the Number of LED Pixels Per NDB Port
below.
7. Select SAVE to make the NDB configuration changes permanent.
8. Write the NDB’s new IP address on a piece of tape and attach it to the NDB
case. This is the easiest way to reference each NDB’s IP address.
9. Press the reset button on the outside of the NDB (do not hold) with a pin to
reboot and apply the changes.
10. Repeat this process to change the IP address for each NDB.
Set the Number of LED Pixels Per NDB Port
Setting LED pixels per port with NDBs must be configured with NDB software,
not the Aurora Mobile App. With multiple NDBs, users can set LED pixels per port
during IP address configuration.
Required Components
• PC or Mac computer
• Cat 5/6 network cable
• Network Distribution Box (NDBs)
Pro-Tip:
If the NDB IP address has been changed, but you have no record of what the
new IP address is, refer to
Reset an NDB
to restore the default IP address.
Fig. 7: NDB configuration page


