2. Installation
HDMI-TPS-RX110AY series – User's Manual
15
Appliedfirmwarepackage:v1.4.0 | LDCsoftware:v2.4.0b3
2.3.
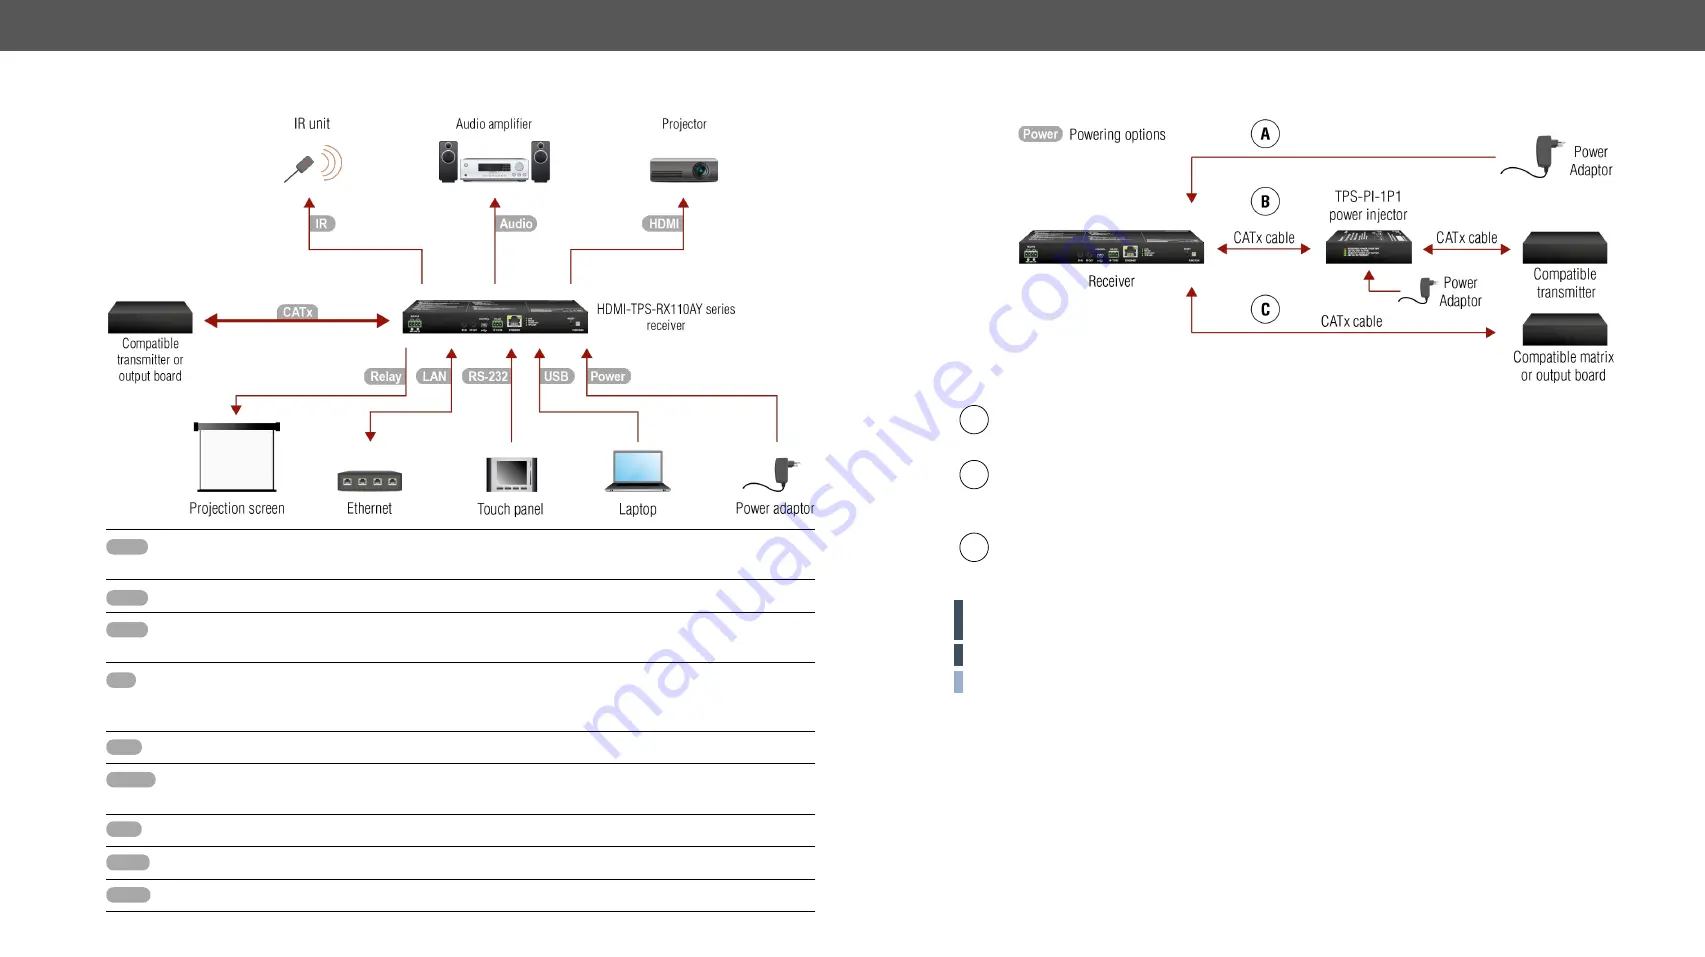
Connecting Steps
CATx
Connect the compatible transmitter or the matrix output board and the receiver unit by a CATx cable
via the TPS connectors.
HDMI
Connect the sink device to the HDMI output port.
Audio
Optionallyconnectanaudiodevice(e.g.anaudioamplifier)totheaudiooutputport.Seethe
wiring guide for the Phoenix 5-pole connector in the
IR
OptionallyforInfraredextension:
- Connect the IR emitter to the IR OUT port of the receiver.
- Connect the IR detector to the IR IN port of the receiver.
USB
Optionally connect the receiver to a control device (e.g. laptop) with an USB mini cable.
RS-232
OptionallyforRS-232extension:connectacontroller/controlleddevice(e.g.touchpanel)tothe
RS-232 port.
LAN
OptionallyconnectthereceivertoaLANnetworkinordertocontrolthedevice.
Relay
Optionallyforrelays:connectacontrolleddevice(s)(e.g.aprojectionscreen)totherelayport.
Power
See powering options on the next section.
Powering Options
A
Using local PSU
-connectthepoweradaptortotheDCinputonthereceiverfirst,thentotheAC
power socket.
B
Using PoE with connecting a transmitter
: connect the TPS IN (PoE) port of the receiver to the
TPS+PoE output port of the TPS-PI-1P1 power injector by a CATx cable as well as connect the TPS
output port of the transmitter to the TPS port of the TPS-PI-1P1 by a CATx cable.
C
Using PoE with connecting a matrix or an output board
:connecttheTPSIN(PoE)portofthereceiver
to the PoE-compatible TPS output port of the matrix or output board by a CATx cable.
ATTENTION!
In case of connecting the receiver to an output board of the matrix always connect an
external PSU to the board. For the detailed information please read the user's manual of the matrix.
ATTENTION!
The Ethernet port does not support PoE. Only the TPS port supports PoE function.
INFO:
If both remote and local power sources are connected, the remote power will be used.


