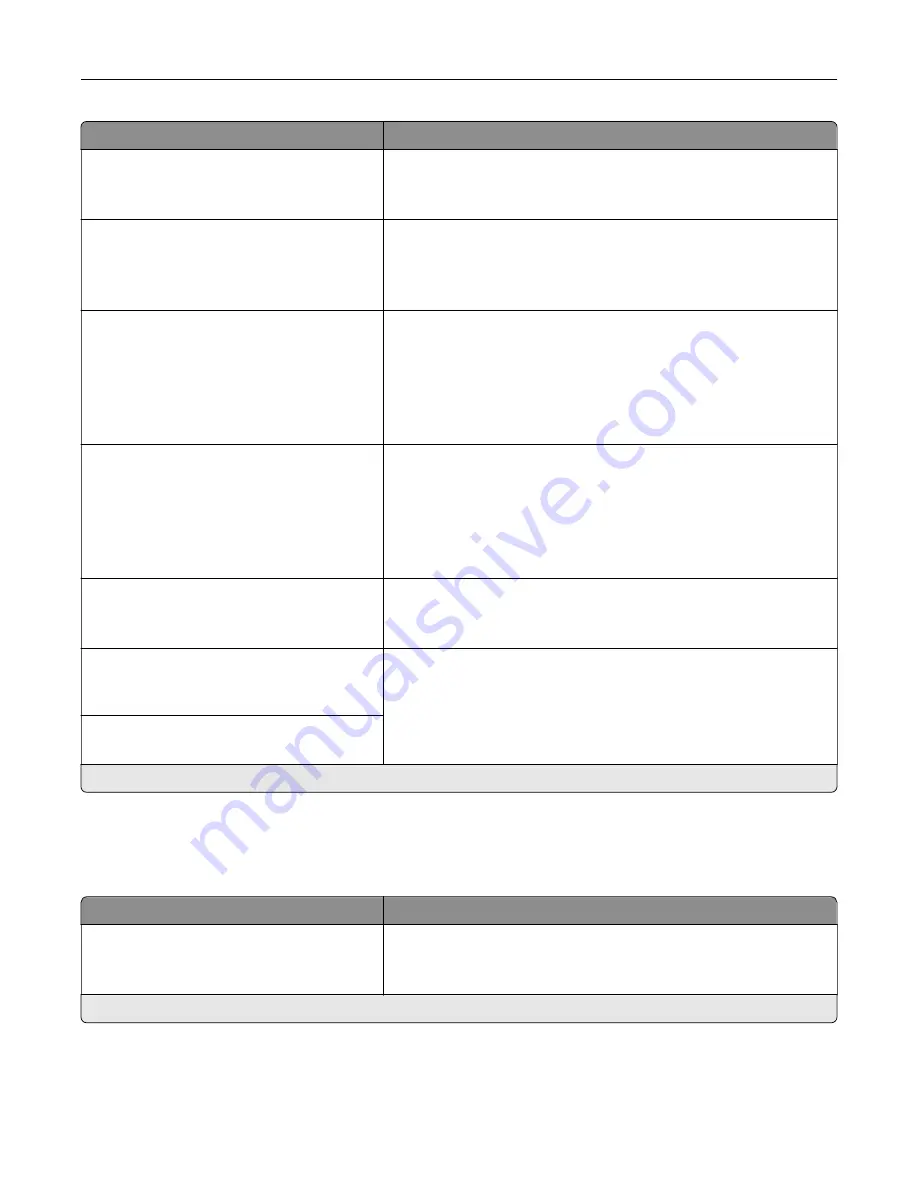
Menu item
Description
Proposed Encryption Method
3DES
AES*
Set the encryption method.
Note:
This menu item appears only when Base Configuration is set
to Compatibility.
Proposed Authentication Method
SHA1
SHA256*
SHA512
Set the authentication method.
Note:
This menu item appears only when Base Configuration is set
to Compatibility.
IKE SA Lifetime (Hours)
1
2
4
8
24*
Specify the IKE SA expiry period.
Note:
This menu item appears only when Base Configuration is set
to Secure.
IPSec SA Lifetime (Hours)
1
2
4
8*
24
Specify the IPSec SA expiry period.
Note:
This menu item appears only when Base Configuration is set
to Secure.
IPSec Device Certificate
Specify an IPSec certificate.
Note:
This menu item appears only when Enable IPSec is set to
On.
Pre
‑
Shared Key Authenticated
Connections
Host [x]
Configure the authenticated connections of the printer.
Note:
These menu items appear only when Enable IPSec is set to
On.
Certificate Authenticated Connections
Host [x] Address[/subnet]
Note:
An asterisk (*) next to a value indicates the factory default setting.
802.1x
Note:
This menu appears only in network printers or printers that are attached to print servers.
Menu item
Description
Active
Off*
On
Let the printer join networks that require authentication before
allowing access.
Note:
An asterisk (*) next to a value indicates the factory default setting.
Use printer menus
208
Summary of Contents for CS943
Page 1: ...CS943 Printer User s Guide May 2022 www lexmark com Machine type 5080 Model 435 ...
Page 65: ...8 Remove tray 2 9 Secure the spacer to the printer with screws Set up install and configure 65 ...
Page 84: ...6 Install the optional tray Set up install and configure 84 ...
Page 85: ...7 Connect the tray connector to the printer Set up install and configure 85 ...
Page 87: ...Installing the banner tray 1 Turn off the printer Set up install and configure 87 ...
Page 98: ...Set up install and configure 98 ...
Page 105: ...12 Attach the finisher to the printer Set up install and configure 105 ...
Page 113: ...8 Close the booklet finisher door 9 Insert the bins Set up install and configure 113 ...
Page 114: ...10 Insert the booklet finisher cable Set up install and configure 114 ...
Page 118: ...17 Remove the rear ports cover 18 Secure the cable Set up install and configure 118 ...
Page 126: ...3 Unplug the booklet finisher cables from the printer Set up install and configure 126 ...
Page 142: ...6 Attach the hard disk to the controller board Set up install and configure 142 ...
Page 144: ...8 Attach the controller board access cover Set up install and configure 144 ...
Page 150: ...5 Attach the NFC card 6 Turn on the printer Set up install and configure 150 ...
Page 152: ...Set up install and configure 152 ...
Page 156: ...9 Secure the ISP to the printer Set up install and configure 156 ...
Page 157: ...10 Attach the controller board access cover Set up install and configure 157 ...
Page 228: ...Replacing a photoconductor unit 1 Open the front door Maintain the printer 228 ...
Page 236: ...3 Insert the new tray insert Maintain the printer 236 ...
Page 238: ...Maintain the printer 238 ...
Page 239: ...3 Unlock the fuser Maintain the printer 239 ...
Page 240: ...4 Remove the used fuser 5 Unpack the new fuser Maintain the printer 240 ...
Page 242: ...2 Remove the used printhead wiper 3 Unpack the new printhead wiper Maintain the printer 242 ...
Page 243: ...4 Insert the new printhead wiper 5 Close the front door Maintain the printer 243 ...
Page 244: ...Replacing the transfer module cleaner 1 Open the front door Maintain the printer 244 ...
Page 247: ...5 Insert the new transfer module cleaner Maintain the printer 247 ...
Page 249: ...Replacing the tray roller kit 1 Turn off the printer Maintain the printer 249 ...
Page 251: ...4 Unpack the new tray roller kit Maintain the printer 251 ...
Page 253: ...Replacing the 2000 sheet tray roller kit 1 Turn off the printer Maintain the printer 253 ...
Page 255: ...4 Locate and remove the used roller kit 5 Unpack the new roller kit Maintain the printer 255 ...
Page 260: ...6 Unpack the new tray roller kit Maintain the printer 260 ...
Page 263: ...3 Remove the used second transfer roller Maintain the printer 263 ...
Page 266: ...Replacing the waste toner bottle 1 Open the front door Maintain the printer 266 ...
Page 274: ...4 Insert the new small cover 5 Insert the tray Maintain the printer 274 ...
Page 278: ...Replacing the trifold Z fold finisher bin 1 Turn off the printer Maintain the printer 278 ...
Page 281: ...4 Insert the new paper bail until it clicks into place Maintain the printer 281 ...
Page 285: ...4 Attach the new controller board access cover Maintain the printer 285 ...
Page 300: ...Cleaning the tray roller kit 1 Turn off the printer Maintain the printer 300 ...
Page 304: ...Cleaning the 2000 sheet tray roller kit 1 Turn off the printer Maintain the printer 304 ...
Page 346: ...Troubleshoot a problem 346 ...
Page 369: ...5 Close the cover 6 Open the booklet finisher door Troubleshoot a problem 369 ...


