background image

Xerox WorkCentre

®

 7232/7242

Copyright © 2007, Xerox Corporation. All rights reserved.

1

Quick Scan Features 
Setup Guide

This guide includes instructions for:

„

Scan to E-mail

 on page 1

„

Scan to Mailbox Setup (Optional)

 on page 6

„

Network Scanning Setup (Optional)

 on page 9

„

Scan to PC (Optional)

 on page 14

Scan to E-mail

Hard copies can be scanned at the device and sent to remote clients as E-mail attachments in 
TIFF/JPEG, Multi-page TIFF, Single-page TIFF, JPEG, and PDF format. SMTP and POP3 
mail servers are used to send and receive E-mail respectively.

See also: 

System Administrator Guide: Contains detail about E-mail setup.
InteractiveUser Guide: Contains information on how to send an E-mail and how to set 
various E-mail options.

701P472

81


v1.0

Summary of Contents for WorkCentre 7232

Page 1: ... to PC Optional on page 14 Scan to E mail Hard copies can be scanned at the device and sent to remote clients as E mail attachments in TIFF JPEG Multi page TIFF Single page TIFF JPEG and PDF format SMTP and POP3 mail servers are used to send and receive E mail respectively See also System Administrator Guide Contains detail about E mail setup InteractiveUser Guide Contains information on how to se...

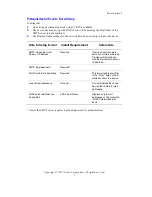
Page 2: ...and password for authentication Data to Setup E mail Install Requirement Comments SMTP mail server Host Name or IP address Required If using an external mail server your Internet Service Provider will provide you with the mail server name or IP address SMTP login password Required WorkCentre E mail address Required This E mail address will fill in the From field on the E mails sent from the device...

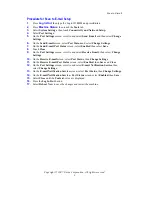
Page 3: ...select Enabled then select Save 8 Touch Close 9 On the Port Settings screen scroll to and select Receive E mail then select Change Settings 10 On the Receive E mail screen select Port Status then Change Settings 11 On the Receive E mail Port Status screen select Enabled then Save and Close 12 On the Port Settings screen scroll to and select E mail Notification Service then select Change Settings 1...

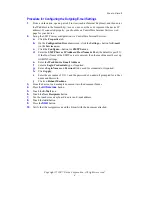
Page 4: ...for SMTP Server d Enter the SMTP Server IP Address Host Name Port the default is port 25 If the Host Name of the SMTP server is entered then the machine must be set up with DNS settings e Enter the WorkCentre E mail Address f Select a Login Credentials type if required g Enter a Login Name and Password to be used for credentials if required h Click Apply i Enter the user name of 11111 and the pass...

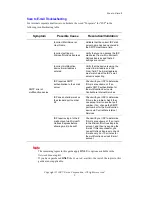
Page 5: ...evice E mail address entered Verify that the device is using the correct E mail address in the From field The E mail address must match what the ISP s mail server is expecting ISP requires SMTP authentication to their mail server Check with your ISP to determine if this is a requirement If so enable SMTP authentication for the multifunction device via CentreWare Internet Services ISP does not allo...

Page 6: ...te button 10 When the New Mailbox Assign Passcode screen displays use the On and Off buttons to determine whether or not a passcode will be required to access the Mailbox If On is selected use the numeric keypad to enter a numbered passcode then select the appropriate Target Operation button to control when the passcode will be required 11 Press the Save button to save your settings 12 When the Ma...

Page 7: ... displayed list and click the Create button for that mailbox 5 Type in a name for this Mailbox in the Mailbox Name entry box 6 Type in a pass code in the Passcode entry box The passcode must be numeric 7 Confirm the pass code by retyping it in the Re enter Passcode box 8 Use the drop down arrow to set Check Mailbox Passcode recommended to secure your mailbox 9 Place a checkmark in the Auto Delete ...

Page 8: ...en it was created enter the passcode series of numbers into the Passcode screen using the Control Panel s numeric keypad Otherwise proceed to step 6 5 Press the Confirm button on the touch screen 6 Select each of the tabbed screens to access controls to set up scanning parameters 7 Place your document in the document handler and press Start 8 Press the Services button to return to the device s mai...

Page 9: ...ng See also Interactive User Guide Contains information on how to perform a network scan as well as information on how to set up templates and repositories System Administrator Guide Contains details about Network Scanning setup Prerequisites for Network Scanning Setup Confirm that 1 An existing operational network utilizing TCP IP is available 2 A repository folder exists on the FTP or SMB server...

Page 10: ... device a Select System Settings b Touch Connectivity and Network Setup c Select Port Settings d Select SMB and then select Change Settings e Select Port Status and then select Change Settings f Select Enabled then select Save g Select Close until the Port Settings screen is displayed 3 If you plan on using the FTP protocol with Network Scanning enable the FTP client port on the device a Select Sy...

Page 11: ...ry settings a Password must be entered as well 8 Click Apply to save the changes or Undo to exit without saving changes If you clicked Apply be prepared to enter the administrator User Name default of 11111 and Password default of x admin if prompted 9 Click the Scan tab at the top of the CentreWare Internet Services screen to create a new Template 10 Fill in the Template Name field with a name fo...

Page 12: ...the new Template select Edit for any of the available categories of settings These include Network Scanning Advanced Settings Layout Adjustment Filing Options Report Options and Compression Capability 18 Click Apply to save your settings Note Select MRC Compression if available to use Mixed Raster Content MRC compression MRC is used to divide the scanned image based on content and then compress ea...

Page 13: ... 3 Load a sample document into the document feeder 4 Press the green Start button The job is sent to the server using FTP or SMB protocol as defined within the template 5 From a workstation log on to the FTP or SMB Server Navigate to the repository destination that was specified earlier Your scanned document is located in that folder Note If remote authentication has been enabled a separate login ...

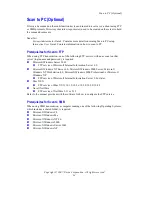
Page 14: ...Microsoft Windows Server 2003 FTP service of Microsoft Internet Information Server 6 0 Microsoft Windows NT Server 4 0 Microsoft Windows 2000 Server Microsoft Windows NT Workstation 4 0 Microsoft Windows 2000 Professional or Microsoft Windows XP FTP service of Microsoft Internet Information Server 3 0 or later Mac OS X FTP service of Mac OS X 10 1 5 10 2 x 10 3 8 10 3 9 10 4 2 Novell NetWare FTP s...

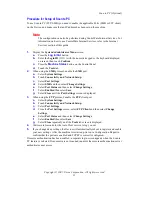
Page 15: ...nd then select Change Settings e Select Port Status and then select Change Settings f Select Enabled then select Save g Select Close until the Port Settings screen is displayed 3 When using the FTP protocol enable the FTP client port a Select System Settings b Touch Connectivity and Network Setup c Select Port Settings d From the Port Settings screen select FTP Client and then select Change Settin...

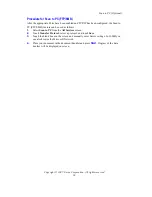
Page 16: ... to PC FTP SMB feature can be used as follows 1 Select Scan to PC from the All Services screen 2 Touch Transfer Protocol select a protocol and touch Save 3 Touch the blank lines on the screen and manually enter Server settings For SMB you can also browse the Microsoft Network 4 Place your document in the document handler and press Start Progress of the data transfer will be displayed on screen ...

Page 17: ...n vers un courrier électronique Des documents papier peuvent être numérisés sur le périphérique et envoyés vers des clients éloignés sous forme de fichiers joints à un courrier électronique au format TIFF JPEG TIFF multipage TIFF une page JPEG ou PDF Des serveurs SMTP et POP3 sont utilisés pour envoyer et recevoir des courriers électroniques respectivement Voir aussi Guide de l administrateur syst...

Page 18: ... l authentification Données de configuration du courrier électronique Conditions pour l installation Commentaires Nom d hôte ou adresse IP du serveur de messagerie SMTP Obligatoire Lors de l utilisation d un serveur de messagerie externe l adresse IP ou le nom d hôte est fourni par le fournisseur d accès Internet Connexion Mot de passe SMTP Obligatoire Adresse électronique du WorkCentre Obligatoir...

Page 19: ...r Activé puis Enregistrer 8 Sélectionner Fermer 9 Sur l écran Paramètres de port appuyer sur le bouton de défilement et sélectionner Réception courrier électronique puis Modifier les paramètres 10 Sur l écran Réception courrier électronique sélectionner État du port puis Modifier les paramètres 11 Sur l écran Réception courrier électronique État du port sélectionner Activé puis Enregistrer et Ferm...

Page 20: ... les informations requises pour Adresse IP du serveur SMTP Nom d hôte et port port 25 par défaut Si le nom d hôte du serveur SMTP est spécifié les paramètres DNS doivent être configurés sur la machine e Entrer l Adresse électronique du WorkCentre f Sélectionner un type de Références de connexion si nécessaire g Entrer un Nom de connexion et un Mot de passe si nécessaire h Sélectionner Appliquer i ...

Page 21: ...ique s affichant dans le champ De est correcte Elle doit correspondre à l adresse attendue par le serveur de messagerie du fournisseur d accès à Internet ISP Le fournisseur d accès requiert une authentification SMTP vers le serveur de messagerie Vérifier auprès du fournisseur d accès Internet s il s agit d une condition requise Dans l affirmative activer l authentification SMTP pour le périphériqu...

Page 22: ... ou l ID utilisateur en cours Appuyer sur Entrer 3 Appuyer sur la touche État de la machine du panneau de commande 4 Sélectionner l onglet Outils 5 Appuyer sur Configuration et calibrage puis sur Configurer 6 Appuyer sur le bouton Créer boîte aux lettres 7 Faire défiler la liste jusqu à un numéro de boîte aux lettres non attribué avec le nom Non utilisé 8 Sélectionner un numéro de boîte aux lettre...

Page 23: ...xx xxx xxx xxx où les xxx représentent l adresse IP du système multifonction Si la connexion aboutit la page Web des Services Internet CentreWare du système multifonction s affiche 2 Sélectionner l onglet Numérisation 3 Sélectionner Boîte aux lettres dans l arborescence 4 Lorsque la liste de boîtes aux lettres s affiche repérer une boîte non attribuée avec le nom Non utilisé dans la liste puis cli...

Page 24: ...a été associé à la boîte aux lettres à sa création entrer le code d accès série de chiffres à l aide du pavé numérique du panneau de commande Sinon passer à l étape 6 5 Appuyer sur le bouton Confirmer sur l écran tactile 6 Sélectionner chacun des onglets pour accéder aux paramètres de numérisation 7 Placer le document dans le chargeur de documents et appuyer sur Marche 8 Appuyer sur le bouton Serv...

Page 25: ...r aussi Guide interactif de l utilisateur décrit comment effectuer une numérisation réseau et configurer des modèles et des espaces d archivage Guide de l administrateur système contient des informations sur la configuration de la fonction de numérisation réseau Conditions requises pour la configuration de la fonction de numérisation réseau Vérifier les points suivants 1 Un réseau opérationnel uti...

Page 26: ...nner Paramètres système b Sélectionner Configuration réseau et connectivité c Sélectionner Paramètres de port d Sélectionner SMB puis Modifier les paramètres e Sélectionner État du port puis Modifier les paramètres f Sélectionner Activé puis Enregistrer g Sélectionner Fermer jusqu à ce que l écran Paramètres de port s affiche 3 Si le protocole FTP doit être utilisé avec la numérisation réseau acti...

Page 27: ...ifié 8 Sélectionner Appliquer pour enregistrer les modifications ou Défaire pour quitter sans enregistrer les modifications Si Appliquer a été sélectionné il peut être nécessaire d entrer le nom d utilisateur 11111 par défaut et le mot de passe x admin par défaut administrateur 9 Cliquer sur l onglet Numérisation en haut de l écran Services Internet CentreWare pour créer un nouveau modèle 10 Spéci...

Page 28: ...e numérisation du nouveau modèle sélectionner Modifier pour les catégories de paramètres disponibles Ces paramètres incluent Numérisation réseau Paramètres avancés Mise en page Options archivage Options de relevé et Capacité de compression 18 Sélectionner Appliquer pour enregistrer les paramètres Remarque Sélectionner Compression MRC si cette option est disponible pour utiliser ce type de compress...

Page 29: ... au travail en cours 3 Placer un document dans le chargeur de documents 4 Appuyer sur la touche Marche Le travail est envoyé au serveur au moyen du protocole FTP ou SMB conformément aux paramètres définis dans le modèle 5 Se connecter au serveur FTP ou SMB à partir d un poste de travail Localiser l espace d archivage destination spécifié au préalable Ce dossier contient le document numérisé Remarq...

Page 30: ...TP suivants avec un compte sur ce serveur nom d utilisateur et mot de passe Microsoft Windows Server 2003 Service FTP de Microsoft Internet Information Server 6 0 Microsoft Windows NT Server 4 0 Microsoft Windows 2000 Server Microsoft Windows NT Workstation 4 0 Microsoft Windows 2000 Professionnel ou Microsoft Windows XP Service FTP de Microsoft Internet Information Server 3 0 ou ultérieur Mac OS ...

Page 31: ... puis Modifier les paramètres e Sélectionner État du port puis Modifier les paramètres f Sélectionner Activé puis Enregistrer g Sélectionner Fermer jusqu à ce que l écran Paramètres de port s affiche 3 Si le protocole FTP est utilisé activer le port FTP a Sélectionner Paramètres système b Sélectionner Configuration réseau et connectivité c Sélectionner Paramètres de port d Sur l écran Paramètres d...

Page 32: ...t être utilisée de la façon suivante 1 Sélectionner Numérisation bureau sur l écran Tous les services 2 Sélectionner Protocole de transfert sélectionner un protocole puis Enregistrer 3 Appuyer sur les lignes blanches de l écran et entrer manuellement les paramètres de serveur En configuration SMB il est possible de parcourir le réseau Microsoft 4 Placer le document dans le chargeur de documents et...

Page 33: ...agina 13 Scansione su e mail La funzione consente di scansire documenti sulla macchina e di inviare i file ottenuti a client remoti come allegati e mail nei seguenti formati TIFF JPEG TIFF multipagina TIFF a pagina singola JPEG e PDF Per inviare e mail viene utilizzato il server di posta elettronica SMTP mentre per riceverle viene utilizzato il server POP3 Vedere anche System Administrator Guide G...

Page 34: ...necessari per l impostazione della funzione E mail Requisiti di installazione Commenti Nome host o indirizzo IP del server di posta SMTP Obbligatorio Se viene utilizzato un server di posta esterno il nome del server o l indirizzo IP viene fornito dal provider del servizio Internet ID accesso password SMTP Obbligatori Indirizzo e mail del sistema WorkCentre Obbligatorio Questo indirizzo e mail verr...

Page 35: ...itato e poi Salva 8 Premere Chiudi 9 Nella schermata Impostazioni porta scorrere fino alla voce Ricezione e mail selezionarla e poi premere Cambia impostazioni 10 Nella schermata Ricezione e mail selezionare prima Stato porta e poi Cambia impostazioni 11 Nella schermata Ricezione e mail Stato porta selezionare Abilitato quindi Salva e poi Chiudi 12 Nella schermata Impostazioni porta scorrere fino ...

Page 36: ... di Indirizzo IP server SMTP Nome host e porta l impostazione predefinita è la porta 25 Se si inserisce il nome host del server SMTP è necessario configurare la macchina con le impostazioni DNS e Inserire il valore di Indirizzo e mail WorkCentre f Se necessario selezionare un tipo di Credenziali per l accesso g Inserire un valore in Nome di accesso e Password da utilizzare come credenziali se nece...

Page 37: ...tarsi che l indirizzo e mail del dispositivo nel campo Da sia corretto L indirizzo e mail visualizzato deve corrispondere al valore previsto sul server di posta del provider Internet Il provider Internet richiede l autenticazione SMTP per l accesso al proprio server di posta Contattare il proprio provider Internet per stabilire se questo è un requisito Se è un requisito abilitare l autenticazione ...

Page 38: ...zionare Impostazione 6 Premere il pulsante Crea mailbox 7 Far scorrere l elenco fino a raggiungere una mailbox non ancora assegnata che visualizza il nome Non in uso 8 Nell elenco visualizzato selezionare un Numero mailbox non assegnato 9 Selezionare il pulsante Crea Cancella 10 Quando viene visualizzata la schermata Nuova mailbox Assegna codice di accesso utilizzare i pulsanti Sì e No per specifi...

Page 39: ...ivo 2 Fare clic sulla scheda Scansione 3 Selezionare Mailbox nella struttura di directory 4 Quando si visualizza l elenco delle mailbox numerate individuare una mailbox non ancora assegnata che visualizza il nome Non in uso quindi fare clic sul pulsante Crea per quella mailbox 5 Digitare un nome per la mailbox nella casella di immissione Nome mailbox 6 Digitare un codice nella casella di immission...

Page 40: ... inserire tale valore la serie di numeri nella schermata Codice di accesso utilizzando il tastierino numerico sul pannello comandi In caso contrario andare al passaggio 6 5 Premere il pulsante Conferma sullo schermo sensibile 6 Selezionare ciascuna delle apposite schermate per accedere ai comandi di impostazione dei parametri di scansione 7 Caricare un originale nell alimentatore automatico e prem...

Page 41: ...nterattiva per l utente contiene informazioni su come eseguire un operazione di scansione in rete nonché informazioni su come impostare modelli e archivi System Administrator Guide Guida per l amministratore contiene informazioni dettagliate sull impostazione di Scansione in rete Prerequisiti per l impostazione di Scansione in rete Accertarsi che 1 Sia disponibile una rete funzionante con il proto...

Page 42: ...ostazioni di sistema b Premere su Configurazione di rete e connettività c Selezionare Impostazioni porta d Selezionare SMB e poi Cambia impostazioni e Selezionare Stato porta e poi Cambia impostazioni f Selezionare Abilitato e poi Salva g Selezionare Chiudi fino a visualizzare la schermata Impostazioni porta 3 Se si prevede di utilizzare il protocollo FTP per la funzione Scansione in rete abilitar...

Page 43: ...uovo modello 10 Nel campo Nome modello inserire il nome del nuovo modello compilando anche i campi Descrizione e Titolare se necessario 11 Selezionare Aggiungi per creare il nuovo modello 12 Fare clic su Modifica per Destinazioni file 13 Dall elenco a discesa selezionare una modalità di archiviazione È possibile accettare solo la modalità predefinita Rinomina nuovo file 14 Per Destinazione file la...

Page 44: ...documento scansito Il secondo strato viene convertito in un formato OCR Optical Character Readable che consente di eseguire ricerche copiare e incollare il testo del documento in base alle esigenze Procedura per la scansione in rete 1 Sul dispositivo selezionare Tutti i servizi e poi Scansione in rete 2 Selezionare un modello dall elenco È possibile modificare qualsiasi altro valore dal pannello c...

Page 45: ...r FTP con relativo account nome di accesso e password Microsoft Windows Server 2003 Servizio FTP di Microsoft Internet Information Server 6 0 Microsoft Windows NT Server 4 0 Microsoft Windows 2000 Server Microsoft Windows NT Workstation 4 0 Microsoft Windows 2000 Professional o Microsoft Windows XP Servizio FTP di Microsoft Internet Information Server 3 0 o versioni successive Mac OS X Servizio FT...

Page 46: ...bia impostazioni e Selezionare Stato porta e poi Cambia impostazioni f Selezionare Abilitato e poi Salva g Selezionare Chiudi fino a visualizzare la schermata Impostazioni porta 3 Quando si utilizza il protocollo FTP abilitare la porta client FTP a Selezionare Impostazioni di sistema b Premere su Configurazione di rete e connettività c Selezionare Impostazioni porta d Nella schermata Impostazioni ...

Page 47: ...guendo questi passaggi 1 Selezionare Scansione su PC dalla schermata Tutti i servizi 2 Selezionare Protocollo di trasferimento scegliere un protocollo e poi premere Salva 3 Selezionare le righe vuote sulla schermata e immettere manualmente le impostazioni del server Per SMB è possibile anche sfogliare la rete Microsoft 4 Caricare un originale nell alimentatore automatico e premere Avvio Sullo sche...

Page 48: ...uf Seite 10 Scanausgabe PC optional auf Seite 15 Scanausgabe E Mail Dokumente können direkt am Gerät gescannt und dann als E Mail Anhang im TIFF JPEG Mehrseiten TIFF Einzelseiten TIFF JPEG und PDF Format an Remote Clients übermittelt werden Die Übertragung der E Mails erfolgt über SMTP und POP3 Mail Server Siehe auch Systemhandbuch Enthält Informationen zur E Mail Konfiguration Interaktives Benutz...

Page 49: ... für die Einrichtung von Scanausgabe E Mail Installations anforderung Kommentare Hostname oder IP Adresse des SMTP Mailservers Erforderlich Bei Verwendung eines externen Mailservers gibt der Internetdienstanbieter Auskunft über den Namen oder die IP Adresse des Mailservers SMTP Anmeldung Kennwort Erforderlich E Mail Adresse des WorkCentre Erforderlich Diese E Mail Adresse wird in das Feld Von alle...

Page 50: ...chließen antippen 9 In der Anzeige Anschlüsse zur Option E Mail Empfang scrollen die Option antippen und dann Einstellung ändern antippen 10 In der Anzeige E Mail Empfang die Option Anschlussstatus und dann Einstellung ändern antippen 11 In der Anzeige E Mail Empfang Anschlussstatus die Option Ein dann Speichern und dann Schließen antippen 12 In der Anzeige Anschlüsse zur Option E Mail Benachricht...

Page 51: ...rs eingeben die Standardseinstellung ist Anschluss 25 Wenn der Hostname des SMTP Servers eingegeben wurde muss das Gerät mit DNS Einstellungen eingerichtet werden e E Mail Adresse des WorkCentre eingeben f Anmeldeart falls erforderlich auswählen g Einen Benutzernamen und ein Kennwort eingeben der das für die Anmeldung verwendet werden soll falls erforderlich h Auf Anwenden klicken i Wenn zur Einga...

Page 52: ...se eingetragen ist Die E Mail Adresse muss mit den im ISP Mailserver gespeicherten Daten übereinstimmen ISP verlangt am Mailserver eine SMTP Authentifizierung Beim ISP nachfragen ob eine Authentifizierung verlangt wird Wenn ja für das Multifunktionsgerät die SNMP Authentifizierung über die CentreWare Internet Services aktivieren ISP lässt keine Mail an die standardmäßige Anschlussnummer 25 zu Beim...

Page 53: ... Rechte vorbehalten 6 Hinweis Die restlichen Themen in diesem Handbuch beziehen sich NUR auf Optionen die im Kit Scanausgabe Netzwerk zur Verfügung stehen Wurde NUR das Kit Scanausgabe E Mail erworben sind die restlichen Themen in diesem Handbuch irrelevant ...

Page 54: ...antippen 6 Die Schaltfläche Mailbox erstellen antippen 7 Die Liste bis zu einer freien Mailboxnummer durchblättern Mailboxname Nicht verwendet 8 Diese freie Mailboxnummer auswählen 9 Die Schaltfläche Erstellen Löschen antippen 10 Wenn der Bildschirm Neue Mailbox Zugriffscode angezeigt wird durch Antippen der Schaltfläche Ein bzw Aus festlegen ob für den Zugriff auf die Mailbox ein Zugriffscode erf...

Page 55: ... Baumstruktur Mailbox auswählen 4 In der angezeigten Liste nummerierter Mailboxen eine freie Mailbox auswählen Mailboxname Nicht verwendet und auf die zu dieser Mailbox zugehörige Schaltfläche Erstellen klicken 5 Einen Mailboxnamen in das Feld Mailboxname eingeben 6 Einen Zugriffscode in das Feld Zugriffscode eingeben Der Zugriffscode darf nur aus Zahlen bestehen 7 Den Zugriffscode zur Bestätigung...

Page 56: ...hlenfolge über den Ziffernblock auf dem Steuerpult im Bildschirm Zugriffscode eingeben Ansonsten mit Schritt 6 fortfahren 5 Auf dem Touchscreen Bestätigen antippen 6 Scanparameter durch Antippen der Register des Bildschirms aufrufen und einrichten 7 Vorlage in den Vorlagenwechsler legen und Start drücken 8 Betriebsarten drücken und zur Hauptanzeige zurückkehren Hinweis Das gescannte Dokument kann ...

Page 57: ...he auch Interaktives Benutzerhandbuch Enthält Informationen zur Durchführung eines Scanvorgangs sowie zur Einrichtung von Profilen und Ablagebereichen Systemhandbuch Enthält Details zur Einrichtung der Scanausgabe an das Netzwerk Voraussetzungen Folgendes überprüfen 1 Ein funktionsfähiges TCP IP Netzwerk ist verfügbar 2 Auf dem FTP oder SMB Server ist ein Ablagebereich Ordner für die gescannten Do...

Page 58: ... aktivieren a Verwaltung auswählen b Anschlüsse und Netzwerk antippen c Anschlüsse auswählen d SMB und dann Einstellung ändern auswählen e Anschlussstatus und dann Einstellung ändern auswählen f Ein und dann Speichern auswählen g Schließen so oft antippen bis die Anzeige Anschlüsse erscheint 3 Soll zum Scannen an das Netzwerk das FTP Protokoll verwendet werden den FTP Clientanschluss am Gerät akti...

Page 59: ...Schließen des Bildschirms ohne Änderungen zu speichern auf Rückgängig klicken Wurde auf Anwenden geklickt bei entsprechender Aufforderung die Benutzerkennung des Administrators Standard 11111 und das Kennwort Standard x admin eingeben 9 Zum Anlegen eines neuen Profils im oberen Bereich des Bildschirms der CentreWare Internet Services auf das Register Scannen klicken 10 In das Feld Profilname einen...

Page 60: ...den klicken 17 Zur Eingabe von Scanparametern für das neue Profil bei einer oder allen der nachfolgenden Optionen Bearbeiten auswählen Scanausgabe Netzwerk Zusatzeinstellung Layout Ablageoptionen Berichtoptionen und Komprimierung 18 Zum Speichern der Einstellungen auf Anwenden klicken Hinweis Zur Verwendung der MRC Komprimierung Mixed Raster Content diese Komprimierungsart auswählen Bei dem MRC Ve...

Page 61: ...estvorlage in den Vorlageneinzug einlegen 4 Taste Start drücken Der Auftrag wird entsprechend der Vorgabe im Profil mit dem FTP oder SMB Protokoll an den Server gesendet 5 Über eine Arbeitsstation beim FTP oder SMB Server anmelden Den zuvor angegebenen Ablagebereich Ablageziel ansteuern In diesem Ordner befindet sich das gescannte Dokument Hinweis Wurde die Remote Authentifizierung aktiviert wird ...

Page 62: ...eldename und Kennwort eingerichtet sein muss Microsoft Windows Server 2003 FTP Service des Microsoft Internet Information Server 6 0 Microsoft Windows NT Server 4 0 Microsoft Windows 2000 Server Microsoft Windows NT Workstation 4 0 Microsoft Windows 2000 Professional oder Microsoft Windows XP FTP Service des Microsoft Internet Information Server ab Version 3 0 Mac OS X FTP Service des Mac OS X 10 ...

Page 63: ...swählen e Anschlussstatus und dann Einstellung ändern auswählen f Ein und dann Speichern auswählen g Schließen so oft antippen bis die Anzeige Anschlüsse erscheint 3 Bei Verwendung des FTP Protokolls den FTP Client Anschluss aktivieren a Verwaltung auswählen b Anschlüsse und Netzwerk antippen c Anschlüsse auswählen d In der Anzeige Anschlüsse die Option FTP Client und dann Einstellung ändern auswä...

Page 64: ... der Anzeige Alle Betriebsarten die Option Scanausgabe PC auswählen 2 Übertragungsprotokoll antippen ein Protokoll auswählen und Speichern antippen 3 Die leeren Zeilen in der Anzeige antippen und manuell Servereinstellungen eingeben Bei Verwendung von SMB kann auch das Microsoft Netzwerk durchsucht werden 4 Vorlage in den Vorlagenwechsler legen und Start drücken Der Fortgang der Datenübertragung i...

Page 65: ...a 9 Escanear a PC opcional en la página 13 Escanear a e mail Las copias en papel se pueden escanear y enviar a clientes remotos como datos adjuntos de e mail en formato TIFF JPEG TIFF multipágina TIFF de una página JPEG y PDF Los servidores SMTP y POP3 se utilizan para enviar y recibir e mail respectivamente Consulte también Guía de administración del sistema contiene información sobre la configur...

Page 66: ...n del e mail Requisito para la instalación Comentarios Nombre del host o dirección IP del servidor de correo SMTP Obligatorio Si se utiliza un servidor de e mail externo el proveedor de servicios de Internet facilitará el nombre o la dirección IP del servidor de e mail Nombre de usuario contraseña SMTP Obligatorio Dirección de e mail de WorkCentre Obligatorio Esta es la dirección de e mail que apa...

Page 67: ...ado y luego Guardar 8 Pulse Cerrar 9 En la pantalla Opciones de puerto desplácese y seleccione Recepción de e mail y después Cambiar opciones 10 En la pantalla Recepción de e mail seleccione Estado del puerto y luego Cambiar opciones 11 En la pantalla Recepción de e mail Estado del puerto seleccione Activado y luego Guardar y Cerrar 12 En la pantalla Opciones de puerto desplácese y seleccione Serv...

Page 68: ...or SMTP d Introduzca Dirección IP del servidor SMTP nombre del host y puerto el puerto predeterminado es el 25 Si se introduce el nombre del host del servidor SMTP se deberá configurar la máquina con las opciones DNS e Introduzca la Dirección de e mail de WorkCentre f Seleccione un tipo de Credenciales de conexión si es necesario g Si es necesario introduzca un Nombre de conexión y una Clave para ...

Page 69: ...ispositivo multifunción incorrecta Compruebe si el dispositivo está utilizando la dirección de e mail correcta en el campo De La dirección de e mail debe concordar con la que espera el servidor de correo ISP ISP requiere autenticación SMTP para su servidor de correo Pregunte a su proveedor de Internet si es un requisito Si lo es active la autenticación SMTP del dispositivo a través de Servicios de...

Page 70: ... para localizar un Número de buzón no asignado con un nombre de buzón Sin usar 8 Seleccione un Número de buzón no asignado de la lista 9 Pulse el botón Crear Eliminar 10 Cuando aparezca la pantalla Buzón nuevo Asignar clave especifique si desea que se pida o no una clave para acceder al buzón mediante los botones Sí y No Si selecciona Sí introduzca el número de clave con el teclado numérico despué...

Page 71: ...uzón en el árbol de directorios 4 Cuando aparezca la lista numerada de buzones localice un número de buzón no asignado con un nombre de buzón Sin usar de la lista y haga clic en el botón Crear 5 Escriba el nombre del buzón en la casilla Nombre del buzón 6 Escriba una clave en la casilla Clave La clave debe ser numérica 7 Confirme la clave volviendo a introducirla en la casilla Introducir la clave ...

Page 72: ...lave compuesta por números con el teclado numérico del panel de control en la pantalla Clave De lo contrario continúe con el paso 6 5 Pulse el botón Confirmar de la pantalla táctil 6 Seleccione cada una de las fichas para acceder a los controles para configurar las opciones de escaneado 7 Coloque el documento en el alimentador de documentos y pulse Comenzar 8 Pulse el botón Servicios para volver a...

Page 73: ...edimiento para la configuración de puertos de escaneado de red Para utilizar la función Escaneado de red es necesario activar los puertos correspondientes cliente FTP o SMB en el dispositivo y comprobar que se ha especificado una dirección IP Nota La configuración también se puede realizar a través de los Servicios de Internet CentreWare Si desea obtener más información sobre el uso de dichos serv...

Page 74: ...puerto seleccione Cliente FTP y después Cambiar opciones e Seleccione Estado del puerto y a continuación Cambiar opciones f Seleccione Activado y después Guardar g Seleccione Cerrar hasta que llegue a la pantalla de la ficha Herramientas 4 Espere unos segundos para que lo desconecte el servicio autocancelar 5 Si ha modificado alguna opción el dispositivo se reiniciará automáticamente para registra...

Page 75: ...arte superior de la pantalla Servicios de Internet CentreWare para crear una nueva plantilla 10 Rellene el campo Nombre de la plantilla con el nombre de la nueva plantilla y rellene los campos opcionales Descripción y Propietario si es necesario 11 Haga clic en Agregar para crear una nueva plantilla 12 Haga clic en Editar para Destinos de archivo 13 Seleccione una norma para archivar documentos en...

Page 76: ...gunda capa de datos con el texto del documento escaneado La segunda capa se convierte en un formato OCR para permitir realizar búsquedas en el texto copiar y pegar según se desee Procedimiento de Escaneado de red 1 Seleccione en el dispositivo Todos los servicios seguido de Escaneado de red 2 Seleccione una plantilla de la lista También se puede cambiar cualquier otro valor a través del panel de c...

Page 77: ...uientes servidores FTP Microsoft Windows Server 2003 Servicio FTP de Microsoft Internet Information Server 6 0 Microsoft Windows NT Server 4 0 Microsoft Windows 2000 Server Microsoft Windows NT Workstation 4 0 Microsoft Windows 2000 Professional o Microsoft Windows XP Servicio FTP de Microsoft Internet Information Server 3 0 o posterior Mac OS X Servicio FTP de Mac OS X 10 1 5 10 2 x 10 3 8 10 3 9...

Page 78: ...ón Cambiar opciones e Seleccione Estado del puerto y a continuación Cambiar opciones f Seleccione Activado y después Guardar g Seleccione Cerrar hasta que llegue a la pantalla Opciones del puerto 3 Cuando utilice el protocolo FTP active el puerto cliente FTP a Seleccione Opciones del sistema b Pulse Configuración de la conectividad y la red c Seleccione Opciones del puerto d En la pantalla Opcione...

Page 79: ... del siguiente modo 1 Seleccione Escanear a PC en la pantalla Todos los servicios 2 Pulse Protocolo de transferencia seleccione un protocolo y pulse Guardar 3 Pulse las líneas en blanco de la pantalla e introduzca manualmente las opciones del servidor Para la función SMB también puede navegar en Microsoft Network 4 Coloque el documento en el alimentador de documentos y pulse Comenzar El proceso de...

Page 80: ...a página 15 Digitalizar para E mail As cópias em papel podem ser digitalizadas no dispositivo e enviadas para clientes remotos como anexos de e mail em vários formatos de arquivo tais como TIFF JPEG TIFF de Várias Páginas TIFF de Uma Página JPEG e formato PDF Os servidores de e mail SMTP e POP3 são utilizados para enviar e receber e mail respectivamente Consulte também Guia do Administrador do Sis...

Page 81: ...dos para configurar e mail Requisitos de instalação Comentários Nome do host ou endereço IP do servidor de e mail SMTP Obrigatório Se estiver usando um servidor de correio externo seu provedor de serviços de Internet fornecerá o nome ou o endereço IP do servidor de correio Login senha do SMTP Obrigatório Endereço de e mail do WorkCentre Obrigatório Esse endereço de e mail preencherá o campo De nos...

Page 82: ...il Status porta selecione Ativada e depois Salvar 8 Toque em Fechar 9 Na tela Configurações da porta selecione Receber e mail e depois selecione Alterar configurações 10 Na tela Receber e mail selecione Status da porta e depois selecione Alterar configurações 11 Na tela Recepção de e mail Status porta selecione Ativada e depois selecione Salvar e Fechar 12 Na tela Configurações da porta selecione ...

Page 83: ... SMTP d Digite o Endereço IP do Servidor SMTP Nome do host e porta o padrão é porta 25 Se o Nome do host do servidor SMTP for inserido a máquina deverá ser configurada com as definições de DNS e Digite o Endereço de e mail do WorkCentre f Selecione um tipo de Credenciais de login se necessário g Digite um Nome de login e Senha a ser usados para credenciais se necessário h Clique em Aplicar i Se so...

Page 84: ...o De O endereço de e mail deve corresponder ao que o servidor de e mail PSI está esperando PSI solicita autenticação SMTP ao servidor de e mail deles Verifique com seu PSI para determinar se isto é um requisito Se sim ative a autenticação SMTP para o dispositivo multifuncional via Serviços de Internet do CentreWare PSI não permite e mail na porta padrão número 25 Verifique com seu PSI para determi...

Page 85: ...ation Todos os direitos reservados 6 Nota Os outros tópicos deste guia se aplicam APENAS a opções disponíveis no kit Digitalização em rede Se você tiver adquirido APENAS o kit Digitalizar para e mail os tópicos restantes neste guia não serão relevantes ...

Page 86: ...ção 6 Pressione o botão Criar caixa postal 7 Percorra a lista para localizar um Número da caixa postal não atribuído com o Nome da caixa postal Disponível 8 Selecione um Número da caixa postal não atribuído na lista exibida 9 Toque no botão Criar Excluir 10 Quando a tela Nova caixa postal Atribuir senha for exibida use os botões Ligado e Desligado para determinar se será solicitada ou não uma senh...

Page 87: ...adamente você deverá ver a página na Web dos Serviços de Internet do CentreWare no seu dispositivo 2 Clique na guia Digitalizar 3 Selecione Caixa postal na árvore de diretórios 4 Quando a lista numerada de Caixas postais for exibida localize uma com o nome Disponível e clique em Criar 5 Digite um nome para essa Caixa postal na caixa de entrada Nome da caixa postal 6 Digite uma senha na caixa de en...

Page 88: ...a à caixa postal quando ela foi criada digite a senha série de números na tela Senha usando o teclado numérico do Painel de controle Caso contrário vá para a etapa 6 5 Pressione o botão Confirmar na tela de seleção por toque 6 Selecione todas as telas com guias para acessar os controles para configurar os parâmetros de digitalização 7 Coloque o seu documento no alimentador de originais e pressione...

Page 89: ...ão em rede Consulte também Guia Interativo do Usuário Contém informações sobre como fazer uma digitalização em rede assim como informações sobre como configurar modelos e repositórios Guia do Administrador do Sistema Contém os detalhes sobre a configuração de digitalização em rede Pré requisitos para a Configuração de Digitalização em rede Confirme se 1 Uma rede operacional existente que utilize T...

Page 90: ... em Configuração da rede e conectividade c Selecione Configurações da porta d Selecione SMB e depois Alterar configurações e Selecione Status da porta e depois Alterar configurações f Selecione Ativada e depois Salvar g Selecione Fechar até que a tela Configurações da porta seja exibida 3 Se planeja usar o protocolo FTP com Digitalização em rede ative a porta do cliente FTP no dispositivo a Seleci...

Page 91: ... Repositório será necessário digitar uma Senha também 8 Clique em Aplicar para salvar as alterações ou em Desfazer para sair sem salvar as alterações Se você clicou em Aplicar esteja preparado para digitar o nome de usuário do administrador padrão 11111 e a senha padrão x admin se solicitados 9 Clique na guia Digitalizar na parte superior da tela Serviços de Internet CentreWare para criar um novo ...

Page 92: ... parâmetros de digitalização para o novo modelo selecione Editar para cada uma das categorias de configuração disponíveis Estas incluem Digitalização em Rede Configurações Avançadas Ajuste de Layout Opções de Arquivamento Opções de Relatório e Capacidade de Compactação 18 Clique em Aplicar para salvar suas configurações Nota Selecione Compactação MRC se disponível para usar a compactação Mixed Ras...

Page 93: ...to de amostra no alimentador de originais 4 Pressione o botão verde Iniciar O trabalho é enviado para o servidor usando o protocolo FTP ou SMB conforme definido no modelo 5 De uma estação de trabalho conecte se ao servidor FTP ou SMB Navegue para o repositório destino que foi especificado anteriormente Seu documento digitalizado estará nesta pasta Nota Se a autenticação remota tiver sido ativada u...

Page 94: ... neste servidor nome de login e senha é necessário Microsoft Windows Server 2003 Serviço FTP do Microsoft Internet Information Server 6 0 Microsoft Windows NT Server 4 0 Microsoft Windows 2000 Server Microsoft Windows NT Workstation 4 0 Microsoft Windows 2000 Professional ou Microsoft Windows XP Serviço FTP do Microsoft Internet Information Server 3 0 ou posterior Mac OS X Serviço FTP do Mac OS X ...

Page 95: ...ne Status da porta e depois Alterar configurações f Selecione Ativada e depois Salvar g Selecione Fechar até que a tela Configurações da porta seja exibida 3 Ao usar o protocolo FTP ative a porta do cliente FTP a Selecione Configurações do sistema b Toque em Configuração da rede e conectividade c Selecione Configurações da porta d Na tela Configurações da porta selecione Cliente FTP e depois selec...

Page 96: ...ado como a seguir 1 Selecione Digitalizar para PC na tela Todos os serviços 2 Toque em Protocolo de transferência selecione um protocolo e toque em Salvar 3 Toque nas linhas em branco na tela e insira manualmente as configurações do Servidor Para SMB você pode também procurar a Microsoft Network Rede Microsoft 4 Coloque o seu documento no alimentador de originais e pressione Iniciar O progresso da...

Reviews: