


1.
Ensure that all components have been reassembled correctly and that no tools
or loose screws are left inside your computer. See “Locating components” on
page 85 for the location of the various components.
2.
If you have removed the front bezel, reinstall it. See “Removing and
reinstalling the front bezel” on page 89.
3.
Make sure that the cables are routed correctly before reinstalling the computer
cover. Keep cables clear of the hinges and sides of the computer chassis to
avoid interference with reinstalling the computer cover.
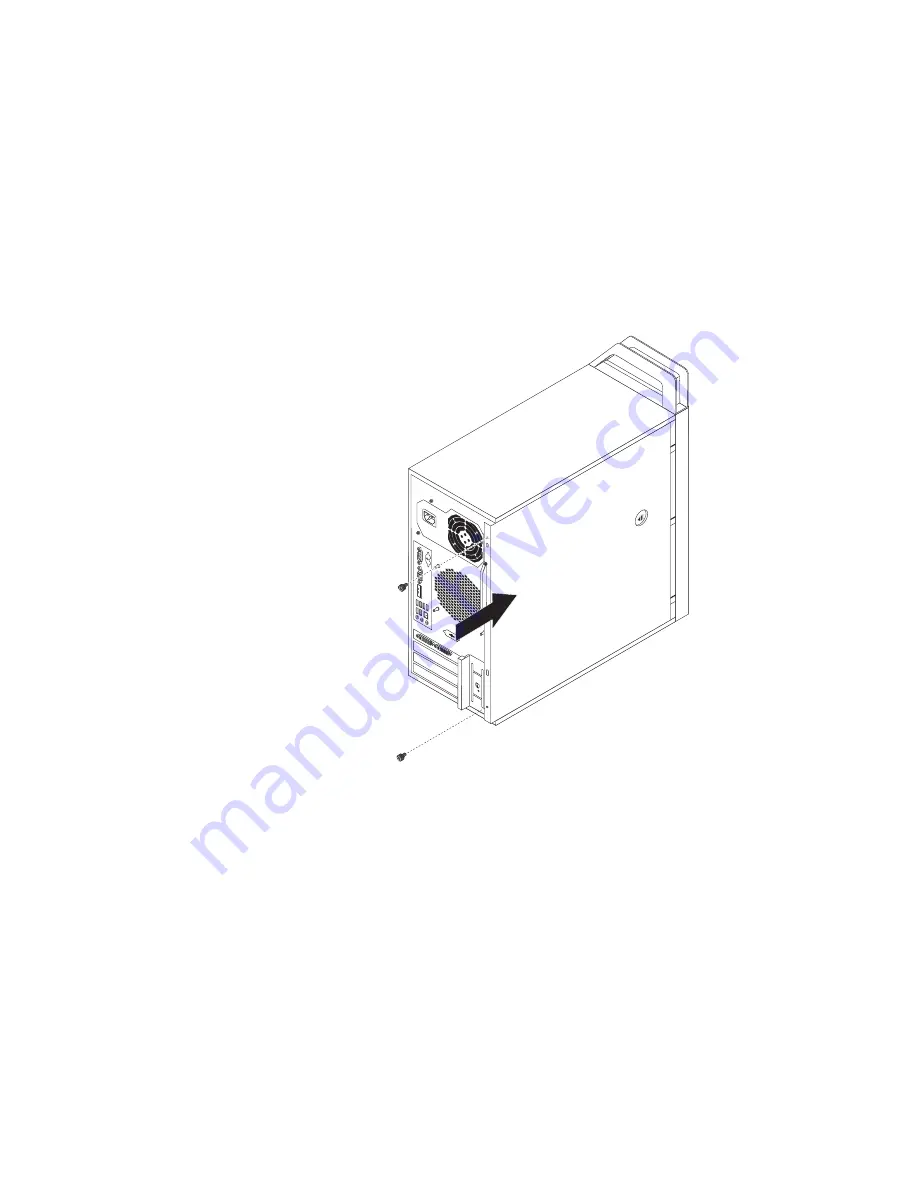
4.
Position the computer cover on the chassis so that the rail guides on the
bottom of the computer cover engage the rails on the chassis. Then, push the
cover to the front of the computer until it snaps into position.
5.
If the computer cover is secured with thumbscrews, install them.
6.
If there is a padlock available, lock the computer cover.
7.
If there is an integrated cable lock available, lock the computer.
8.
Reconnect the external cables and power cords to the computer. See “Locating
connectors on the rear of your computer” on page 84.
9.
If you have replaced the system board, you must update (flash) the BIOS. See
“Updating (flashing) the BIOS” on page 167.
10.
Some FRU replacements require the configuration to be updated. See
Chapter 6, “Using the Setup Utility program,” on page 49.
Figure 41. Reinstalling the computer cover
Chapter 9. Replacing FRUs
123
Summary of Contents for ThinkStation 4215
Page 1: ......
Page 2: ......
Page 3: ...ThinkStation Hardware Maintenance Manual ...
Page 17: ...Chapter 2 Safety information 11 ...
Page 18: ...12 Hardware Maintenance Manual ...
Page 19: ... 18 kg 37 lbs 32 kg 70 5 lbs 55 kg 121 2 lbs 1 2 Chapter 2 Safety information 13 ...
Page 23: ...Chapter 2 Safety information 17 ...
Page 24: ...1 2 18 Hardware Maintenance Manual ...
Page 25: ...Chapter 2 Safety information 19 ...
Page 26: ...1 2 20 Hardware Maintenance Manual ...
Page 33: ...Chapter 2 Safety information 27 ...
Page 34: ...28 Hardware Maintenance Manual ...
Page 35: ...1 2 Chapter 2 Safety information 29 ...
Page 39: ...Chapter 2 Safety information 33 ...
Page 40: ...1 2 34 Hardware Maintenance Manual ...
Page 44: ...38 Hardware Maintenance Manual ...
Page 54: ...48 Hardware Maintenance Manual ...
Page 130: ...124 Hardware Maintenance Manual ...
Page 179: ......
Page 180: ...Part Number 71Y8031 Printed in USA 1P P N 71Y8031 ...