Page 4
# 504,910M
using a proper conduit fitting. Units are approved for
use only with copper conductors. 24V Class II circuit
connections are made in the low voltage junction box.
Refer to Figure 7 on page 15 for field wiring diagram
(wiring diagram also found inside unit control box
cover).
3. Install room thermostat on an inside wall that is not
subject to drafts, direct sunshine, or other heat
sources.
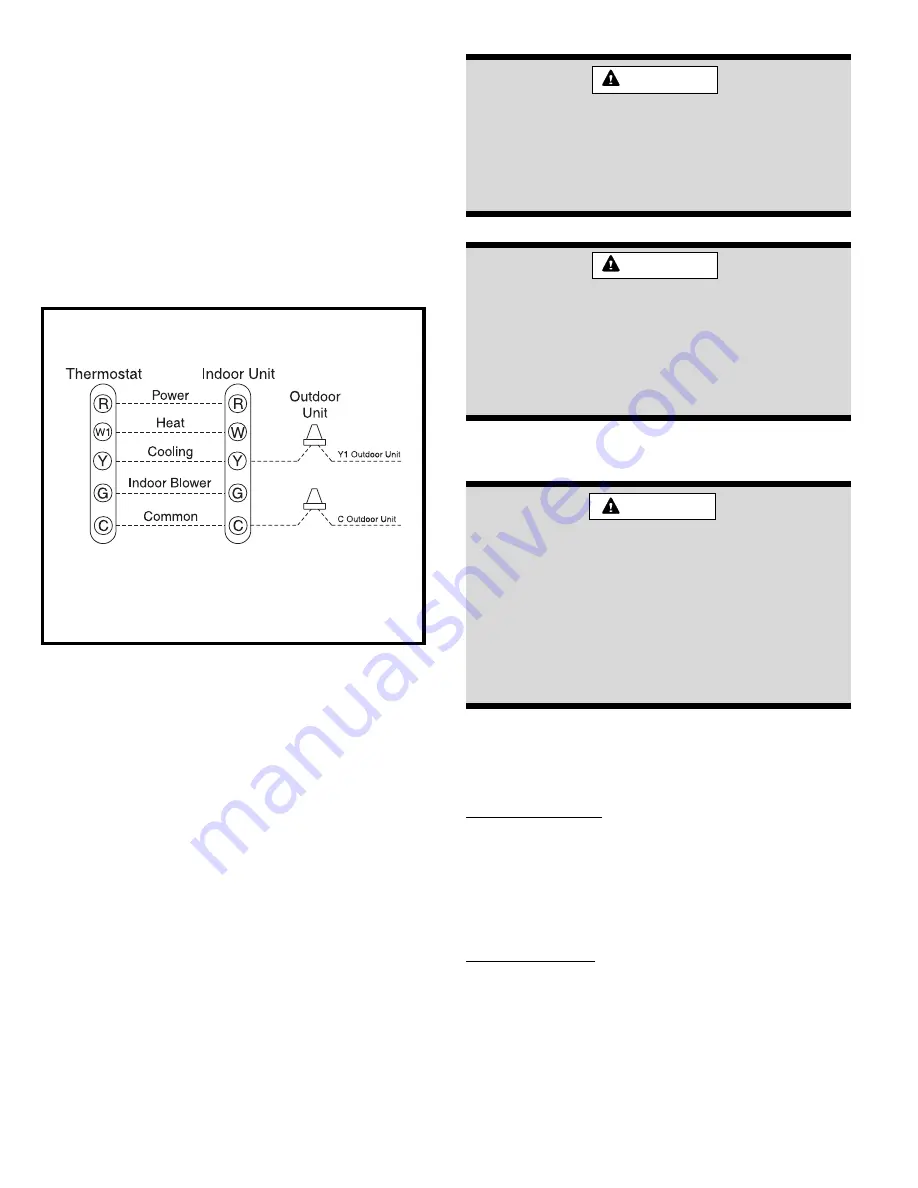
4. Install low voltage wiring from outdoor to indoor unit
and from thermostat to indoor unit (see Figure 2).
Thermostat Designations
Figure 2
See unit wiring diagram for power supply connections.
If the indoor unit is not equipped with a blower relay,
one must be field-supplied and installed.
Refrigerant Piping
If the SCU12M unit is being installed with a new indoor
coil and line set, the refrigerant connections should be
made as outlined in the section found on page 6 entitled
Plumbing Connections Using New Indoor Coil and
Line Set
. If an existing line set and/or indoor coil will be
used to complete the system, refer to the following section
entitled
Flushing Existing Line Set and Indoor Coil
.
If this unit is being matched with an approved line set
or indoor coil which was previously charged with R22
refrigerant, the line set and coil must be flushed prior to
installation. If the unit is being used with an existing
indoor coil which was equipped with a liquid line which
served as a metering device (RFCI), the liquid line must
be replaced prior to the installation of the SCU12M unit.
Field refrigerant piping consists of liquid and suction lines
from the outdoor unit (sweat connections) to the indoor
coil (flare or sweat connections).
Flushing Existing Line Set and Indoor Coil
Polyol ester (POE) oils used with R410A
refrigerant absorb moisture very quickly. It is
very important that the refrigerant system be
kept closed as much as possible. DO NOT
remove line set caps or service valve stub
caps until ready to make connections.
WARNING
Before opening any system, make sure the
pressure in the system is brought to and
remains at atmospheric pressure. Failure to
comply can result in system damage and/or
personal injury.
WARNING
When flushing existing line set and/or indoor
coil, be sure to empty all existing traps. Re-
sidual mineral oil can act as an insulator,
preventing proper heat transfer. It can also
clog the thermal expansion valve, reducing
system performance and capacity. Failure to
properly flush the system as explained in
these instructions will void the warranty.
CAUTION
This procedure should not be performed on systems
which contain contaminants, such as compressor
burn out.
Required Equipment (see Figure 3)
The following equipment is needed to flush the existing
line set and indoor coil: Two clean R22 recovery bottles,
an oil-less recovery machine with a pump down feature,
and two sets of gauges (one for use with R22 and one for
use with R410A).
Flushing Procedure
IMPORTANT:
The line set and/or indoor coil must be
flushed with at least the same amount of refrigerant that
previously charged the system. Check the charge in the
flushing cylinder before flushing the unit.
1. Remove existing R22 refrigerant using the appropriate
procedure.


