Last Updated on Sep 2021
4.3 Software initiation
Turn on the machine following the instructions pasted on the wall and inserted in the log book.
Wait for complete initialization of microscope and Windows after logging in with your TLL
username and password.
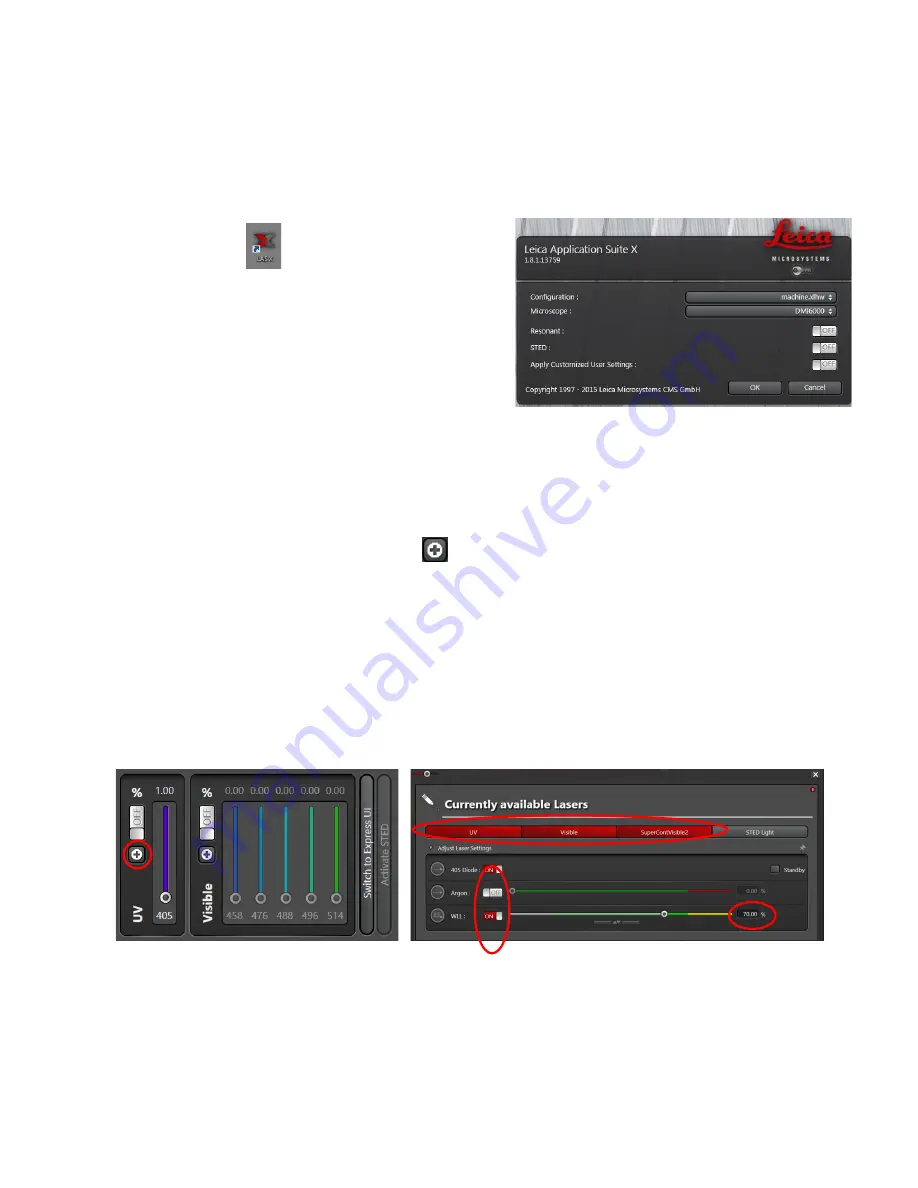
Double click on:
(A) The LAS X configuration screen will appear:
Configuration:
Machine.xlhw
must be selected.
Microscope:
Check that
DMI6000
is selected.
Click on
OK
and wait for complete initialization. Do not move anything on the microscope
during the initialization process.
4.4 Turning on the lasers
1.
Under the Visible panel, click on the
button to open the laser panel.
2.
Click on the UV (405nm), Visible (Argon) and SuperContVisible2(WLL) bar to observe
405nm, Argon and WLL respectively in the dropdown menu.
3.
White light laser (WLL) has excitation wavelengths from 470nm-670nm allowing you to
select specific excitation light source. Argon lasers have much higher power than the WLL
and has excitation wavelengths
–
458nm, 476nm, 488nm, 496nm and 514nm.
4.
Turn on
the laser that you need by clicking on the sliders. Make sure that WLL and
SuperContVisible2 are at 70% before carrying on with the next steps.
4.5 Using Dye Assistant tab
•
Select the objective lens that you would like to image with your sample.
1
3
4
2


