Kyocera ECOSYS M3145dn Operation Manual Download Page 290

8-30

Setup and Registration (System Menu) > System Menu
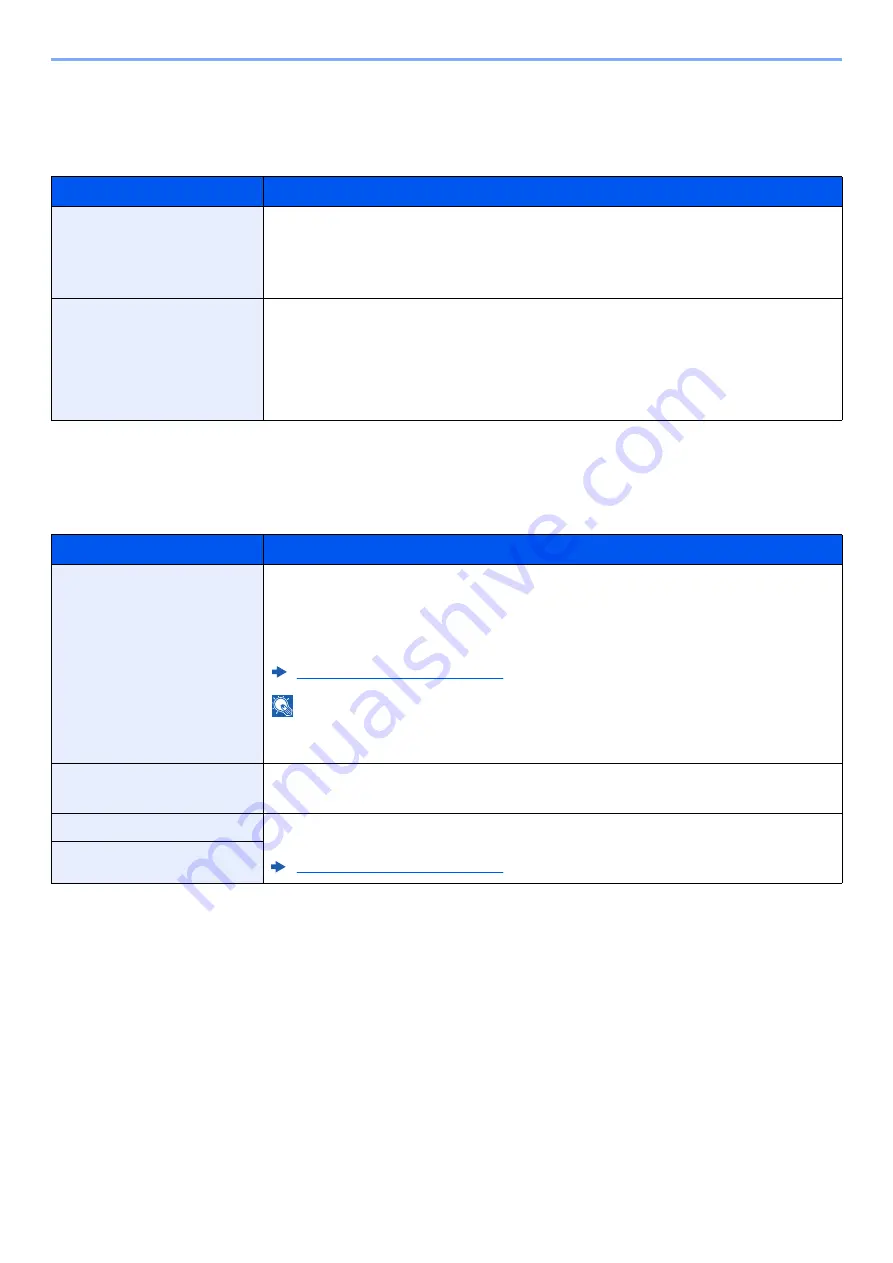
Error Handling

[

System Menu/Counter

] key > [

] [

] key > [

Common Settings

] > [

OK

] key > [

] [

] key > [

Error Handling

] > [

OK

] key

Select whether to cancel or continue the job when error has occurred.

Date Setting

[

System Menu/Counter

] key > [

] [

] key > [

Common Settings

] > [

OK

] key > [

] [

] key > [

Date Setting

] > [

OK

] key

Configure settings related to the date and time.

Item

Description

DuplexPaperError

Select what to do when duplex printing is not possible for the selected paper size and media type.

Value

1-sided: Printed in 1-sided
Display Error: Message to cancel printing is displayed.

PaperMismatchErr

Select what to do when the selected paper size or type does not match paper size or type 
loaded in the specified paper source while printing from the computer by specifying the 
cassette or multi-purpose tray.

Value

Ignore: The setting is ignored and the job is printed.
Display Error: Message to cancel printing is displayed.

Item

Description

Date/Time

Set the date and time for the location where you use the machine. When you send an E-mail 
using the transmission function, the date and time as set here will be printed in the header of 
the E-mail message.

Value

: Year (2000 to 2037), Month (01 to 12), Day (01 to 31), Hour (00 to 23), 

Min. (00 to 59), Second (00 to 59)

Setting Date and Time (page 2-16)

NOTE

If you change the date/time while using the trial version of an application, you will no longer be 
able to use the application.

Date Format

Select the display format of year, month, and date. The year is displayed in Western notation.

Value

: Month/Day/Year, Day/Month/Year, Year/Month/Day

Time Zone

Set the time difference from GMT. Choose the nearest listed location from the list. If you select 
a region that utilizes summer time, configure settings for summer time.

Setting Date and Time (page 2-16)

Summer Time

Summary of Contents for ECOSYS M3145dn

Page 1: ...ECOSYS M3145dn PRINT COPY SCAN ECOSYS M3645dn PRINT COPY SCAN FAX OPERATION GUIDE...

Page 2: ...numerous quality inspections Please use our genuine toner containers which have passed rigorous quality control testing The use of non genuine toner containers may cause failure We will not be liable...

Page 3: ...Legal Restriction on Copying Scanning 1 9 EN ISO 7779 1 9 EK1 ITB 2000 1 9 Wireless Connection Mexico only 1 9 Security Precautions when Using Wireless LAN If equipped 1 9 Limited Use of This Product...

Page 4: ...ox 2 55 Printing a document stored in a Custom Box 2 56 Transferring Data from Our Other Products 2 58 Migrating the Address Book 2 58 3 Preparation before Use 3 1 Loading Paper 3 2 Precaution for Loa...

Page 5: ...essor 5 3 Program 5 5 Registering Programs 5 5 Confirming the Registered Program 5 6 Recalling Program 5 6 Overwriting Program 5 7 Deleting Program 5 7 Select Key Settings 5 8 Copying 5 9 Basic Operat...

Page 6: ...6 13 Color Selection 6 14 Sharpness 6 14 Contrast 6 15 Background Density 6 15 Prevent Bleed t Prevent Bleed thru 6 16 Zoom 6 16 Combine 6 18 Duplex 6 20 Continuous Scan 6 22 Job Finish Notice 6 22 F...

Page 7: ...rs to Scan Using WIA 9 14 To Manage the Users that Send Faxes from a PC 9 15 Local Authoriz Local Authorization 9 16 Group Auth Group Authorization Settings 9 17 Guest Authorization Set 9 18 NW User P...

Page 8: ...1 2 Optional Applications 11 7 Character Entry Method 11 9 Using the Keys 11 9 Selecting Type of Characters 11 10 Characters That Can be Entered Using the Numeric Keys 11 10 Entering Symbols 11 11 Ent...

Page 9: ...rom your PC Document Box functions Security Output Data Copy functions Printer functions USB memory Send functions Fax functions Original Electronic data Fax data USB memory Input Data Wi Fi connectio...

Page 10: ...ndouts When a large number of originals cannot be placed in the document processor at one time the originals can be scanned in separate batches and then copied or sent as one job Continuous Scan page...

Page 11: ...f the paper You can also print multiple originals onto one sheet Combine page 6 18 Duplex page 6 20 Save energy and cost Create attractive documents Skip blank pages when printing Skip Blank Page When...

Page 12: ...y save a printer document in the machine By printing the document from the machine prevents someone takes your document Printing Data Saved on the Printer page 4 12 Strengthen security Use functions m...

Page 13: ...t from the USB memory by plugging it directly into the machine Original scanned at the machine can be saved in the USB memory also Printing Documents Stored in Removable USB Memory page 5 39 Saving Do...

Page 14: ...color modes are as follows For details refer to the following Color Selection page 6 14 Color mode Description Reference image Reference page Before After Auto Color Automatically recognizes whether...

Page 15: ...ze or blur the image outline Example Emphasize the image outlines Sharpness page 6 14 Adjust the difference between dark and light parts of the image Contrast page 6 15 Darken or lighten the backgroun...

Page 16: ...to use basic functions of the machine how to use convenient features how to perform routine maintenance and what to do when problems occur For safe use of the machine Safety Guide Provides safety and...

Page 17: ...Center RX User Guide Explains how to access the machine from a Web browser on your computer to check and change settings Print data from a computer Printer Driver User Guide Explains how to install t...

Page 18: ...e machine such as placing originals making copies sending documents and using document boxes 6 Using Various Functions Explains convenient functions that are available on the machine 7 Status Job Canc...

Page 19: ...move from the current page to the previously displayed page This is convenient when you want to return to the page from which you jumped to the current page Click an item in the Table of Contents to j...

Page 20: ...erating the machine In this Operation Guide continuous operation is as follows Actual procedure Procedure indicated in this guide Select the System Menu Counter key Select the or key to select Common...

Page 21: ...e page 6 12 ID Card Copy page 6 9 Duplex page 6 20 Zoom page 6 16 Combine page 6 18 Original Size page 6 9 Orig Orientation page 6 11 Mixed Size Orig page 6 12 Original Image page 6 13 Density page 6...

Page 22: ...12 Continuous Scan page 6 22 File Format page 6 26 File Name Entry page 6 22 Subject Body page 6 30 Long Original page 6 32 JobFinish Notice page 6 22 FAX Resolution Refer to FAX Operation Guide FAX D...

Page 23: ...page 4 13 Quick Proof page 4 17 USB Memory Store File Quiet Mode page 6 23 Color Selection page 6 14 Original Size page 6 9 Original Image page 6 13 Scan Resolution page 6 30 Storing Size page 6 32 Zo...

Page 24: ...ll program page 5 5 Print Job Status page 7 4 Send Job Status page 7 5 Store Job Status page 7 6 Scheduled Job page 7 7 Print Job Log page 7 10 Send Job Log page 7 11 Store Job Log page 7 12 FAX Job L...

Page 25: ...8 5 Opt NW Status page 8 5 Data Sanitization page 8 5 Admin Rpt Set Refer to FAX Operation Guide Result Rpt Set page 8 6 Job Log History Auto Sending page 8 6 Send History page 8 6 Destination page 8...

Page 26: ...age 8 12 IP Filter IPv4 page 8 12 IP Filter IPv6 page 8 12 IPSec page 8 12 Protocol Settings page 8 16 Secure Settings page 8 7 Ping page 8 17 Restart Network page 8 17 Optional Network Basic page 8 1...

Page 27: ...port page 9 40 Total Accounting page 9 39 Each Job Account page 9 39 Account List page 9 28 Default Setting Apply Limit page 9 37 Copy Print Count page 9 37 Counter Limit page 9 38 Unknown User Unknow...

Page 28: ...Def PaperSource page 8 27 SpcialPaper Act page 8 27 Paper Setup Msg page 8 27 Preset Limit page 8 29 Measurement page 8 29 Error Handling DuplexPaperError page 8 30 PaperMismatchErr page 8 30 Date Se...

Page 29: ...py page 8 33 Skip Blank Send page 8 33 File Name Entry page 8 33 Subject Body page 8 34 Con scan Copy page 8 34 Con scan FAX page 8 34 Con scan Others page 8 34 File Format page 8 34 File Separation p...

Page 30: ...9 EcoPrint page 8 39 Override A4 LTR page 8 39 Duplex page 8 39 Copies page 8 39 Orientation page 8 39 Wide A4 page 8 39 FormFeed TimeOut page 8 39 LF Action page 8 39 CR Action page 8 39 Job Name pag...

Page 31: ...Key Set page 8 38 Edit Destination Address Book page 8 43 Edit Restriction page 8 43 Print List page 8 43 AddrBookDefaults page 8 43 Adjust Maint Quiet Mode page 8 44 Copy Denst Adj page 8 44 Send Box...

Page 32: ...ance and Conformity 1 7 Other precautions for users in California the United States 1 7 Warranty the United States and Canada 1 8 Legal Restriction on Copying Scanning 1 9 EN ISO 7779 1 9 EK1 ITB 2000...

Page 33: ...ention are indicated inside the symbol General warning Warning of high temperature The symbol indicates that the related section includes information on prohibited actions Specifics of the prohibited...

Page 34: ...id poorly ventilated locations If the floor is delicate against casters when this machine is moved after installation the floor material may be damaged During copying some ozone is released but the am...

Page 35: ...ntact a physician If you do happen to get toner in your eyes flush them thoroughly with water If there is any remaining tenderness contact a physician If toner does happen to get on your skin wash wit...

Page 36: ...n emitted inside this machine is hermetically sealed within the protective housing and external cover In the normal operation of the product by user no radiation can leak from the machine This machine...

Page 37: ...A laser product related act was implemented on Aug 2 1976 by the Center for Devices and Radiological Health CDRH of the U S Food and Drug Administration FDA This act prohibits the sale of laser produc...

Page 38: ...lded interface cable with the referenced device is prohibited CAUTION The changes or modifications not expressly approved by the party responsible for compliance could void the user s authority to ope...

Page 39: ...your area or check KYOCERA s website at http www kyoceradocumentsolutions com for KYOCERA Document Solutions America Inc or http www kyoceradocumentsolutions ca for KYOCERA Document Solutions Canada...

Page 40: ...sible that this equipment or device may not cause harmful interference and 2 this equipment or device must accept any interference including interference that may cause undesired operation La operaci...

Page 41: ...ing to the instructions and precautions provided by the administrator of the institution or those provided on the medical instruments Radio waves transmitted from this product may affect automatic con...

Page 42: ...ica Palatino and Times are registered trademarks of Linotype GmbH ITC Avant Garde Gothic ITC Bookman ITC ZapfChancery and ITC ZapfDingbats are registered trademarks of International Typeface Corporati...

Page 43: ...OpenSSL Project for use in the OpenSSL Toolkit http www openssl org THIS SOFTWARE IS PROVIDED BY THE OpenSSL PROJECT AS IS AND ANY EXPRESSED OR IMPLIED WARRANTIES INCLUDING BUT NOT LIMITED TO THE IMP...

Page 44: ...ou return to Monotype Imaging Under the terms of this License Agreement you have the right to use the Fonts on up to three printers If you need to have access to the fonts on more than three printers...

Page 45: ...or promote products derived from this software without specific prior written permission THIS SOFTWARE IS PROVIDED BY THE COPYRIGHT HOLDERS AND CONTRIBUTORS AS IS AND ANY EXPRESS OR IMPLIED WARRANTIE...

Page 46: ...free irrevocable except as stated in this section patent license to make have made use offer to sell sell import and otherwise transfer the Work where such license applies only to those patent claims...

Page 47: ...the Work including but not limited to damages for loss of goodwill work stoppage computer failure or malfunction or any and all other commercial damages or losses even if such Contributor has been ad...

Page 48: ...uplex printing be set to use duplex mode by default Resource Saving Paper For the preservation and sustainable use of forest resources it is recommended that recycled as well as virgin paper certified...

Page 49: ...the standards laid out in the International Energy Star Program ENERGY STAR is a voluntary energy efficiency program with the goal of developing and promoting the use of products with high energy effi...

Page 50: ...ate and Time 2 16 Network Setup 2 17 Configuring the Wired Network 2 17 Configuring the Wireless Network 2 19 Setting Wi Fi Direct 2 23 Energy Saver function 2 25 Low Power Mode 2 25 Sleep and Auto Sl...

Page 51: ...th Guides 3 Original Table 4 Original Eject Table 5 Inner Tray 6 Paper Stopper 7 Front Cover 8 Cassette 1 9 Power Switch 10 Original Stopper 11 USB Memory Slot 12 Front Cover Open Button 13 Slit Glass...

Page 52: ...2 3 Installing and Setting up the Machine Part Names 18 Anti theft Lock Slot 19 Rear Cover 18 19...

Page 53: ...nector 2 Network Interface Connector 3 Option Interface Slot 4 TEL Connector 5 LINE Connector 6 Fuser Cover 7 Paper Width Guides 8 Tray Extension 9 Multi Purpose Tray 10 Paper Length Guide 11 Paper Wi...

Page 54: ...2 5 Installing and Setting up the Machine Part Names 15 Toner Container 16 Toner Container Lock Lever 17 Registration Roller 18 Left Cover 19 Waste Toner Box 15 16 19 17 18...

Page 55: ...2 6 Installing and Setting up the Machine Part Names With Optional Equipments Attached 1 Cassette 2 2 Cassette 3 3 Cassette 4 4 Cassette 5 Optional Equipment page 11 2 2 3 4 1...

Page 56: ...er to the following Configuring the Wireless Network page 2 19 Connection Environment Function Necessary Cable Connect a LAN cable to the machine Printer Scanner Network FAX LAN cable 10BASE T 100BASE...

Page 57: ...able 1 Connect the cable to the machine 1 Connect the LAN cable to the network interface connector 2 Connect the other end of the cable to the hub 2 Power on the machine and configure the network IMPO...

Page 58: ...left side of the body 2 Connect the other end of the cable to the PC 2 Power on the machine Connecting the Power Cable 1 Connect the cable to the machine Connect one end of the supplied power cable to...

Page 59: ...hen turn on the power switch Show PowerOffMsg page 8 36 CAUTION If this machine will be left unused for an extended period e g overnight turn it off at the main power switch If the machine will not be...

Page 60: ...ys Enter numbers and symbols Clears entered numbers and characters Returns settings to their default states Cancels or pauses the job in progress Starts copying and scanning operations and processing...

Page 61: ...System Menu Counter key or Function Menu key to display the setting menus The directions of usable arrow keys are shown on the screen displayed When the or key is selected the selection moves line by...

Page 62: ...played on the message display select Help to display the Help screen The Help screen shows machine operation Select the key to display the next step or select the key to display the previous step Sele...

Page 63: ...d login password are set as shown below Login User Name 4500 Login Password 4500 You will be unable to login if you forget your login user name or login password In this event login with administrator...

Page 64: ...t from the machine select the Authentication Logout key to return to the login user name login password entry screen Users are automatically logged out in the following circumstances When the machine...

Page 65: ...is enabled you can only change the settings by logging in with administrator privileges If user login administration is disabled the user authentication screen appears Enter a login user name and pass...

Page 66: ...g OK key 2 Configure the settings When setting the static IP address 1 key DHCP OK key key Off OK key 2 key IP Address OK key Configuration Method Description Reference Page Configuring Connections on...

Page 67: ...osition being entered which is shown highlighted NOTE You can set any value between 000 and 255 Use the numeric keys or select the or key to enter a number Select the or key to move the position being...

Page 68: ...figure the connection according to the instructions provided by the wizard Setting the Connection by Using the Wi Fi Setup Tool page 2 19 Configuring Connections on the Web Page For the IB 36 the conn...

Page 69: ...ext 2 Use LAN cable Next Next NOTE Installation on Windows must be done by a user logged on with administrator privileges If the Welcome to the Found New Hardware Wizard dialog box displays select Can...

Page 70: ...key On OK key 3 Restart the network System Menu Counter key key System Network OK key key Network Setting OK key key Restart Network OK key Yes 4 Connect a computer or a handheld device with the machi...

Page 71: ...device discovery method and specify the IP address or host name to search the machine 4 Select the machine Next 5 Select Use the device settings on Authentication mode and enter the login user name a...

Page 72: ...key Restart Network OK key Yes 4 Specify the machine name from the computer or handheld device If a confirmation message appears on the operation panel of the machine select Yes The network between t...

Page 73: ...y key Wi Fi Direct OK key key PushButton Setup OK key 5 Press the push button on the computer or handheld device and select Push Button on the screen of operation panel simultaneously Next The network...

Page 74: ...starts printing Also when fax data arrives while the machine is in Low Power Mode the machine automatically wakes up and starts printing To resume perform one of the following actions Select any key...

Page 75: ...ay cause the machine to respond more slowly Auto Sleep Auto Sleep automatically switches the machine into Sleep if left idle for a preset time The default preset time is 1 minute To change the preset...

Page 76: ...ings refer to the following Sleep Level models except for Europe page 8 31 Follow the steps below to select the sleep level and use Energy Saver mode for each function 1 Display the screen System Menu...

Page 77: ...MiniDriver that supports PCL and KPDL There are some restrictions on the machine features and option features that can be used with this driver FAX Driver This makes it possible to send a document cre...

Page 78: ...fer to the following Custom Install page 2 32 1 Insert the DVD 2 Display the screen NOTE Installation on Windows must be done by a user logged on with administrator privileges If the Welcome to the Fo...

Page 79: ...lick OK IMPORTANT If Wi Fi or Wi Fi Direct is enabled be sure to specify the IP address for the port name Installation may fail if the host name is specified NOTE The machine cannot be detected unless...

Page 80: ...int a test page click the Print a test page checkbox and select the machine Click Finish to exit the wizard If a system restart message appears restart the computer by following the screen prompts Thi...

Page 81: ...nstall 4 Install the software 1 Select the device to be installed NOTE Installation on Windows must be done by a user logged on with administrator privileges If the Welcome to the Found New Hardware W...

Page 82: ...to specify the IP address for the port name Installation may fail if the host name is specified NOTE The machine cannot be detected unless it is on If the computer fails to detect the machine verify...

Page 83: ...ftware To print a test page click the Print a test page checkbox and select the machine Click Finish to exit the wizard If a system restart message appears restart the computer by following the screen...

Page 84: ...deleted 3 Finish uninstalling If a system restart message appears restart the computer by following the screen prompts This completes the software uninstallation procedure NOTE Uninstallation on Windo...

Page 85: ...the printer driver installation If a USB connection is used the machine is automatically recognized and connected If an IP connection is used the settings below are required NOTE Installation on MAC O...

Page 86: ...ck the item that appears in Name and then select the driver in Use 3 Select the options available for the machine 4 The selected machine is added NOTE When using an IP connection click the IP icon for...

Page 87: ...arch list 2 Click Add 2 Configure TWAIN Driver NOTE In Windows 7 select Start button on the Windows All Programs Kyocera and then TWAIN Driver Setting TWAIN Driver screen appears Network 1 Enter the m...

Page 88: ...Setting up the Machine Installing Software 3 Finish registering NOTE When the machine s IP address or host name is unknown contact Administrator NOTE Click Delete to delete the added machine Click Ed...

Page 89: ...n appears 2 Select the same name as this machine from WIA Drivers and click Properties 2 Configure WIA Driver NOTE In Windows 7 click Start button on the Windows and enter Scanner in Program and File...

Page 90: ...achine Checking the Counter Checking the Counter Check the number of sheets printed and scanned 1 Display the screen System Menu Counter key key Counter OK key 2 Check the counter Select the item you...

Page 91: ...figure all settings therefore please change the login user name and password In addition this machine is equipped with user authentication function which can be configured to limit the access to this...

Page 92: ...or the Administrator I want to Function Reference page Protect the transmission from interception and wiretapping IPP over SSL page 8 14 HTTPS page 8 14 LDAP Security Refer to the CommandCenter RX Use...

Page 93: ...re distinguished case sensitive Login User Name Admin Login Password Admin Setting Description Administ rator General User Device Information The machine s structure can be checked Job Status Displays...

Page 94: ...2 Configure the function Select a category from the navigation bar on the left of the screen NOTE If the screen There is a problem with this website s security certificate is displayed configure the...

Page 95: ...following order to check the machine s IP address and the host name System Menu Counter key key Report OK key key Report Print OK key key Status Page OK key Yes 3 Log in with administrator privileges...

Page 96: ...achine Command Center RX 2 Configure the Security Settings From the Security Settings menu select the setting you want to configure NOTE For details on settings related to certificates refer to the fo...

Page 97: ...der to check the machine s IP address and the host name System Menu Counter key key Report OK key key Report Print OK key key Status Page OK key Yes 3 Log in with administrator privileges The factory...

Page 98: ...ost name Enter the device information and then click Submit IMPORTANT After changing the setting restart the network or turn the machine OFF and then ON To restart the network interface card click Res...

Page 99: ...The setting to limit the size of E mails Item E mail Size Limit in E mail Send Settings The procedure for specifying the SMTP settings is explained below 1 Display the screen Display the SMTP Protocol...

Page 100: ...2 51 Installing and Setting up the Machine Command Center RX 4 From the Network Settings menu click Protocol 2 Configure the settings Set SMTP E mail TX to On in the Send Protocols 1 2...

Page 101: ...2 52 Installing and Setting up the Machine Command Center RX 3 Display the screen Display the E mail Settings screen From the Function Settings menu click E mail 1 2...

Page 102: ...owing items when you only enable the function of sending e mail from the machine Set the following items if you want to enable the function of receiving e mail on the machine Command Center RX User Gu...

Page 103: ...s 3 Log in with administrator privileges The factory default setting for the default user with administrator privileges is shown below Upper case and lower case letters are distinguished case sensitiv...

Page 104: ...ddress and the host name System Menu Counter key key Report OK key key Report Print OK key key Status Page OK key Yes 3 From the Document Box menu click Custom Box 4 Click Add 2 Configure the Custom B...

Page 105: ...or location bar enter the machine s IP address or the host name Click in the following order to check the machine s IP address and the host name System Menu Counter key key Report OK key key Report P...

Page 106: ...d Setting up the Machine Command Center RX 2 Print the document 1 Select the document you wish to print Select the checkbox of the document to be printed 2 Click Print 3 Configure settings for printin...

Page 107: ...igrating the Address Book The Address Book registered on the machine can be backed up or migrated using the KYOCERA Net Viewer on the included DVD For details on operating the KYOCERA Net Viewer refer...

Page 108: ...ng Data from Our Other Products 3 Select destination device group and click Next 4 Select Device Address Book and click Next 5 Select Create from device and remove the checkmark from Overwrite setting...

Page 109: ...cify the location to save the file enter the file name and then click Save For Save as type make sure to select XML File NOTE If the Admin Login screen appears enter the Admin Login and Login Password...

Page 110: ...Please note that selecting Finish will write the data to the machine s Address Book Writing Address Book Data to the Machine 1 Launch the KYOCERA Net Viewer 2 Load the Address Book data 1 Right click...

Page 111: ...ce group and click Next 4 Select Device Address Book and click Next 5 Select Create from file and remove the checkmark from Overwrite settings on target device and then click Next Selecting the Overwr...

Page 112: ...ine Transferring Data from Our Other Products 6 Click Browse and select the backup Address Book file and then click Next 7 Click Finish The write process of the Address Book data starts 8 Once the wri...

Page 113: ...aper Stopper 3 14 Preparation for Sending a Document to a Shared Folder in a PC 3 15 Making a note of the computer name and full computer name 3 15 Making a note of the user name and domain name 3 16...

Page 114: ...age 1 Multi Purpose Tray page 3 8 2 Cassette 1 page 3 4 3 Cassette 2 page 3 4 4 Cassette 3 page 3 4 5 Cassette 4 page 3 4 6 Cassette 5 page 3 4 NOTE The number of sheets that can be held varies depend...

Page 115: ...y as dampness can be a cause of problems Seal any remaining paper after loading in the multi purpose tray or cassettes back in the paper storage bag If the machine will not be used for a prolonged per...

Page 116: ...etting refer to the following Media Type Setting page 8 29 1 Pull the cassette completely out of the machine Cassette No Sheets Cassette 1 to 5 500 sheets Plain paper 80 g m2 NOTE A6 paper cannot be l...

Page 117: ...Press the paper width adjusting tab and slide the guides to the paper size required Paper sizes are marked on the cassette 2 Adjust the paper length guide to the paper size required Press the paper l...

Page 118: ...dow 3 Press the bottom plate down until it locks 4 Load paper 1 Fan the paper then tap it on a level surface to avoid paper jams or skewed printing 2 Load the paper in the cassette NOTE When the size...

Page 119: ...the paper before loading it in the cassette Precaution for Loading Paper page 3 3 Before loading the paper be sure that it is not curled or folded Paper that is curled or folded may cause paper jams E...

Page 120: ...gaki Cardstock 1 sheets Envelope DL Envelope C5 Envelope 10 Envelope 9 Envelope 6 3 4 Envelope Monarch Youkei 4 Youkei 2 5 sheets OHP film 1 sheet 1 Open the multi purpose tray IMPORTANT If you are us...

Page 121: ...e multi purpose tray size Paper sizes are marked on the multi purpose tray 4 Load paper Insert the paper along the paper width guides into the tray until it stops After removing new paper from its pac...

Page 122: ...ading the paper If there is just a small amount of paper left over in the multi purpose tray and you want to add more first remove the left over paper from the tray and include it with the new paper b...

Page 123: ...d How to load envelopes orientation and facing will differ depending on the type of envelope Be sure to load it in correctly otherwise printing may be done in the wrong direction or on the wrong face...

Page 124: ...icio II 16K ISO B5 Envelope 10 Envelope 9 Envelope 6 Envelope Monarch Envelope DL Envelope C5 Oufukuhagaki Return postcard Youkei 4 Youkei 2 Custom Cassette 1 to 5 Type 2 2 To change to a media type o...

Page 125: ...Envelope C5 Hagaki Cardstock Oufukuhagaki Return postcard Youkei 4 Youkei 2 Custom 1 1 For instructions on how to specify the custom paper size refer to the following Custom PaperSize page 8 26 MP Tr...

Page 126: ...3 14 Preparation before Use Paper Stopper Paper Stopper When using paper A4 Letter or larger open the paper stopper shown in the figure...

Page 127: ...1 Display the screen In Windows 8 1 right click PC in the Start screen and select Properties Or right click the Window icon and select System In Windows 8 select the desktop in the Start screen right...

Page 128: ...ch box Select Command Prompt in the search list In Windows 7 from Start button on the Windows select All Programs or Programs Accessories and then Command Prompt In Windows 10 right click Start button...

Page 129: ...roup in System Properties configure the settings below to limit folder access to a specific user or group 1 Select Settings in charms on Desktop and select Control Panel Appearance and Personalization...

Page 130: ...C 2 Right click the scannerdata folder select Property and click Sharing and Advanced Sharing 2 Configure permission settings 1 Select the Share this folder checkbox and click the Permissions button 2...

Page 131: ...he same as the domain name If the text after the first dot in the full computer name that you made a note of does not appear in From this location click the Locations button select the text after the...

Page 132: ...rity tab 2 Select the user you entered If the user does not appear on Group or user names click Edit button to add user in a similar way of configuration of permission settings 3 Make sure that checkm...

Page 133: ...nd set the port used for SMB transmission 1 Check file and printer sharing 1 In charms on Desktop click Settings Control Panel System and Security and then Windows Firewall 2 Select the File and Print...

Page 134: ...tion for Sending a Document to a Shared Folder in a PC 2 Add a port 1 In charms on Desktop click Settings Control Panel System and Security and Check firewall status 2 Select Advanced settings 3 Selec...

Page 135: ...or Sending a Document to a Shared Folder in a PC 5 Select Port 6 Select TCP as the port to apply the rule to Then select Specific local ports and enter 445 then click Next 7 Select Allow the connectio...

Page 136: ...rity and then Allow a program through Windows Firewall If the User Account Control dialog box appears click the Continue button 2 Configure the settings In Windows 10 1 In Windows 10 right click Start...

Page 137: ...No Only on products with the fax function installed 1 Display the screen System Menu Counter key key Edit Destination OK key key Address Book OK key Menu key Add Address OK key key Contact OK key 2 Ad...

Page 138: ...ocument to a Shared Folder in a PC page 3 15 Item Description Max No of Characters Host Name SMB 1 1 To specify a port number different from the default 445 enter using the format Host name port numbe...

Page 139: ...ort number Example FTPhostname 140 To enter the IPv6 address enclose the address in brackets Example 3ae3 9a0 cd05 b1d2 28a 1fc0 a1 10ae 140 Host name or IP address of FTP server Up to 64 characters P...

Page 140: ...o add and select the OK key 3 Select the destination to be registered in the group from the destinations registered in the contact addresses and select the OK key The selected member is added to group...

Page 141: ...elect the OK key The group is added to the Address Book NOTE You can set any value between 1 and 250 Use the numeric keys or select the or key to enter a number Address Number is an ID for a destinati...

Page 142: ...ter the changed destination Editing a Group 1 Select the group to edit and select the OK key 2 Change Group Name and Address Number 3 key Group Member Edit 4 To delete the destination from the group s...

Page 143: ...group you want to register to the One touch key from the Address Book 2 Select the destination to be registered to the One touch key from the destinations registered in the addresses and select the O...

Page 144: ...red One Touch Key number is selected the Address Book appears The One Touch Key can be registered by selecting the destination from the Address Book 2 Edit or delete the destination Changing the Regis...

Page 145: ...Printing by AirPrint 4 11 Printing by Google Cloud Print 4 11 Printing by Mopria 4 11 Printing with Wi Fi Direct 4 11 Printing Data Saved on the Printer 4 12 Specifying the Job Box from a Computer and...

Page 146: ...e from the Name menu and click the Properties button NOTE To print the document from applications install the printer driver on your computer from the supplied DVD Product Library In some environments...

Page 147: ...s not included in print sizes of the machine such as cardstock or envelopes the paper size needs to be registered To print on the special paper such as thick paper or transparency click Media type men...

Page 148: ...the machine set the paper size and type in the following Paper Size and Media Type for the Multi Purpose Tray MP Tray Setting page 3 13 NOTE If you loaded a postcard or envelope select Cardstock or E...

Page 149: ...r printing the print job is treated as banner printing Follow the steps below to set banner paper in the printer driver 1 Display the screen Click File and select Print in the application 2 Configure...

Page 150: ...length 470 1 mm 18 52 or longer and width of the custom paper size being registered 3 Enter the name of the paper 4 Click the Save button 5 Click the OK button 4 Configure the print paper size 1 Click...

Page 151: ...4 7 Printing from PC Printing from PC 5 Load paper 1 Open the multi purpose tray and extend the support tray section of the multi purpose tray 2 Load paper...

Page 152: ...el printing select Cancel Set whether the confirmation screen appears before each sheet is printed when printing multiple banner sheets IMPORTANT After pressing Continue support the paper with both ha...

Page 153: ...ling Imaging tab This tab lets you configure settings related to the quality of the print results Publishing tab This tab lets you create covers and inserts for print jobs and put inserts between shee...

Page 154: ...ter properties menu of the printer driver 3 Click the Basic button on the General tab 4 Select the default settings and click the OK button Canceling Printing from a Computer To cancel a print job exe...

Page 155: ...roid 4 4 or later products Mopria Print Service needs to be installed and enabled in advance For details on how to use refer to a Web site of Mopria Alliance Printing with Wi Fi Direct Wi Fi Direct is...

Page 156: ...int Box page 4 13 Printing Document from Stored Job Box page 4 15 Printing Document from Quick Copy Box page 4 17 Printing Document from Proof and Hold Box page 4 19 Specifying the Job Box from a Comp...

Page 157: ...lows 1 Display the screen 1 Document Box USB key key Job Box OK key key Private Print OK key 2 Select the creator of the document and select the OK key 2 Print the document 1 Select the document to pr...

Page 158: ...key The file is selected A checkmark will be placed on the right of the selected file Select the checkmarked file and select Select again to cancel the selection 2 key Delete OK key Yes The document i...

Page 159: ...n 1 Document Box USB key key Job Box OK key key Private Print OK key 2 Select the creator of the document and select the OK key 2 Print the document 1 Select the document to print and Select OK key Th...

Page 160: ...OK key The file is selected A checkmark will be placed on the right of the selected file Select the checkmarked file and select Select again to cancel the selection 2 key Delete OK key Yes The documen...

Page 161: ...follows 1 Display the screen 1 Document Box USB key key Job Box OK key key Proof and Hold OK key 2 Select the creator of the document and select the OK key 2 Print the document 1 Select the document...

Page 162: ...K key 2 Delete the document 1 Select the document to delete and Select OK key The file is selected A checkmark will be placed on the right of the selected file Select the checkmarked file and select S...

Page 163: ...ng the Documents You can print the documents stored in the Proof and Hold box The procedure is as follows 1 Display the screen 1 Document Box USB key key Job Box OK key key Proof and Hold OK key 2 Sel...

Page 164: ...OK key 2 Delete the document 1 Select the document to delete and Select OK key The file is selected A checkmark will be placed on the right of the selected file Select the checkmarked file and select...

Page 165: ...nu to exit the Status Monitor Exit automatically The Status Monitor automatically shuts down after 7 minutes if it is not being used Status Monitor Display The display of the Status Monitor is as foll...

Page 166: ...ed Select a job on the job list and it can be canceled using the menu displayed with a right click Paper Tray Status Tab Information is displayed about the paper in the printer and about the amount of...

Page 167: ...f the printer is connected to a TCP IP network and has its own IP address use a web browser to access the Command Center RX to modify or confirm the network settings This menu is not displayed when us...

Page 168: ...e event notification If this setting is set to Off then the Status Monitor will not start up even when printing is executed 2 Select an event to use with the text to speech function in Available event...

Page 169: ...ns 5 20 Confirmation Screen of Destinations 5 21 Recall 5 22 Send to Me E mail 5 22 Sending to Different Types of Destinations Multi Sending 5 23 Canceling Sending Jobs 5 24 WSD Scan 5 25 Using fax se...

Page 170: ...or cardstock in the multi purpose tray page 3 11 CAUTION Do not leave the document processor open as there is a danger of personal injury IMPORTANT Do not push the document processor forcefully when...

Page 171: ...ore loading Failure to do so may cause the originals to jam Originals with adhesive tape or glue Originals with cut out sections Curled original Originals with folds Straighten the folds before loadin...

Page 172: ...fer to the following Orig Orientation Original Orientation page 6 11 IMPORTANT Confirm that the original width guides exactly fit the originals If there is a gap readjust the original width guides The...

Page 173: ...oom Auto Combine 2 in 1 Original Size Statement Inch models A5 Metric models Continuous Scan On Registering Programs Use the procedure below to register a program 1 Configure the settings of the funct...

Page 174: ...the selected program key Confirming the Registered Program The settings of the registered program can be confirmed by recalling the program Recalling Program page 5 6 Recalling Program Select the one...

Page 175: ...ss the one of the Program I to Program IV keys to change and hold it 2 seconds or more 2 key Overwrite OK key Yes Register the changed program Deleting Program You can delete program 1 Display the scr...

Page 176: ...t Key Settings Commonly used functions can be registered to the Select key Functions can be easily configured by selecting the Select key Functions can be registered in Select keys from the system men...

Page 177: ...Place the originals Place the originals Check the original size and the paper size Loading Originals page 5 2 NOTE For selecting the original size refer to the following Original Size page 6 9 For se...

Page 178: ...lack white and then scans the document Full Color Scans all documents in full color Black White Scans all documents in black white Color Selection page 6 14 Copy page 6 3 NOTE This function allows you...

Page 179: ...ith the copy screen displayed 2 Cancel a job 1 key Cancel Print Job OK key 2 Select the job to cancel and Menu 3 key Cancel Job OK key 4 Select Yes The job is canceled NOTE Select Detail and the OK ke...

Page 180: ...ic sending The following four options are available Send as E mail E mail Addr Entry Sends a scanned original image as an E mail attachment Refer to page 5 14 and page 5 16 Send to Folder SMB Stores a...

Page 181: ...ernal Address Book For details on the External Address Book refer to the following Choosing a Destination from the FAX For more information on using the FAX refer to the following 4 Select the functio...

Page 182: ...more information about how to register destinations in the Address Book refer to the following Registering Destinations in the Address Book page 3 25 1 In the basic screen for sending select the Addre...

Page 183: ...meric keys 3 Select the OK key The searched destination is displayed 3 Select the OK key To send to multiple destinations repeat steps 1 to 3 You can send to as many as 100 destinations at once Destin...

Page 184: ...In the basic screen for sending select key E mail OK key 2 Enter destination E mail address 3 Select the OK key To send to multiple destinations select the Confirm Add Destination key You can send to...

Page 185: ...select the OK key NOTE For the method for setting a shared folder destination on a PC refer to the following Preparation for Sending a Document to a Shared Folder in a PC page 3 15 For details on how...

Page 186: ...ent Domain name User name For example abcdnet james smith Up to 64 characters Login Password Windows logon password Case sensitive Up to 64 characters Item Data to be entered Max characters Host Name...

Page 187: ...elect Yes to check the connection and No to not check it Connected appears when connection to the destination is correctly established If Cannot connect appears review the entry To send to multiple de...

Page 188: ...ons OK key Delete the destination 1 Select the destination you want to delete and select the OK key 2 key Delete OK key Yes 3 Select Exit Specifying Destination page 5 14 Specifying Destination page 5...

Page 189: ...ow to confirm the destinations 1 Confirm all destination To show the detailed information of the destination select the destination and OK key key Detail OK key To delete the destination select the de...

Page 190: ...the E mail address of the logged in user 1 In the basic screen for sending select key Me E mail OK key NOTE When the last sending included FAX computers and E mail destinations they are also displayed...

Page 191: ...g to different types of destination E mail addresses folders etc in a single operation No of broadcast items E mail Up to 100 Folders SMB FTP Total of 5 SMB and FTP FAX Up to 100 Procedures are the sa...

Page 192: ...rs 2 Cancel jobs 1 key Cancel Send Job OK key 2 Select the job to cancel and Menu 3 key Cancel Job OK key 4 Select Yes The job is canceled NOTE Selecting the Stop key will not temporarily stop a job t...

Page 193: ...rs 2 Install the driver Click Add a device Select the machine s icon and then click Next When the machine s icon is displayed in Printers on the Devices and Printers screen the installation is complet...

Page 194: ...mputer and select the OK key You can view information on the selected computer by selecting Detail 3 Select the Function Menu key to set the type of original file format etc as desired 4 Press the Sta...

Page 195: ...ide Using fax server to send a fax 1 Select the Send key 2 Place the originals Place the originals 3 key FAX Server OK key 4 Specifying destination Entering the destination fax number with the numeric...

Page 196: ...estinations can be changed later 5 Select the functions Select the Function Menu key to select the send functions to use 6 Press the Start key Sending starts NOTE The address book set in AddrBookDefau...

Page 197: ...oftware 2 Select the machine using the application and display the dialog box 2 Configure the scan settings Select scanning settings in the dialog box that opens 3 Place the originals 4 Scan the origi...

Page 198: ...5 30 Operation on the Machine How to use the FAX Function How to use the FAX Function On products with a FAX function it is possible to use the FAX function FAX Operation Guide...

Page 199: ...tedly Quick Copy Proof and Hold Box page 4 17 page 4 19 Quick Copy feature facilitates additional prints of a document already printed Activating Quick Copy and printing a document using the printer d...

Page 200: ...on the machine to print a saved file You can print data directly from the USB memory without a PC Image files scanned using this machine can also be saved to USB memory in the PDF TIFF JPEG XPS OpenX...

Page 201: ...Deleting Documents page 5 38 NOTE The operation on Custom Box you perform from operation panel can also be made using Command Center RX Command Center RX User Guide NOTE To use Custom Box an optional...

Page 202: ...x Entering a password is not mandatory Enter a password of up to 16 characters and select the OK key Reenter the same password for confirmation and select the OK key This can be set if Shared is selec...

Page 203: ...data which is sent from a PC For the operation of the printing from the PC refer to the following Printer Driver User Guide NOTE When you have logged in as a user you can only edit a box whose owner...

Page 204: ...e print settings select key Print ChangeSet OK key If Print is selected change the number of copies to print as necessary If Print ChangeSet is selected change the print settings For the features that...

Page 205: ...in to cancel the selection 2 OK key key Move OK key 3 Select the destination box and the OK key The selected document is moved NOTE If a custom box is protected by a password enter the correct passwor...

Page 206: ...ted file Select the checkmarked file and select Select again to cancel the selection 2 OK key key Delete OK key Yes NOTE If a custom box is protected by a password enter the correct password Select Me...

Page 207: ...ile PDF files you wish to print should have an extension pdf Files to be printed should be saved no further down than the top 3 folder levels including the root folder Plug the USB memory directly int...

Page 208: ...Change the number of copies duplex printing etc as desired For the features that can be selected refer to the following 5 Press the Start key Printing of the selected file begins NOTE Select Menu to...

Page 209: ...isplay the screen Document Box USB key key USB Memory OK key 4 Store the document 1 Select the folder where the file will be stored and the OK key The machine will display the top 3 folder levels incl...

Page 210: ...You can check the USB memory information 1 Display the screen Document Box USB key key USB Memory OK key Menu key Memory Detail OK key 2 Check the information Select the key to view the next screen Se...

Page 211: ...Memory OK key 2 Select Remove Memory Menu key Remove Memory OK 3 Remove the USB memory When USB memory can be safely removed is displayed select OK and then remove the USB memory IMPORTANT Be sure to...

Page 212: ...iginal Image 6 13 EcoPrint 6 13 Color Selection 6 14 Sharpness 6 14 Contrast 6 15 Background Density 6 15 Prevent Bleed t Prevent Bleed thru 6 16 Zoom 6 16 Combine 6 18 Duplex 6 20 Continuous Scan 6 2...

Page 213: ...To configure the settings for functions select the Function Menu key 1 2 3 4 1 Displays the function menu 2 Selects the item displayed or changes the numeric value 3 Confirms the selected setting 4 C...

Page 214: ...ginal document top edge to scan correct direction page 6 11 Mixed Size Orig Mixed Size Originals Scans all sheets in the document processor even if they are of different sizes page 6 12 Original Image...

Page 215: ...age quality level can also be adjusted page 6 26 File Name Entry Adds a file name page 6 22 Subject Body Adds subject and body when sending a document page 6 30 JobFinish Notice Sends E mail notice wh...

Page 216: ...Hides background colors and image bleed through when scanning thin original page 6 16 Skip Blank Page When there are blank pages in a scanned document this function skips the blank pages and prints o...

Page 217: ...tion Select the cassette or multi purpose tray that contains the required paper size page 6 10 Duplex Print a document on both sides of the paper page 6 21 EcoPrint EcoPrint saves toner when printing...

Page 218: ...different sizes page 6 12 Continuous Scan Scans a large number of originals in separate batches and then produce as one job page 6 22 File Format Specify the image file format Image quality level can...

Page 219: ...aper page 6 21 EcoPrint EcoPrint saves toner when printing page 6 13 File Name Entry Adds a file name page 6 22 JobFinish Notice Sends E mail notice when a job is complete page 6 22 Print Override Sus...

Page 220: ...to DP 1 A4 A5 A6 B5 B6 Folio 216 340 mm Letter Legal Statement Executive Oficio II 16K ISO B5 Envelope 10 Envelope 9 Envelope 6 Envelope Monarch Envelope DL Envelope C5 Hagaki Cardstock Oufuku Hagaki...

Page 221: ...mm Letter Legal Statement Executive Oficio II 16K ISO B5 Envelope 10 Envelope 9 Envelope 6 Envelope Monarch Envelope DL Envelope C5 Hagaki Cardstock Oufuku Hagaki Return postcard Youkei 4 Youkei 2 Cus...

Page 222: ...onveniently select in advance the size and type of paper that will be used often and set them as default MP Tray Set MP Tray Settings page 8 28 If the specified size of paper is not loaded in the pape...

Page 223: ...even if they are of different sizes Value Off On Supported Combinations of Originals Legal and Letter Folio and A4 Collate Offsets the output by page or set Value Off On Density Adjust density Adjust...

Page 224: ...Text Photo selecting Text may improve the result Best for mixed text and photo documents Photo Best for photos taken with a camera Text Best for documents that are mostly text Graphic Map Best for gra...

Page 225: ...ocument is color or black and white and scan color documents in Full Color and black and white documents in Grayscale Auto Color B W Automatically recognizes whether the document is color or black and...

Page 226: ...originals If the ground color is obtrusive select Auto If Auto does not remove the ground color select Manual and adjust the density of the ground color Item Description 1 to 4 Higher Increases the s...

Page 227: ...es at preset magnifications Others Reduces or enlarges at magnifications other than the Standard Zoom Model Zoom Level Original Copy Model Zoom Level Original Copy Metric Models 400 200 141 A5 A4 115...

Page 228: ...numeric keys or select or to enter the any magnification Sending Storing Item Description 100 Reproduces the original size Auto Reduces or enlarges original to sending storing size NOTE To reduce or...

Page 229: ...g Orientation Top Edge on Top Top Edge on Left Select the orientation of the original document top edge to scan correct direction Choose orientation of the originals either Top Edge on Top or Top Edge...

Page 230: ...R to L B to T 4 in 1 Right then Down Left then Down Down then Right Down then Left NOTE The paper sizes supported in Combine mode are A4 A5 B5 Folio 216 340 mm Letter Legal Statement Oficio II and 16K...

Page 231: ...t to Binding Top Images on the second sides are rotated 180 degrees Copies can be bound on the top edge facing the same orientation when turning the pages Copies each side of a two sided original onto...

Page 232: ...rig Binding Left Right Top Select Detail to display the Orig Binding screen Select the binding orientation of originals and select the OK key Orig Orientation Top Edge on Top Top Edge on Left Select t...

Page 233: ...job status using the file name date and time or job number specified here Enter the file name up to 32 characters and select the OK key To add date and time select Date and the OK key To add job numbe...

Page 234: ...to check for blank pages in the document NOTE This function is not available if current job was an override Print override may not be available depending on the status of the current print job and me...

Page 235: ...efault setting For the default settings refer to the following Function Defaults page 8 33 Orig Binding Left Right Top Select Detail to display the Orig Binding screen Select the binding direction of...

Page 236: ...ecutive Oficio II 16K ISO B5 Envelope 10 Envelope 9 Envelope 6 Envelope Monarch Envelope DL Envelope C5 Hagaki Cardstock Oufuku Hagaki Return postcard Youkei 4 Youkei 2 Select from standard sizes Orig...

Page 237: ...ct the OK key If On is selected refer to the following PDF Encryption Functions page 6 28 TIFF Select the OK key to save or send a TIFF file The Image Quality settings will be the default values For t...

Page 238: ...ngs will be the default settings For the default settings refer to the following Function Defaults page 8 33 Image Quality Comp Priority Standard Quality Priority Select Detail to display the Image Qu...

Page 239: ...c Off On Enter the password to edit the PDF file Select On and select the OK key Enter a password up to 256 characters and then select the OK key Enter the password again for confirmation and select t...

Page 240: ...Allowed Low Res Allowed Restricts printing of the PDF file Select from the following restrictions then select the OK key Not Allowed Disables the printing of PDF file Allowed Low Res Can print the PDF...

Page 241: ...0dpi 400 400dpi U Fin 600 600dpi Subject Body Adds subject and body when sending a document Select Subject Body to enter the E mail subject body NOTE A three digit serial number such as abc_001 pdf ab...

Page 242: ...int Delete after Printed Automatically deletes a document from the box once printing is complete Value Off On NOTE Click Security Settings and then Network Security in the Command Center RX Be sure th...

Page 243: ...pe Monarch Envelope DL Envelope C5 Hagaki Cardstock Oufuku Hagaki Return postcard Youkei 4 Youkei 2 Select from standard sizes Original Size and the size you wish to store as are the same different Or...

Page 244: ...n XPS FitTo Page Reduces or enlarges the image size to fit to the selected paper size when printing XPS file Value Off On NOTE For details on entering the password refer to the following Character Ent...

Page 245: ...g topics Checking Job Status 7 2 Checking Job History 7 8 Sending the Log History 7 12 Job Operation 7 13 Pause and Resumption of Jobs 7 13 Canceling of Jobs 7 13 Device Communication 7 14 Checking th...

Page 246: ...re Job Status or Scheduled Job OK key 2 Select the job you want to check 1 Select the job you want to check and Menu Status Display Job status to be displayed Print Job Status Copy Printer FAX recepti...

Page 247: ...FAX job is selected in Send Job Status then PriorityOverride is displayed Select PriorityOverride and select the OK key to suspend the current job and gives the selected job top priority For Scheduled...

Page 248: ...roducts with the fax function installed User Name User Name for the executed job If user login administration is disabled appears Page and Copy Number of pages printed Number of copies printed Total n...

Page 249: ...Name for the executed job If user login administration is disabled appears Original Pages Number of original pages Color B W Color mode Color B W Full Color Black White Grayscale Mixed Auto Color Gra...

Page 250: ...installed User Name User Name for the executed job If user login administration is disabled appears Original Pages Number of original pages Color B W Color mode Color B W Full Color Black White Graysc...

Page 251: ...name in Job Name is displayed in a short form select Detail to see the complete job name Select the OK key to return to the previous screen Job Type FAX is displayed User Name User Name for the execut...

Page 252: ...ailable NOTE Job history is also available by Command Center RX or KYOCERA Net Viewer from the computer Command Center RX User Guide KYOCERA Net Viewer User Guide Screen Job histories to be displayed...

Page 253: ...of each job The job has been completed An error has occurred The job has been canceled 3 Check the job history Select the key to view the next screen Select the key to return to the previous screen N...

Page 254: ...t the OK key to return to the previous screen Job Type Copy Copy job FAX 1 FAX reception Box Job from Document Box Printer Printer job Report Report List E mail E mail reception USB Data from removabl...

Page 255: ...FTP FAX 1 Sending Job FAX Application Sending Job Application FAX Server FAX Server transmission Multi Multi Sending 1 Displayed only on products with the fax function installed User Name User Name fo...

Page 256: ...of job End Time Completed time of job Job Name When the job name in Job Name is displayed in a short form select Detail to see the complete job name Select the OK key to return to the previous screen...

Page 257: ...he job to be canceled and Menu 2 key Cancel Job OK key Yes Send Job Status Store Job Status or Scheduled Job Status 1 Select the job to be canceled and Cancel 2 Select Yes NOTE If the Back key or othe...

Page 258: ...and status such as waiting or printing are displayed FAX The information such as sending receiving and dialing is displayed Select Line Off to cancel a fax in sending receiving USB Memory The usage c...

Page 259: ...ant to connect to start the connection to the machine Select key Detail Info OK key information on the device that is connected by Wi Fi Direct appears Select key ConnectionStatus OK key key Connected...

Page 260: ...nd paper on the message display 1 Display the screen Select the Status Job Cancel key 2 Check the status key Toner Status or Paper Status OK key The items you can check are described below Toner Statu...

Page 261: ...ains the following topics System Menu 8 2 System Menu Settings 8 3 Report 8 5 System Network 8 7 User Job Account 8 23 User Property 8 23 Common Settings 8 24 Copy 8 38 Printer 8 39 Send 8 41 FAX 8 41...

Page 262: ...change settings that require administer privileges you must log in with administrator privileges The factory default login user name and login password are set as shown below Login User Name 4500 Log...

Page 263: ...ing is primarily a menu option used by service personnel for maintenance work There is no need for customers to use this menu Data Security Configure settings for data stored in the optional SSD and m...

Page 264: ...age 8 36 Keyboard Type Select the type of keyboard that you want to use page 8 36 Low Toner Alert Set the amount of remaining toner to notify the administrator when to order a toner when the toner is...

Page 265: ...allowing you to check the information including current settings available memory space and optional equipment installed Font List Prints the font list allowing you to check the font samples installed...

Page 266: ...the job is canceled before being sent Value Off On Dest Info 2 Select the Recipient Format for the send result report Value Dest or Name Dest and Name FAX RX Result 1 FAX Operation Guide JobFinish Not...

Page 267: ...s available on the machine Item Description Wi Fi Direct Select whether to use Wi Fi Direct Value Off On Device Name Specify the device name NOTE Up to 32 characters can be entered This function is di...

Page 268: ...nd set WEP Key Index AvailableNetwork Displays access points to which the machine can connect NOTE When Reload is selected the list is reloaded If the access point s security setting uses WEP select M...

Page 269: ...ation type Value Open WPA2 WPA PSK WPA2 PSK WPA2 WPA EAP WPA2 EAP Encryption Select encryption method The setting values vary depending on the Network Authentication setting Item Description Network A...

Page 270: ...to use Auto IP Value Off On IP Address Set the IP address Value NOTE When DHCP is set to On this item is displayed only and cannot be entered Subnet Mask Set the IP subnet mask Value NOTE When DHCP i...

Page 271: ...ction is displayed when IPv6 Setting is set to On To enter Default Gateway set RA Stateless to Off RA Stateless Select whether to use RA Stateless Value Off On NOTE This function is displayed when IPv...

Page 272: ...r IPv4 Value Off On Item Description IP Filter IPv6 Make this setting when you use IP Filter IPv6 Value Off On Item Description IPSec Make this setting when you use IPSec Value Off On Item Description...

Page 273: ...2 Wired Network SMTP Select whether to send E mail using SMTP Value Off On POP3 Select whether to receive E mail using POP3 Value Off On RAW Port Select whether to receive documents using Raw Port 1 V...

Page 274: ...i Fi Direct 2 Set whether to enable this function for each network Value Disable Enable NOTE This function is displayed when HTTPS is set to On Wi Fi 2 Wired Network LDAP Select whether to use LDAP Va...

Page 275: ...On NOTE Selecting Off will disable the functionality of WIA TWAIN and Network FAX driver Wi Fi Direct 2 Set whether to enable this function for each network Value Disable Enable NOTE This function is...

Page 276: ...whether to use REST secured by SSL When selecting On specifies the port number used The default port number is 9081 1 3 Value Off On Port Number 1 to 32767 NOTE This function is displayed when REST o...

Page 277: ...anged from Command Center RX Changing Device Information page 2 48 TCP IP Settings For details on setting value TCP IP Settings page 8 11 IPSec page 8 12 Bonjour Select whether to use Bonjour Value Of...

Page 278: ...int NOTE The push button method supports only the WPS PIN Device Starts connection using the machine s PIN code Enter the PIN code into the access point The PIN code of the machine is automatically ge...

Page 279: ...Character Entry Method page 11 9 Preshared Key 3 Register the Preshared Key Select Edit and Enter the Preshared Key using the numeric keys NOTE The number of characters is between 8 and 64 Character E...

Page 280: ...s the USB memory slot Value Unblock Block NOTE This function is available when USB Host is set to Unblock Option I F This locks and protects the optional interface slots Value Unblock Block NOTE If th...

Page 281: ...ion might fail NOTE If you accidentally turn off power during initialization turn it back on Initialization will restart automatically DataSanitization Return the following information registered in t...

Page 282: ...unter key key System Network OK key key Software Version OK key Item Description Restart Restart the CPU without turning the power switch off Use this to deal with any unstable operation by the machin...

Page 283: ...you to view information about logged in users and edit some of that information Enabling User Login Administration page 9 3 Item Description FAX Server Select whether or not to use FAX Server Value O...

Page 284: ...ring right after start up default screen Value Status Copy Send FAX Document Box Item Description Buzzer Set options for buzzer sound during the machine operations Key Confirmation Emit a sound when t...

Page 285: ...er to automatically detect originals of the document processor Auto Detect Select whether to enable automatic detection of original size Value Off On System of Units Select metric or inch for the unit...

Page 286: ...Cassette 2 to 5 Size 1 Register the custom paper size to be used in Cassettes 2 to 5 Value Metric X 92 to 216 mm in 1 mm increments Y 162 to 356 mm in 1 mm increments Inch X 3 62 to 8 50 in 0 01 incre...

Page 287: ...urpose tray Value Cassette 1 to 5 MP Tray NOTE Cassette 2 to Cassette 5 are displayed when optional paper feeder is installed SpecialPaper Act When printing on Prepunched Preprint and Letterhead punch...

Page 288: ...ght that cannot be loaded in the cassette is set for a media type that media type does not appear Select the media type Value Cassette 1 Plain 60 to 105 g m2 Rough Recycled Preprinted 3 Bond Color Pre...

Page 289: ...ransparencies Media Type Default Media Type Default Plain Normal 2 Cardstock Heavy 3 Transparency Extra Heavy Color Normal 2 Rough Normal 2 Prepunched Normal 2 Vellum Light Letterhead Normal 2 Labels...

Page 290: ...ose tray Value Ignore The setting is ignored and the job is printed Display Error Message to cancel printing is displayed Item Description Date Time Set the date and time for the location where you us...

Page 291: ...entering the Low Power mode Value For Europe 1 to 120 minutes 1 minute increments Except for Europe 1 to 240 minutes 1 minute increments Low Power Mode page 2 25 Sleep Level models except for Europe...

Page 292: ...to Off if the machine does not communicate with the other devices the machine will enter Power Off Mode Power Off Timer models for Europe Select whether to turn off the power automatically after a per...

Page 293: ...Zoom Select the enlarged reduced default when paper size sending size changed after the originals set Value 100 Auto Collate Set the defaults for Collate Value Off On Orig Orientation Set the origina...

Page 294: ...o T 4 in 1 Layout Set the default for the 4 in 1 layout of Combine copies Value Right then Down Down then Right Left then Down Down then Left Border Line Set the default for the border line of Combine...

Page 295: ...when the optional SSD is installed Item Description RAM Disk Mode A RAM disk can be created and its size can be set Creating a RAM disk makes it possible to print from a Job Box Value RAM Disk Mode Of...

Page 296: ...All Jobs Log Value Show All My Jobs Only Hide All FAX Log 1 1 Only on products with the fax function installed Value Show All Hide All Item Description Keyboard Type Select the type of keyboard that...

Page 297: ...functions immediately However this mode saves less energy Normal Recovery In this mode you can select the method from the following enabling the use of all functions immediately or enabling the use o...

Page 298: ...er source of different size from the original is selected select whether automatic zoom reduce zoom is performed Value Off On Reserve Priority Specify whether the default screen appears when a subsequ...

Page 299: ...lar in size as the same size when printing Value Off A4 and Letter are not regarded as the same in size On A4 and Letter are regarded as the same in size The machine will use whichever size is in the...

Page 300: ...er source while printing Value Off On NOTE When selecting Off the machine displays Load paper in cassette is a cassette number or Load paper in MP Tray and stops printing Load the paper according to t...

Page 301: ...eSend Select whether to display the confirmation screen of destinations after pressing the Start key when performing sending jobs Value Off On Check New Dest When adding new destination select whether...

Page 302: ...of this function setting temporary documents are deleted when the main power switch is turned off Storage Media Select which storage media to use Value SSD SD Card NOTE This setting is not displayed i...

Page 303: ...key Edit Destination OK key key Print List OK key FAX Operation Guide Item Description Address Book Restrict editing of the address book If you selected Admin Only you can only edit the Address Book b...

Page 304: ...background density adjustment Copy Auto Darkens or lightens overall background density adjustment during copying Value 3 Lighter 2 1 0 Normal 1 2 3 Darker Send Box Auto Darkens or lightens overall bac...

Page 305: ...age when the document processor is used Value Off No correction performed Select this when you want to reproduce fine lines in the original more clearly than with On On Correction performed Service Se...

Page 306: ...User Property Obtain Network User Property 9 21 ID Card Settings 9 22 PIN Login Settings 9 23 Using User Login Administration 9 24 Login Logout 9 24 Overview of Job Accounting 9 25 Enabling Job Accoun...

Page 307: ...nt on the machine from PCs To Manage the Users to Use TWAIN for Scanning TWAIN driver settings on the PC are necessary to manage the users that use TWAIN for scanning To Manage the Users to Scan Using...

Page 308: ...u Select Edit and select the OK key then enter the domain name in 256 characters or less Select the OK key and the domain will be registered To edit or delete a domain name that has already been regis...

Page 309: ...NOTE If the login user name and password are rejected check the following settings Network Authentication setting of the machine User property of the Authentication Server Date and time setting of the...

Page 310: ...in For this you need to login with administrator privileges The factory default login user name and login password are set as shown below Login User Name 4500 Login Password 4500 Item Descriptions Loc...

Page 311: ...ties are Machine Administrator User Name DeviceAdmin Login User Name 4500 Login Password 4500 Access Level Machine Administrator Administrator User Name Admin Login User Name Admin Login Password Admi...

Page 312: ...at user registration Enter the name displayed on the user list up to 32 characters Login User Name 1 Enter the login user name to login up to 64 characters The same login user name cannot be registere...

Page 313: ...t Select whether or not use of the copy print function is prohibited Duplex Restrict Select whether only duplex printing is allowed CombineRestrict Specify whether only Combine is allowed EcoPrint Res...

Page 314: ...o change a user property 3 OK key Yes The user information is changed Deleting a user 1 Select the user whose properties you wish to delete and Menu 2 key Delete OK key Yes The selected user will be d...

Page 315: ...in Login Password Changes the password that is entered at login Up to 64 characters can be entered E mail Address Changes the user s e mail address Up to 256 characters can be entered NOTE This cannot...

Page 316: ...to use the same User login for every print job If this option is selected the user does not have to type the name and password for each print job Prompt for name A screen for entering the user name an...

Page 317: ...12 User Authentication and Accounting User Login Job Accounting Setting User Login Administration 3 Click OK NOTE For other settings of job accounting refer to the following Printer Driver User Guide...

Page 318: ...ed on interface elements as they appear in Windows 8 1 1 Display the screen 1 Select Search in charms and enter TWAIN Driver Setting in the search box Click TWAIN Driver Setting in the search list the...

Page 319: ...lay the screen 1 Click Search in charms and enter Scanner in the search box Click View scanners and cameras in the search list then the Scanners and Cameras screen appears 2 Select the same name as th...

Page 320: ...ne and click the Printer properties menu of the printer driver 3 Click FAX TX Setting on the Printing Preferences window 2 Configure the settings 1 Select User Login on the Authentication tab 2 Set th...

Page 321: ...e the setting key Local Authoriz OK key key Off or On OK key NOTE When using Local Authorization the user authentication type must be set to Local Authoriz Enabling User Login Administration page 9 3...

Page 322: ...horization settings Netwk Authentic must be selected for the authentication method in Enabling User Login Administration Select On for LDAP in Protocol Settings Enabling User Login Administration page...

Page 323: ...ser Login Administration must be enabled in Enabling User Login Administration Enabling User Login Administration page 9 3 NOTE If the login user name entry screen appears during operations enter a lo...

Page 324: ...Select whether or not use of the print function of the printer is prohibited Applicable print functions are as follows Print from Box Print from Removable Memory Print Report Copy Restrict Select whet...

Page 325: ...nctions that are restricted Select Edit Change or Detail on each item enter the information and then select the OK key Select the key to view the next screen Select the key to return to the previous s...

Page 326: ...E To obtain the network user property from the LDAP server Netwk Authentic must be selected for the authentication method in Enabling User Login Administration Select On for LDAP in Protocol Settings...

Page 327: ...entication Kit page 11 3 NOTE If the login user name entry screen appears during operations enter a login user name and password and select Login For this you need to login with administrator privileg...

Page 328: ...OTE This setting is only displayed when Netwk Authentic must be selected for the authentication method and the server type is set to Ext in Netwk Authentic Enabling User Login Administration page 9 3...

Page 329: ...ministration is enabled the login user name and login password entry screen appears each time you use this machine Use the procedure below to login and logout Login If the login user name entry screen...

Page 330: ...r Scan Using TWAIN page 9 34 To Manage the Scan Job Account by Using WIA To manage the scan job account by using WIA you need to configure the WIA driver settings on the computer connected to the mach...

Page 331: ...key NOTE If the login user name entry screen appears during operations enter a login user name and password and select Login For this you need to login with administrator privileges The factory defaul...

Page 332: ...key 2 key Job Account Set OK key 2 Configure the settings key AccountingAccess OK key key Local or Network OK key NOTE If the login user name entry screen appears during operations enter a login user...

Page 333: ...he operation select key Exit OK key Item Descriptions Account Name Enter the account name up to 32 characters Account ID Enter the account ID as many as eight digits between 0 and 99999999 Restriction...

Page 334: ...count ID and set the use restrictions To change the details select Edit enter the information and then select the OK key Select the key to view the next screen Select the key to return to the previous...

Page 335: ...er Limits the number of sheets used for printing Scan Restrict Others Limits the number of sheets scanned excludes copying FAX TX Restrict Limits the number of sheets sent by fax This is displayed onl...

Page 336: ...nd Restricting the Use of the Machine to change account information 3 OK key Yes The account information is changed NOTE If the login user name entry screen appears during operations enter a login use...

Page 337: ...ey Account List OK key 2 Delete an account 1 Select the account you want to delete and Menu 2 key Delete OK key Yes The account is deleted NOTE If the login user name entry screen appears during opera...

Page 338: ...ount ID Printing will be performed using the entered Account ID If this option is selected the user does not have to enter the Account ID for each print job Prompt for account ID A screen for entering...

Page 339: ...terface elements as they appear in Windows 8 1 1 Display the screen 1 Select Search in charms and enter TWAIN Driver Setting in the search box Click TWAIN Driver Setting in the search list then the TW...

Page 340: ...appear in Windows 8 1 1 Display the screen 1 Click Search in charms and enter Scanner in the search box Click View scanners and cameras in the search list then the Scanners and Cameras screen appears...

Page 341: ...o be used as the FAX Driver and select Printing preferences from the resulting pull down menu 3 Click FAX TX Setting in the Printing Preferences window 2 Configure the settings 1 Select Job Accounting...

Page 342: ...ounter has reached the limit of restriction The table below describes the action taken Value Immediately Job stops when the counter reaches its limit The next job will be prohibited in sending or in s...

Page 343: ...ying Print Restrict Sets the default restriction on the number of sheets used for printing ScanRest Other Sets the default restriction on the number of sheets used for scanning excludes copying FAX Re...

Page 344: ...Duplex Pages and Combine Pages to check the number of pages used 1 Only on products with the fax function installed Copy Print Pages Displays the number of pages copied and printed and the total numb...

Page 345: ...t a job accounting report 1 Prepare paper Check that A4 or Letter paper is loaded in the cassette 2 Display the screen 1 System Menu Counter key key User Job Account OK key 2 key Job Account Set OK ke...

Page 346: ...ed the screen to enter the login user name and password appears Enter a login user name and password to login If the user has already registered the account information the account ID entry would be s...

Page 347: ...ows 1 Display the screen 1 System Menu Counter key key User Job Account OK key 2 key Unknown User key OK key 2 Configure the settings key Unknown ID Job OK key key Reject or Permit OK key Item Descrip...

Page 348: ...o Permit Unknown ID Job page 9 42 NOTE If the login user name entry screen appears during operations enter a login user name and password and select Login For this you need to login with administrator...

Page 349: ...xplains the following topics Regular Maintenance 10 2 Cleaning 10 2 Toner Container Replacement 10 5 Waste Toner Box Replacement 10 9 Troubleshooting 10 11 Solving Malfunctions 10 11 Responding to Mes...

Page 350: ...ed with alcohol or mild detergent Slit Glass When using the document processor clean the slit glass surface and the reading guide with the dry cloth CAUTION For safety always unplug the power cord bef...

Page 351: ...ting Regular Maintenance Registration Roller 1 2 3 IMPORTANT Be careful not to touch the black transfer roller and brown transfer belt during cleaning as this may adversely affect print quality Transf...

Page 352: ...10 4 Troubleshooting Regular Maintenance 4 Vents Use a lint free cloth to clean dust and dirt away from the vents...

Page 353: ...he Toner Container Printable pages 12 500 images NOTE The average number of images that can be printed with the toner container provided with the machine is 6 000 images To maintain quality we recomme...

Page 354: ...10 6 Troubleshooting Regular Maintenance Replacing the Toner Container 1 2 3 4 NOTE When removing the toner container from the machine lift up the right hand side first...

Page 355: ...10 7 Troubleshooting Regular Maintenance 5 6 7 IMPORTANT Do not touch the points shown below...

Page 356: ...er does not close check that the new toner container is installed correctly in step 7 Return the exhausted toner container to your dealer or service representative The collected toner container will b...

Page 357: ...ular Maintenance Waste Toner Box Replacement When the waste toner box becomes full immediately replace the waste toner box 1 2 3 CAUTION Do not attempt to incinerate parts which contain toner Dangerou...

Page 358: ...oting Regular Maintenance 4 5 NOTE Return the exhausted waste toner box to your dealer or service representative The collected waste toner box will be recycled or disposed in accordance with the relev...

Page 359: ...on the operation panel to recover the machine from Sleep mode page 2 26 Blank sheets are ejected Are the originals loaded correctly When placing originals on the platen place them face down and align...

Page 360: ...ature rapidly changes Use in an environment that has suitable humidity Select the System Menu Counter key Adjust Maint Service Setting Drum Refresh Yes Images are skewed Are the originals placed corre...

Page 361: ...aps when ejected multi feed Load the paper correctly page 3 2 Printouts are wrinkled Is the paper loaded correctly Load the paper correctly page 3 2 Is the paper damp Replace the paper with new paper...

Page 362: ...djust Maint Service Setting Drum Refresh Yes Print on the back of the sheet is visible on the front Set Prevent Bleed through to On page 6 16 page 8 33 Lines appear on ruled lines Is the paper damp Re...

Page 363: ...3 21 Do the time settings for the equipment domain server and data destination computer differ Set the equipment domain server and data destination computer to the same time Is the screen displaying...

Page 364: ...Job is canceled The specified box cannot be found Job is canceled Select OK Box limit exceeded Job is canceled 1 1 When Auto Error Clear is set to On processing resumes automatically after a set amoun...

Page 365: ...ing MP tray page 6 20 Cannot execute this job Restricted by Group Authorization This job is canceled because it is restricted by Group Authorization settings Select OK page 9 17 Cannot feed paper Set...

Page 366: ...llowing Auto Err Clear page 8 32 The account ID was incorrect when processing the job externally The job is canceled Select OK Incorrect box password Job is canceled The box password was incorrect whe...

Page 367: ...s the indicated cassette out of paper Load paper Select Paper to select the other paper source page 3 4 Load paper in MP tray Displayed alternately Press OK to continue using MP tray Is the paper of t...

Page 368: ...ls on Auto Error Clear refer to the following Auto Err Clear page 8 32 Message Checkpoints Corrective Actions Reference Page Non genuine Toner Press Help Is the installed toner container our own brand...

Page 369: ...AM disk error Press OK An error has occurred on the RAM disk Job is canceled Select OK The possible error codes and their descriptions are as follows 04 Insufficient space on the RAM disk If the optio...

Page 370: ...d Select OK Send Error 1 1 When Auto Error Clear is set to On processing resumes automatically after a set amount of time elapses For details on Auto Error Clear refer to the following Auto Err Clear...

Page 371: ...Installed PC K Does the installed toner container s regional specification match the machine s Install the specified toner container USB memory error Job is canceled An error occurred in the removable...

Page 372: ...ommand Center RX SMTP login user name and login password POP3 login user name and login password E mail size limit page 2 50 Failed to send via FTP Check the FTP settings Login user name and login pas...

Page 373: ...he SMTP server Is SMTP over SSL available Is the encryption available Refer to the Command Center RX User Guide Failed to send via FTP Check the following of the FTP server Is FTPS available Is the en...

Page 374: ...perly 2204 Failed to send the e mail Check the e mail size limit of the SMTP settings on the Command Center RX page 2 50 3101 Failed to send the e mail Check the authentication methods of both the sen...

Page 375: ...and the error message will be cleared The machine resumes with the page that was printing when the jam occurred 1 Shows the location of a paper jam 2 Displays the Help screen NOTE For details on Help...

Page 376: ...tears during removal be sure to remove any loose scraps of paper from inside the machine Scraps of paper left in the machine could cause subsequent jamming Multi Purpose Tray 1 2 CAUTION The fixing un...

Page 377: ...10 29 Troubleshooting Troubleshooting Cassettes 1 to 5 Procedures for handling a paper jam in Cassettes 1 to 5 are all the same This section explains procedures using Cassette 1 as an example 1 2...

Page 378: ...10 30 Troubleshooting Troubleshooting Duplex Unit 1 2 3...

Page 379: ...e the Machine 1 2 3 If the jammed paper appears to be pinched by rollers pull it along the normal running direction of the paper If you cannot find a paper jam try checking inside the rear of the prin...

Page 380: ...Inner Tray Inside Rear Cover 1 2 3 If you cannot find a paper jam try checking inside the rear of the machine 4 CAUTION The fixing unit is extremely hot Take sufficient care when working in this area...

Page 381: ...10 33 Troubleshooting Troubleshooting Document Processor 1 2 3 4...

Page 382: ...10 34 Troubleshooting Troubleshooting 5...

Page 383: ...ters That Can be Entered Using the Numeric Keys 11 10 Entering Symbols 11 11 Entering Characters 11 11 Entering Using the Character Selection Screen 11 13 Paper 11 14 Basic Paper Specifications 11 14...

Page 384: ...ional Equipment The following optional equipment is available for the machine 2 PF 3110 1 Card Authentication Kit B 3 Expansion Memory 6 IB 50 7 IB 51 5 HD 6 HD 7 4 SD Memory Card SDHC Memory Card 8 I...

Page 385: ...the standard cassettes Loading in the Cassettes page 3 4 3 Expansion Memory The machine can perform the more multiple jobs simultaneously by adding more memories You can increase the machine s memory...

Page 386: ...s working properly test it by printing a status page Report page 8 5 4 SD SDHC Memory Card An SD SDHC memory card is useful for storing fonts macros and overlays The machine is equipped with a slot fo...

Page 387: ...ers 5 Insert the power cord into the socket and turn on the power switch 5 HD 6 HD 7 SSD With SSD installed in the machine received data can be rasterized and stored on this SSD This enables high spee...

Page 388: ...g b In addition network printing is possible without using the wireless LAN router because Wi Fi Direct is supported 9 Data Security Kit E Data Security Kit The Data Security Kit overwrites all unnec...

Page 389: ...o to Step 6 Application Data Security Kit Card Authentication Kit 1 1 This can be used on a trial basis for a limited time ThinPrint Option 1 NOTE Restrictions such as the number of times the applicat...

Page 390: ...the previous screen The table below lists the item you can view Extend the trial period key Date of Trial Extend Yes The trial period is extended NOTE If you started the Security Kit or Thin Print opt...

Page 391: ...sition of the cursor 3 Right Select key Select to select the type of characters you want to enter When Text is displayed 4 OK key Select to finalize entry and return to the screen before the entry To...

Page 392: ...key changes the character in the order from left to right _ 1 Repeats from the first character on the left 1 During number entry a b c A B C 2 Repeats from the first character on the left 2 During nu...

Page 393: ...rom the first character on the left 9 During number entry _ space 0 Repeats from the first character on the left 0 During number entry Select to change the character in the cursor position between upp...

Page 394: ...he key Displays the symbol list 5 Select the or key to move the cursor and select 6 Select the OK key is entered 7 Select the 3 key four times D is entered 8 Select the key Account Name Text ABC R Acc...

Page 395: ...the following Login Operation page 8 35 1 Select the or key to move the cursor and select the character to be entered 2 Select the OK key The selected character is entered You can go back one characte...

Page 396: ...quality of paper Poor quality paper may result in unsatisfactory output Basic Paper Specifications The following table lists the specifications of paper that is supported with this machine Refer to th...

Page 397: ...on Those types of paper may produce harmful fumes from the heat of printing and may damage the drum Be sure to use the standard paper that contains at least 80 pulp i e not more than 20 of the total p...

Page 398: ...ies depending on the relative humidity in the room High relative humidity causes paper to become damp making the edges expand so it appears wavy Low relative humidity causes paper to lose moisture mak...

Page 399: ...ss Paper whiteness affects print contrast Use whiter paper for sharper brighter copies Quality Machine problems may occur if sheet sizes are not uniform or if corners are not square edges are rough sh...

Page 400: ...Thus special paper is more likely than regular paper to cause printing problems Before purchasing special paper in volume try testing a sample to ensure the print quality is satisfactory General preca...

Page 401: ...by the force applied in the machine The carrier sheet bears the top sheet until the label is used This composition of labels may cause more problems The label surface must be covered completely with...

Page 402: ...us keep the package sealed until you are ready to use them Keep the following points in mind Do not use envelopes with exposed adhesive In addition do not use the type of envelope in which the adhesiv...

Page 403: ...tions Basic Paper Specifications page 11 14 The colored ink must be able to withstand the heat of printing It must be resistant to silicone oil as well Do not use paper with a treated surface such as...

Page 404: ...d Preprinted Bond Cardstock Color Colour Prepunched Letterhead Envelope Thick High Quality Custom 1 to 8 Paper Size Cassette A4 A5 B5 Letter Legal Statement Executive Oficio II Folio 216 340 mm 16K B5...

Page 405: ...Altitude 3 500 m 11 482 ft maximum Brightness 1 500 lux maximum Dimension W D H 18 71 18 74 22 64 475 476 575 mm Weight Approx 49 2 lb Approx 22 3 kg without toner container Space Required W D Using m...

Page 406: ...ize Legal Folio Original Feed System Fixed Item Description Printing Speed Same as Copying Speed First Print Time A4 feed from Cassette 5 9 seconds or less Resolution Fast 1200 Fine 1200 600 dpi Opera...

Page 407: ...ity Text Photo original 1 sided B W 60 Images min Color 40 Images min 2 sided B W 26 Images min Color 17 Images min Interface Ethernet 10 BASE T 100 BASE TX 1000 BASE T USB Transmission System SMB SMT...

Page 408: ...velope 6 3 4 Envelope Monarch Envelope DL Envelope C5 Oufuku Hagaki Return postcard Youkei 4 Youkei 2 Custom 92 162 to 216 356 mm Supported Paper Paper weight 60 to 120 g m Media types Plain Rough Rec...

Page 409: ...cific period In Sleep mode power consumption is kept to a minimum Bonjour Bonjour also known as zero configuration networking is a service that automatically detects computers devices and services on...

Page 410: ...s operation of PCL6 KPDL3 PostScript 3 compatible FTP File Transfer Protocol A protocol to transfer files on the TCP IP network whether the Internet or an intranet Along with HTTP and SMTP POP FTP is...

Page 411: ...F PDF A and is a file format based on PDF 1 4 It has been standardized as ISO 19005 1 and is a specialization of PDF which has been mainly used for printing for long term storage A new part ISO 19005...

Page 412: ...etwork address section originally part of the host address made possible by the subnet mask is referred to as the subnet address When you enter the subnet mask be sure to set the DHCP setting to Off T...

Page 413: ...Selection 6 14 Default 8 33 Combine 6 18 Command Center RX 2 44 Common Settings 8 24 Date Setting 8 30 Default Screen 8 24 Display Brightness 8 24 Display Status Log 8 36 Error Handling 8 30 Function...

Page 414: ...Document Processor How to Load Originals 5 3 Loading Originals 5 3 Originals Not Supported by the Document Processor 5 3 Originals Supported by the Document Processor 5 3 Part Names 2 2 dpi 11 28 Dup...

Page 415: ...7 9 Displaying Status Screens 7 2 Pause and Resumption 7 13 Sending the Log History 7 12 Job Accounting 9 25 Adding an Account 9 28 Counting the Number of Pages Printed 9 39 Default Setting 9 37 Dele...

Page 416: ...ddress 5 16 New PC Folder 5 17 Notice 1 2 NW InterfaceSend 8 19 O One Touch Key Adding 3 31 Editing and Deleting 3 32 OpenSSL License 1 12 Operation Panel 2 2 Option Card Authentication Kit 11 3 Data...

Page 417: ...tch 2 2 PPM 11 29 Precaution for Loading Paper 3 3 Precautions for Use 1 4 Preset Limit 8 29 Prevent Bleed thru 6 16 Default 8 33 Print Density 8 44 Print Override 6 23 Print Settings 4 9 Printer 8 39...

Page 418: ...8 13 SMTP 11 30 Protocol Settings 8 13 SNMPv1 v2c Protocol Settings 8 13 SNMPv3 Protocol Settings 8 12 Solving Malfunctions 10 11 Sound 8 24 Specifications 11 22 Copy Functions 11 24 Document Process...

Page 419: ...ing User Login Administration 9 3 FAX Driver 9 15 Group Authorization Set 9 17 Guest Authorization Set 9 18 ID Card Settings 9 22 Local Authoriz 9 16 Login 2 14 Logout 2 15 Obtain NW User Property 9 2...

Page 420: ......

Page 421: ...yron Avenue Takapuna Auckland New Zealand Phone 64 9 415 4517 Fax 64 9 415 4597 KYOCERA Document Solutions Asia Limited 13 F Mita Centre 552 566 Castle Peak Road Tsuen Wan New Territories Hong Kong Ph...

Page 422: ...k No 6 Mecidiyek y 34394 i li stanbul Turkey Phone 90 212 356 7000 Fax 90 212 356 6725 is a trademark of KYOCERA Corporation KYOCERA Document Solutions Deutschland GmbH Otto Hahn Strasse 12 40670 Meer...

Page 423: ...First edition 2018 2 2TGKDEN000...

Reviews: