Multicheck6010
EN
- 94 -
Step 3
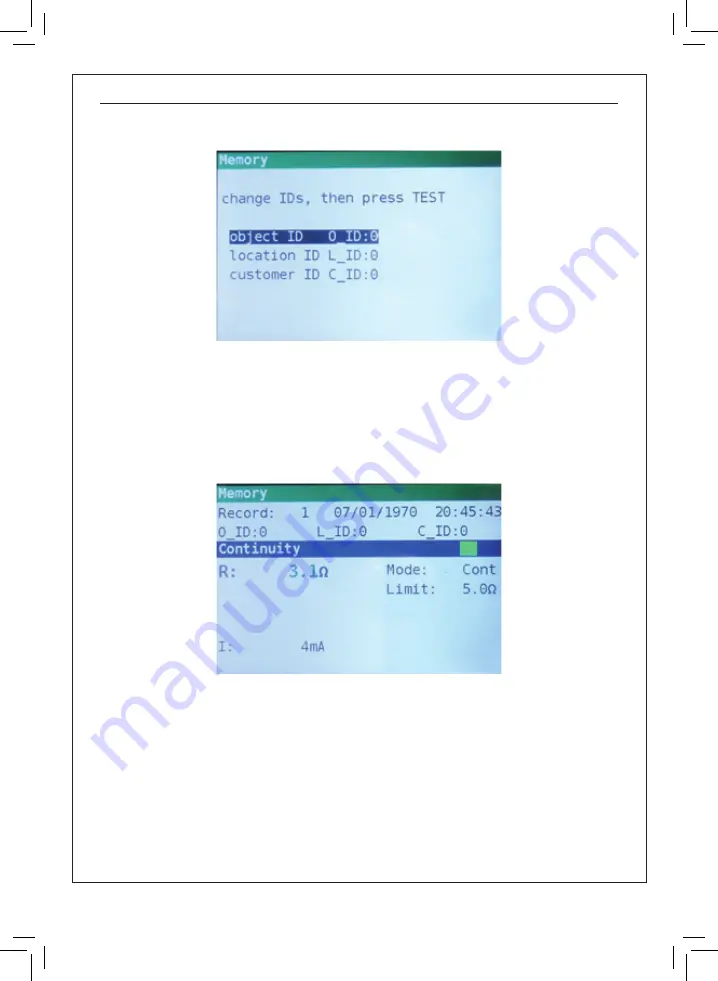
To change customer ID, location ID or object ID, press the LEFT key. The following
screen will be displayed (Figure 7.3).
Figure 7.3: ID editor
Use the
▲▼
navigation keys to choose the ID type and the
◀▶
navigation keys to change the
value of the ID.
Press the
Exit/Back/Return
key to return to the record screen without changing the IDs.
Press
TEST
to save the IDs in the actual record. These IDs will also be used for the following new
records.
Step 4
To store the result of last measurement, press
TEST
key. The following will be
displayed (Figure 7.4).
Figure 7.4: Saved results
The record number will change from red to black letters. That means that this result will be saved
in memory as record 1.
Each single result can be shown in colored letters:
•
Green: measured and passed
•
Red: measured but failed
•
Black: measured but not judged
In addition the blue function bar contains a colored field that shows the overall result of the mea
-
surement:
•
Green: measured and passed
•
Red: measured but failed
•
Brown: measured but not judged
Summary of Contents for Multicheck6010
Page 1: ...Multicheck6010 Comprobador multifunción Multifunction tester Manual de usuario User s manual ...
Page 2: ......
Page 51: ...Multicheck6010 EN Multifunction tester ...
Page 99: ......
Page 100: ......


