C353P
10-36
Troubleshooting
10
11
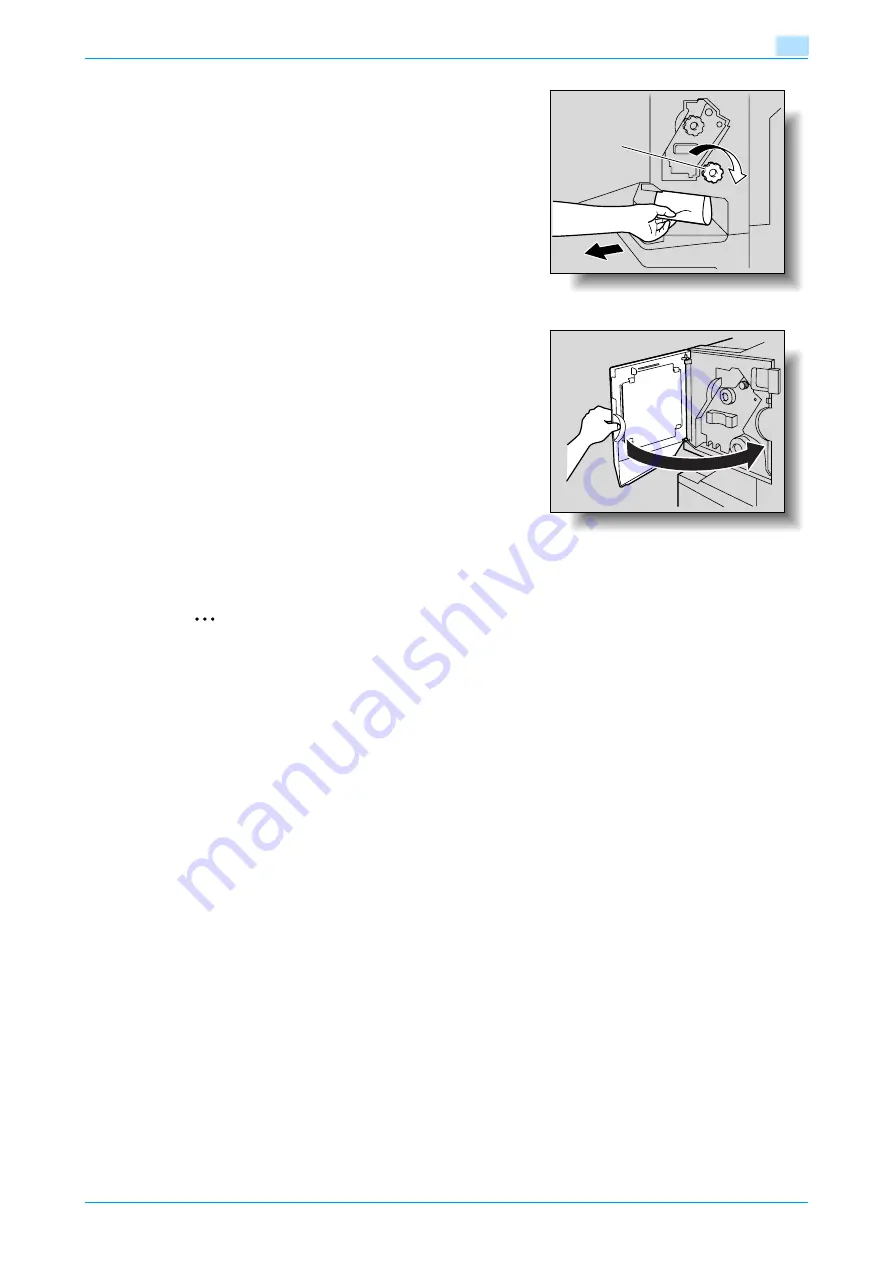
If the paper could not be removed in step 10, turn the
misfeed-clearing dial in the folding section clockwise.
Feed the paper into the output tray 2, and then remove it.
12
Close the front door of the finisher.
13
Slide the finisher back against the machine.
2
Reminder
If the message "Misfeed detected." appears, be sure to open the front door, turn the misfeed-clearing
dial until the removal indicator is completely blue, and then remove the paper. If the paper is removed
with too much force, the finisher may be damaged.
Do not remove paper remaining in the transfer unit with too much force, otherwise the folding unit may
be damaged.
Be careful that your fingers are not pinched when the front door is closed.
For details on the positions of paper misfeeds, refer to
"Paper misfeed indications" on page 10-4
Misfeed-
clearing dial in
the folding
section
Summary of Contents for BIZHUB C353P
Page 1: ...User s Guide...
Page 27: ...C353P x 26 Explanation of manual conventions...
Page 28: ...C353P x 27...
Page 31: ...C353P x 30...
Page 32: ...1 Before using the machine...
Page 77: ...C353P 1 46 Before using the machine 1...
Page 78: ...2 Network settings...
Page 97: ...C353P 2 20 Network settings 2...
Page 98: ...3 Installing the printer driver for Windows...
Page 135: ...C353P 3 38 Installing the printer driver for Windows 3...
Page 136: ...4 Installing the printer driver for Macintosh...
Page 153: ...C353P 4 18 Installing the printer driver for Macintosh 4...
Page 154: ...5 Print functions of the printer drivers for Windows...
Page 172: ...6 Print functions of the printer driver for Macintosh...
Page 199: ...C353P 6 28 Print functions of the printer driver for Macintosh 6...
Page 200: ...7 Function detail description...
Page 242: ...8 Settings for control panel...
Page 249: ...C353P 8 8 Settings for control panel 8 User Setting Menu...
Page 251: ...C353P 8 10 Settings for control panel 8 System Setting Menu...
Page 252: ...C353P 8 11 Settings for control panel 8...
Page 254: ...C353P 8 13 Settings for control panel 8 Admin Settings Menu...
Page 270: ...9 PageScope Web Connection...
Page 328: ...C353P 9 59 PageScope Web Connection 9 Specify the following settings...
Page 363: ...C353P 9 94 PageScope Web Connection 9...
Page 364: ...10 Troubleshooting...
Page 415: ...C353P 10 52 Troubleshooting 10...
Page 416: ...11 Replacing consumables...
Page 440: ...12 Care of the machine...
Page 445: ...C353P 12 6 Care of the machine 12...
Page 446: ...13 Specifications...
Page 454: ...14 Authentication unit Biometric type AU 101...
Page 476: ...15 Authentication unit IC card type AU 201...
Page 496: ...16 Appendix...
Page 497: ...C353P 16 2 Appendix 16 16 Appendix 16 1 Configuration page...
Page 498: ...C353P 16 3 Appendix 16 16 2 Font list 16 2 1 PCL Font List...
Page 499: ...C353P 16 4 Appendix 16 16 2 2 PS Font List...
Page 500: ...C353P 16 5 Appendix 16 16 2 3 Demo page...
Page 508: ...17 Index...
Page 515: ...C353P 17 8 Index 17...
Page 516: ...http konicaminolta com Copyright 2007 2007 9 A02E 9990 00...


