background image

92

401027/B

385422 Processing Unit dimensions

Kongsberg EM 712 Installation manual

Summary of Contents for EM 712

Page 1: ...401027 B June 2018 Kongsberg Maritime AS Kongsberg EM 712 Multibeam echo sounder Installation manual ...

Page 2: ...ct and fairly stated but does not accept liability for any errors or omissions Warning The equipment to which this manual applies must only be used for the purpose for which it was designed Improper use or maintenance may cause damage to the equipment and or injury to personnel All users must be familiar with the contents of the appropriate manuals before attempting to install operate maintain or ...

Page 3: ...ion heating and ventilation 18 Requirements for electrical installations cables and communication 18 Where to install the transducer 20 Introduction to transducer location 20 Mount the transducer deep 20 Avoid protruding objects near the transducer 21 Keep the transducer far away from the propellers 22 Choose a transducer position far away from the bow thruster s 22 Summary and general recommendat...

Page 4: ...ions 73 219621 EM 712 Transducer RX1 dimensions 75 216146 EM 712 Transducer RX2 dimensions 77 223137 EM 712 Transducer mounting frame 0 5 degrees 79 223139 EM 712 Transducer mounting frame 1 degree 81 223273 EM 712 Transducer mounting frame 2 degrees 83 317812 EM 712 Casing w mounting frame 0 5 degrees 85 320320 EM 712 Casing w mounting frame 1 degree 86 375817 EM 712 Combined casing w mounting fr...

Page 5: ...5 RS 422 serial line using five wires and RJ45 connector 136 Adapter for D connector to RJ45 connector for RS 422 137 Clock synchronisation 1PPS using a coax cable 138 External synchronisation 139 Remote control overview 140 Remote control 142 Remote Control using K Rem 143 Dummy plug for not using remote control 144 Remote control of Transmitter Unit 145 Remote control of Receiver Unit 147 TECHNI...

Page 6: ...ation or use 171 Unpacking instructions 173 Unpacking standard parts and units 173 Unpacking mechanical units 174 Unpacking electronic and electromechanical units 175 Unpacking transducers 176 Specifications for storage after unpacking 178 Kongsberg EM 712 ...

Page 7: ...m echo sounders in hydrographic applications Installation instructions You must follow the instructions in this manual to ensure optimal performance As a guide installation procedures are presented in the order they must be done The equipment described in this manual includes the complete system with relevant cabinets Units provided locally by the customer installation shipyard or local representa...

Page 8: ...be obtained before the installation can begin The shipowner and shipyard doing the installation are responsible for obtaining and paying for such approval The outline dimensions of the EM 712 units are found in the Drawing file chapter in this manual Online information For information about the EM 712 and other products from Kongsberg Maritime visit our website https www km kongsberg com Registere...

Page 9: ...401027 B 9 Kongsberg EM 712 Topics System diagram 0 5 x 0 5 degrees system page 10 System units page 12 Kongsberg EM 712 ...

Page 10: ...ponents of a basic EM 712 system Only the main connections between the units are shown Detailed interface capabilities and power cables are not shown A Hydrographic Work Station HWS B Interfaces Sound speed sensor Tide Center depth output C Processing Unit PU Kongsberg EM 712 Installation manual ...

Page 11: ...tioning systems Attitude roll pitch and heave Velocity Heading Clock Processing Unit special interfaces Trigger input output Clock synchronization 1PPS E Transmitter Unit F Receiver Unit G Transmit transducer H Receive transducer Kongsberg EM 712 ...

Page 12: ...ys for transmitting and receiving sound pulses Both transducer arrays can have one or more modules which are assembled in mounting frames The EM 712 transducer modules are available in an ice reinforced version For more information contact Kongsberg Maritime The two transducer arrays are normally mounted as T or L configurations under the vessel s hull Mills Cross configuration The transmit transd...

Page 13: ...ter Unit is normally located in a sonar room close to the transducer arrays For a 0 5 degree transducer one Transmitter Unit is used Receiver Unit description The EM 712 Receiver Unit has all receive electronics like control processor amplifiers Analog to Digital Converters power supply and Ethernet interface The Receiver Unit is a small wall mounted steel cabinet with integrated shock and vibrati...

Page 14: ... one sensor of each type may be connected simultaneously with one in use and all of them logged The Processing Unit controls the Transmitter and Receiver units via Ethernet communication and is also interfaced to the Operator station via Ethernet The 48 V output from the Processing Unit can be used for remote on off control of the Transmitter and Receiver Units Hydrographic Work Station descriptio...

Page 15: ... equipped with a standard set of tools This tool set must comprise the normal tools for electronic and electromechanical tasks This includes different screwdriver types pliers spanners a cable stripper a soldering iron etc Each tool must be provided in various sizes We recommend that all tools are demagnetized to protect your equipment However you must make sure that the following specialized tool...

Page 16: ...ks are competent and experienced craftsmen As a minimum the following certified craftsmen must be available Service engineer from Kongsberg Maritime Welders Electricians Note The quality of the welding is critical to the safety of the vessel Welding must only be done by a certified welder If applicable the final installation welds must be approved by the vessel s national registry the correspondin...

Page 17: ...r Observe the environmental specifications related to the EM 712 units Related topics Environmental requirements page 161 Size and access requirements A well designed sonar room with a well fitted size and easy access reduces the risk of corrosion and simplifies maintenance This increases system reliability The sonar room must be large enough to house all the system units The room must provide eno...

Page 18: ...igh as possible A funnel shaped drip collector must be mounted below the vent pipes to divert moisture to the bilge On the main deck the best ventilation is provided when the outlet pipe is at least four meters higher than the inlet pipe To keep out sea water rain and spray the ventilation pipes must be fitted with goosenecks or an equivalent design Note If the vessel is likely to operate in tropi...

Page 19: ...tlets must be provided for other equipment Cabling requirements The sonar room units are connected to other EM 712 units located in different compartments on the vessel The units may also be connected to peripheral devices If these cables pass through hatches or areas where they may be damaged they must be run in conduits Minimum 2 conduit is recommended Make sure that all system cables are proper...

Page 20: ...eral advice Each EM 712 installation must be handled separately depending on the hull design and the other electrical and mechanical systems installed on the vessel Mount the transducer deep In order to achieve the best possible EM 712 performance mount the transducer as deep as possible under the vessel s hull There are several reasons for this recommendation Flow noise Consider the situations wh...

Page 21: ...ransducer as deep as possible on the hull Note Kongsberg Maritime AS takes no responsibility for any damages to the transducer the cable or the mounting arrangement caused by slamming Avoid protruding objects near the transducer Objects protruding from the hull will generate turbulence and flow noise This will reduce the EM 712 performance Protruding objects may be zinc anodes transducers or even ...

Page 22: ...re not in operation the tunnel creates turbulence If your vessel is pitching the tunnel may be filled with air or aerated water in the upper position and release this in the lower position In general the transducer should therefore be placed well away from the bow thruster s However this is not an invariable rule Certain thruster designs combined with their physical locations on the hull may still...

Page 23: ...ckwards when the vessel is moving at normal speed Do not place a transducer in the vicinity of protruding objects and especially not close behind them Make sure that the surface of the resulting installation is as smooth and streamlined as possible Preparations ...

Page 24: ...uipment used on board a vessel are The quality and properties of the transmitted signal The quality of the receiving system The operational settings made during operation The properties of the target s The signal to noise ratio The majority of these factors can neither be controlled nor improved by means of installation methods or transducer locations The quality and properties of the transmitting...

Page 25: ... other hydroacoustic systems B The transducer cable is long and may pick up electric noise from generators pumps cooling systems and other electric or electromechanical devices C The preamplifiers are very sensitive and they can easily pick up electrical noise from internal and external power supplies The preamplifiers are also vulnerable for analogue noise created by their own electronic circuitr...

Page 26: ...ter borne In some cases however shaft vibrations or vibrations in the hull near the propeller may be structure borne to the transducer If a propeller blade is damaged this may increase the noise considerably Propeller cavitation is a severe source of noise Singing propellers might be a source of noise which interferes at discrete frequencies In some cases static discharge from the rotating propell...

Page 27: ...s sticking out from the hull or dents in the hull will disturb the flow and will increase the thickness of the boundary layer When the flow speed is high the turbulence can be violent enough to destroy the integrity of the water Small voids or cavities in the water will occur and this is called cavitation Rattle noise Rattle noise may be caused by loose objects in the vicinity of the transducer li...

Page 28: ...rated in any other part of the equipment than the transducer Hum picked up by the transducer cables or picked up from the power supply is usually the most common source of electrical self noise At higher frequencies where rather wide bandwidths are necessary the noise from components transistors or other analogue electronic may be a limiting factor Some means to reduce acoustic noise Several facto...

Page 29: ...e reduced by isolation for example by providing vibration clamping between the transducer and the hull structure Reducing propeller noise Sufficient clearance between the propellers and the hull the rudder and the keel must be provided Place the zinc alloy anodes in places where the water flow is the least disturbed Ensure that the propellers blades are correctly designed and without damages The u...

Page 30: ...l noise Make sure that all units are properly grounded as this is important to avoid electrical noise Use shielded cables with correct grounding Separate EM 712 cables from other cables with high voltages large currents or transients Place all high voltage power cables in metal conduits Kongsberg EM 712 Installation manual ...

Page 31: ...ge 39 Manufacturing and installing the casings page 42 Designing manufacturing and mounting the steel conduits page 44 Installing the mounting frames page 47 Installing the transducers into the mounting frames page 49 Rules for transducer handling page 53 Painting the transducer face page 54 Approved anti fouling paints page 56 Installing the transducer ...

Page 32: ...s depends on the chosen configuration The standard types identified by transmission x reception beam width are 0 5 x 0 5 degrees system 2 TX1 modules and 2 RX 1modules 0 5 x 1 degree system 2 TX1 modules and 1 RX1 module 1 x 1 degree system 1 TX1 module and 1 RX1 module 1 x 2 degrees system 1 TX1 module and 1 RX2 module 2 x 2 degrees system 1 TX2 module and 1 RX2 module Note The red protective coa...

Page 33: ...e to mount the receive transducers with the cables pointing to the stern or to the bow The default orientation is astern this should be used if possible Default orientation of transducer modules top view 1 x 1 degree system A Transmit transducer TX B Receive transducer RX Optional orientation of transducer modules top view 1 x 1 degree system A Transmit transducer TX B Receive transducer RX Instal...

Page 34: ...electronic units are installed using normal tools the transducer arrays must be located and installed depending on the vessel s design A number of different factors related to the vessel s design must be taken into consideration during the installation planning The transducer can be installed using one of the following principles Gondola Blister Flush mounted Externally mounted with fairings Box k...

Page 35: ...ss The cable glands should be of the type having a pressure rating of 4 bars or more If the tubes end below the vessel s water line classification requirements may require a double set of glands The installation of the transducer arrays must thus be planned together with the installation shipyard and or the client Once the installation method is defined the installation shipyard must provide the n...

Page 36: ...be water filled To let the air escape make suitable holes in the rear end close to the vessel s hull A gondola installation may help in avoiding air bubble blockage of the sound path under the transducers by aerated water Gondolas may also contain additional transducers for other systems Note The inside surface of the gondola must be protected with appropriate protective paint and an adequate amou...

Page 37: ...lister is well suited for refitting a vessel with an EM 712 system The blister can also be used for other sonar and echo sounder transducers The interior of the blister must be filled with water Use drainage holes in the bottom and an air outlet on the top Note The inside surface of the blister must be protected with appropriate protective paint and an adequate amount of sacrificial anodes The ins...

Page 38: ...ired all drawings and documents must be approved by the vessel s national registry and corresponding maritime authority and or classification society Such approval must be obtained before the installation can begin The shipowner and shipyard doing the installation are responsible for obtaining and paying for such approval External mounted with fairings The transducer arrays can be mounted directly...

Page 39: ...llation drawings as well as the relevant work standards and mounting procedures Note In order to obtain maximum safety and EM 712 performance it is very important that the installation procedures in this manual are complied to You must do the tasks in the order they are described The vessel owner must make sure that the installation shipyard holds the applicable competence to perform the installat...

Page 40: ... capable of accepting the transducer frames We recommend that the frames are mounted into steel casings For more information see Manufacturing and installing the casings page 42 4 Prepare and install the necessary cable conduit from the top of the transducer to the sonar room For more information see Designing manufacturing and mounting the steel conduits page 44 5 Install the mounting frames For ...

Page 41: ...ion and then again as often as required to maintain the protection For more information see Painting the transducer face page 54 Approved anti fouling paints page 56 Further requirements Connect the transducer cables to the Transmitter and Receiver Units For more information see Transmit transducer cables page 119 Receive transducer cables page 123 Related topics Cable layout and interconnections ...

Page 42: ...he following prerequisites must be met All relevant vessel and transducer drawings must be available All relevant drawings have been approved by the classification society All relevant work instructions procedures and standards must be available The installation principle has been determined The physical location of the transducer has been determined The installation angles of the transducer have ...

Page 43: ...uction drawings Alter the drawings and the design as required to fit the vessel and the chosen installation principle 2 Install the casings under the hull in either the blister the gondola or into the hull Related topics Designing manufacturing and mounting the steel conduits page 44 Drawing file page 70 Installing the transducer ...

Page 44: ... Observe the relevant rules and regulations related to welding The quality of the welding is critical to the safety of the vessel Welding must only be done by a certified welder The final installation welds must be approved by the vessel s national registry the corresponding maritime authority and or classification society Context The transducer cables connect through the vessel s hull using steel...

Page 45: ...1 RX conduit 2 x 2 degrees system 1 common TX and RX conduit A Vessel s hull B Ice and debris knife C Casings for the transducer arrays frames and modules D Support brackets inside the casing must not block for the transducer cables E Water filled blister air outlet towards the hull F One or more steel conduits for the RX Transducer array G One or more steel conduits for the TX Transducer array H ...

Page 46: ...ot more than 30 degrees Note however that one or two sharp bends on the conduits may require a larger diameter The upper opening of the steel conduits should be minimum 1 5 metres above the vessel s waterline as specified by the classification society If the openings of these conduits are under the water level then special acceptances are needed from the classification society Close the top of the...

Page 47: ...e required for this task Torque wrench Loctite 242 removable medium strength threadlocker Lifting device Rope Tackles Context Mounting frames are designed to house the individual transducer modules While the transducer modules are mounted into the frames the frames require casings The installation must be carried out according to arrangement drawings designed for the specific vessel Refer to the d...

Page 48: ...hecked by measuring the relative vertical positions of the module mounting bars on the frames If the deviations are too large this has to be corrected before the modules are put in place 3 Loosen each M12 screw 4 Apply Loctite 242 to secure and firm mount Use a torque of approximately 74 Nm Related topics Designing manufacturing and mounting the steel conduits page 44 Installing the transducers in...

Page 49: ...comprise the normal tools for mechanical tasks This includes different screwdriver types pliers adjustable spanners etc Each tool must be provided in various sizes We recommend that all tools are demagnetized to protect your equipment The following specific tools and items are required for this task Torque wrench Loctite 242 removable medium strength threadlocker Lifting device Ropes and tackles C...

Page 50: ...nless a suitable lifting device available make sure that enough manpower is available to lift hold and fasten the transducer A transducer must always be handled as a delicate item Wrongful actions may damage the transducer beyond repair Do not lift the transducer by the cable Procedure 1 Dismount as illustrated the cover plates and clamping bars Kongsberg EM 712 Installation manual ...

Page 51: ...cer cables pass through the casing in such a way that they are not exposed to wear and tear Secure as required The minimum bending radius for the transducer cables is 85mm 7 Note the orientation of the cable outlet from the transducer modules Fill in the tables below Serial number Module type TX1 TX2 Cable orientation port starboard Transmit trans ducer TX number 1 Transmit trans ducer TX number 2...

Page 52: ...cer cables page 119 Receive transducer cables page 123 216148 EM 712 Transducer TX1 dimensions page 71 221048 EM 712 Transducer TX2 dimensions page 73 219621 EM 712 Transducer RX1 dimensions page 75 216146 EM 712 Transducer RX2 dimensions page 77 Kongsberg EM 712 Installation manual ...

Page 53: ...The transducer has not been designed with any protection against biological fouling Whenever opportunity arise typically when the vessel is dry docked the transducer face must be cleaned for shells and other marine growth Be careful so that you do not accidentally make cuts or inflict other physical damage to the transducer face Remove biological fouling carefully using a plastic brush a suitable ...

Page 54: ... a plastic brush Fine grade sandpaper 240 inch grit size Primer Anti fouling paint Wet film gauge Airless spray Because some paint types may be aggressive to the polyurethane in the transducer consult our list of approved paints Context The transducer has not been designed with any protection against biological fouling Anti fouling paint may therefore be applied to the transducer face To minimize ...

Page 55: ...ance 4 Remove all dust 5 Apply the primer and let it dry 6 Apply the paint Observe the instructions provided by the paint manufacturer Use airless spray Apply the minimum specified film thickness per coat and for the complete layer It is not possible to measure dry film thickness on transducer surface You must therefore use a wet film gauge to frequently measure the paint thickness Note We strongl...

Page 56: ...facturer s website http www jotun com Products Primer Safeguard Universal ES Apply 80 µm wet film thickness 50 µm dry film thickness Paint SeaQuantum Ultra S Apply 250 µm wet film thickness 125 µm dry film thickness Data sheets and application guides can be downloaded from http www jotun com ww en b2b technical info tds index aspx International Marine Coatings Manufacturer International Marine Coa...

Page 57: ...401027 B 57 Apply 40 µm dry film thickness Paint Intersmooth 7465Si SPC Apply 100 µm dry film thickness The list can also be found on http www km kongsberg com Installing the transducer ...

Page 58: ...58 401027 B Installing the EM 712 hardware units Topics Transmitter Unit page 59 Receiver Unit page 63 Processing Unit page 68 Kongsberg EM 712 Installation manual ...

Page 59: ...401027 B 59 Transmitter Unit Topics Installing the Transmitter Unit page 60 RIO P board dip switch setting page 62 Installing the EM 712 hardware units ...

Page 60: ...re you start the installation work Free bulkhead space is required to mount the Transmitter Unit Note The installation shipyard must provide all necessary installation drawings If required all drawings and documents must be approved by the vessel s national registry and corresponding maritime authority and or classification society Such approval must be obtained before the installation can begin T...

Page 61: ...r Note Always check on the other side of the bulkhead before drilling holes 4 Mount the cabinet to the bulkhead with sixteen 16 M10 bolts The bolts must be supplied by the shipyard Bolts of grade A4 80 should be used As the cabinet is heavy a lifting arrangement articulated jack or similar must be used The foundation onto which the cabinet is mounted will determine the correct torque to be applied...

Page 62: ...ansmitter Unit should be set to ON ON is when they are pushed towards the rear of the circuit board The position of the dip switches are shown with the LED lights on the front of the RIO P board when the board is installed and the Transmitter Unit is powered up MASTER should be lit ID5 ID6 and ID7 should not be lit Kongsberg EM 712 Installation manual ...

Page 63: ...401027 B 63 Receiver Unit Topics Installing the Receiver Unit page 64 Receiver Unit dip switch setting page 66 Installing the EM 712 hardware units ...

Page 64: ...national registry and corresponding maritime authority and or classification society Such approval must be obtained before the installation can begin The shipowner and shipyard doing the installation are responsible for obtaining and paying for such approval Context The Receiver Unit is delivered as a complete cabinet with shock absorbers Mounting hole pattern for the Receiver Unit Procedure 1 Pre...

Page 65: ...before drilling holes 4 Mount the cabinet to the bulkhead with six 6 M8 bolts The bolts must be supplied by the shipyard Bolts of grade A4 80 should be used The foundation onto which the cabinet is mounted will determine the correct torque to be applied to the bolts Related topics 396428 EM 712 Receiver Unit dimensions page 91 Weight and outline dimensions page 158 Installing the EM 712 hardware u...

Page 66: ... switch setting in the Receiver Unit has to be correct The software in the Processing Unit must know the identification of the Receiver Units A switch on the processing board inside the Receiver Unit is used for this Kongsberg EM 712 Installation manual ...

Page 67: ...FF Receiver Unit 1 is the one connected to channel 1 128 B Receiver Unit 2 switch 1 2 and 3 must be set to OFF switch 4 must be set to ON Receiver Unit 2 is the one connected to channel 129 256 OFF is when they are pushed up Installing the EM 712 hardware units ...

Page 68: ...68 401027 B Processing Unit Topics CBMF board dip switch setting page 69 Kongsberg EM 712 Installation manual ...

Page 69: ... dip switch setting on the CBMF board has to be correct All the dip switches on all the CBMF boards in the Processing Unit should be set to OFF OFF is when they are pushed towards the edge of the circuit board Installing the EM 712 hardware units ...

Page 70: ...e 0 5 degrees page 85 320320 EM 712 Casing w mounting frame 1 degree page 86 375817 EM 712 Combined casing w mounting frame 1 degree page 87 331369 EM 712 Casing w mounting frame 2 degrees page 88 396402 EM 712 Transmitter Unit dimensions page 89 212984 EM 712 Transmitter Unit mounting bracket page 90 396428 EM 712 Receiver Unit dimensions page 91 385422 Processing Unit dimensions page 92 378828 H...

Page 71: ...401027 B 71 216148 EM 712 Transducer TX1 dimensions Drawing file ...

Page 72: ...72 401027 B Kongsberg EM 712 Installation manual ...

Page 73: ...401027 B 73 221048 EM 712 Transducer TX2 dimensions Drawing file ...

Page 74: ...74 401027 B Kongsberg EM 712 Installation manual ...

Page 75: ...401027 B 75 219621 EM 712 Transducer RX1 dimensions Drawing file ...

Page 76: ...76 401027 B Kongsberg EM 712 Installation manual ...

Page 77: ...401027 B 77 216146 EM 712 Transducer RX2 dimensions Drawing file ...

Page 78: ...78 401027 B Kongsberg EM 712 Installation manual ...

Page 79: ...401027 B 79 223137 EM 712 Transducer mounting frame 0 5 degrees Drawing file ...

Page 80: ...80 401027 B Kongsberg EM 712 Installation manual ...

Page 81: ...401027 B 81 223139 EM 712 Transducer mounting frame 1 degree Drawing file ...

Page 82: ...82 401027 B Kongsberg EM 712 Installation manual ...

Page 83: ...401027 B 83 223273 EM 712 Transducer mounting frame 2 degrees Drawing file ...

Page 84: ...84 401027 B Kongsberg EM 712 Installation manual ...

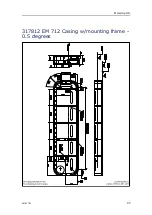
Page 85: ...401027 B 85 317812 EM 712 Casing w mounting frame 0 5 degrees Drawing file ...

Page 86: ...86 401027 B 320320 EM 712 Casing w mounting frame 1 degree Kongsberg EM 712 Installation manual ...

Page 87: ...401027 B 87 375817 EM 712 Combined casing w mounting frame 1 degree Drawing file ...

Page 88: ...88 401027 B 331369 EM 712 Casing w mounting frame 2 degrees Kongsberg EM 712 Installation manual ...

Page 89: ...401027 B 89 396402 EM 712 Transmitter Unit dimensions Drawing file ...

Page 90: ...90 401027 B 212984 EM 712 Transmitter Unit mounting bracket Kongsberg EM 712 Installation manual ...

Page 91: ...401027 B 91 396428 EM 712 Receiver Unit dimensions Drawing file ...

Page 92: ...92 401027 B 385422 Processing Unit dimensions Kongsberg EM 712 Installation manual ...

Page 93: ...401027 B 93 378828 Hydrographic Work Station dimensions Drawing file ...

Page 94: ...94 401027 B Kongsberg EM 712 Installation manual ...

Page 95: ...401027 B 95 371591 Rack installation kit dimenisons Drawing file ...

Page 96: ...96 401027 B 370275 Remote Control Unit K REM dimensions Kongsberg EM 712 Installation manual ...

Page 97: ...401027 B 97 Drawing file ...

Page 98: ...98 401027 B 373962 Remote Control Unit K REM wiring diagram Kongsberg EM 712 Installation manual ...

Page 99: ...l surveying and alignment Topics About dimensional surveying and alignment page 100 Dimensional surveying page 100 Alignment page 101 Calibration page 102 Vessel coordinate system page 102 Dimensional surveying and alignment ...

Page 100: ...tion is then repeated at regular interfaces and prior to each survey Dimensional surveying Determining the relative positions and orientations of the sensors and the transducer with high accuracy is important This can only be met using a survey company personnel with good experience in maritime dimensional surveying The dimensional surveying tasks required for EM 712 include 1 Establishing the ves...

Page 101: ...requirements are not met and this is found to be the reason for a malfunctioning system the vessel will most likely need to be dry docked in order to repeat the dimensional survey Alignment To ensure a successful installation of the EM 712 all alignment and measurements must be done to the highest possible accuracy The alignment tasks required for EM 712 include Measure and adjust the transducer t...

Page 102: ... the relative physical locations of systems and sensors When you have several different sensors and transducers on your vessel and you wish each of them to provide accurate data you need to know their relative physical positions The antenna of a position sensor is typically mounted high above the superstructure while a motion sensor is often located close to the vessel s centre of gravity Both of ...

Page 103: ... with the mast A positive value for Z means that a sensor or a new reference point is located under the reference point origin 4 Reference point origin Coordinate system origin The origin is the common reference point where all three axis in the vessel coordinate system meet All physical locations of the vessel s sensors radar and positioning system antennas echo sounder and sonar transducers moti...

Page 104: ... of EM 712 cables page 113 Transmit transducer cables page 119 Receive transducer cables page 123 Clock synchronization 1PPS page 127 External synchronization page 129 Hydrographic Work Station rear connectors MP 5810 page 132 Cable drawings and specifications page 134 Kongsberg EM 712 Installation manual ...

Page 105: ... Kongsberg Maritime as a part of the EM 712 delivery They may also be included with third party items that are used with the EM 712 All electronic installations and corresponding wiring must be in accordance with the vessel s national registry and corresponding maritime authority and or classification society If no such guidelines exist we recommend that Det Norske Veritas DNV GL Report No 80 P008...

Page 106: ...1027 B Cable plans Topics Cable plan Processing Unit page 107 Cable plan Transmitter Unit page 108 Cable plan Receiver Unit 0 5 degree page 110 Topside cable plan page 113 Kongsberg EM 712 Installation manual ...

Page 107: ...sing Unit to AC mains power and to the transmitter and receiver units One Ethernet cable is used to connect the Processing Unit to the Hydrographic Work Station A Processing Unit Cables identified with an asterisk are system cables These cables are supplied with the EM 712 delivery Cable layout and interconnections ...

Page 108: ... Transmitter Unit The transmitter TX Unit cables include those used to connect the EM 712 TX Unit s to AC mains power to the receiver RX Unit to the Processing Unit and to the transducers Kongsberg EM 712 Installation manual ...

Page 109: ...TX number 1 F Transmit transducer TX number 2 Cables identified with an asterisk are system cables These cables are supplied with the EM 712 delivery The illustration shows the TX transducer arrays mounted in the default orientation with the cables pointing towards starboard Cable layout and interconnections ...

Page 110: ...include those used to connect the EM 712 RX Unit s to AC mains power to the transmitter TX Unit to the Processing Unit and to the transducers If there are more than one RX Unit they have to be connected to each other with a fibre optic cable Kongsberg EM 712 Installation manual ...

Page 111: ...al value The transducer cables are moulded to the RX array but connect in the other end to the Receiver Unit RXU with 76 pin D sub connectors Connection of RX transducer cables Note During the installation of the RX array you must fill in the cable identification table s below For a system with 0 5 degree RX you will need all cables listed in the tables With a 1 degree system you only need the fir...

Page 112: ...112 401027 B RX array identification RX2 TX Unit identification 3 2 RX 3 4 2 RX 4 Kongsberg EM 712 Installation manual ...

Page 113: ...A Hydrographic Work Station B Display C Computer keyboard D Computer mouse or trackball Cables identified with an asterisk are system cables These cables are supplied with the EM 712 delivery List of EM 712 cables A set of cables is required to connect the EM 712 units to each other and to the relevant power source s The following cables are used when the EM 712 is set up Cable layout and intercon...

Page 114: ...it to vessel ground C27 Control cable From Processing Unit to remote control device Remote on off switch If remote control is not used a termination plug has to be inserted in the Remote control plug on the Processing Unit This plug is a 9 pin D SUB supplied with the Processing Unit Remote control page 142 Remote Control using K Rem page 143 Dummy plug for not using remote control page 144 C28 Con...

Page 115: ...mitter Unit 1 C62 AC power Ship supply Transmitter Unit 2 See comment 9 C63 Ground Ground Transmitter Unit 2 C64 AC power Ship supply Receiver Unit 1 See comment 10 C65 Ground Ground Receiver Unit 1 C66 AC power Ship supply Receiver Unit 2 See comment 10 C67 Ground Ground Receiver Unit 2 TX1 1 Transducer TX Transducer 1 Transmitter Unit See comment 11 TX1 2 Transducer TX Transducer 1 Transmitter U...

Page 116: ...nsmitter Unit See comment 11 TX2 9 Transducer TX Transducer 2 Transmitter Unit See comment 11 TX2 10 Transducer TX Transducer 2 Transmitter Unit See comment 11 RX1 1 Transducer RX Transducer 1 Receiver Unit 1 See comment 11 RX1 2 Transducer RX Transducer 1 Receiver Unit 1 See comment 11 RX1 3 Transducer RX Transducer 1 Receiver Unit 1 See comment 11 RX1 4 Transducer RX Transducer 1 Receiver Unit 1...

Page 117: ...T 5E STP Shielded Twisted Pair quality or better Using cables with lower bandwidth capacity will reduce the EM 712 performance 8 The fiber cables between the Transmitter Units and the Receiver Units are delivered with the units The standard cable length is 10 metres 9 Power supply to the Transmitter Units TXU The power cables are delivered with the Transmitter Units 10 Power supply to the Receiver...

Page 118: ...118 401027 B are connected In such project cable drawings the EM 712 cables are identified as EM 712 Cx Kongsberg EM 712 Installation manual ...

Page 119: ...the connector during the installation Cable length 15 or 25 metres Maximum outer diameter 16 2 mm Minimum bending radius 95 mm Marking of transmit transducer cables Each transducer cable is identified with transducer type transducer part number cable number and transducer serial number It is possible to mount the transmit transducers with the cables pointing to the port or to the starboard side Th...

Page 120: ...ost aft module is transmit transducer number 1 The location of the transducer modules must be recorded during installation and written down in the cable identification table A Transmit transducer TX num ber 1 B Transmit transducer TX num ber 2 C Receive transducer RX num ber 1 D Receive transducer RX num ber 2 E TX cable number 1 F TX cable number 10 G RX cable number 1 H RX cable number 4 Kongsbe...

Page 121: ...odule is transmit transducer number 1 The location of the transducer modules must be recorded during installation and written down in the cable identification table A Transmit transducer TX num ber 1 B Transmit transducer TX num ber 2 C Receive transducer RX num ber 1 D Receive transducer RX num ber 2 E TX cable number 1 F TX cable number 10 G RX cable number 1 H RX cable number 4 Cable layout and...

Page 122: ...cer 20 cables 1 degree transmit transducer 10 cables 2 degrees transmit transducer 5 cables Table 1 Cable identification table Posi tion TX module identification TX Unit Size of system Transducer serial number fill in Cable TX RIO board Socket 1 1 P3 2 1 P4 3 2 P3 4 2 P4 5 3 P3 2 deg 6 3 P4 7 4 P3 8 4 P4 9 5 P3 1 10 5 P4 1 deg 1 6 P3 2 6 P4 3 7 P3 4 7 P4 5 8 P3 6 8 P4 7 9 P3 8 9 P4 9 10 P3 2 10 10...

Page 123: ...ends not to dismount the connector during the installation Cable length 15 or 25 metres Maximum outer diameter 16 2 mm Minimum bending radius 95 mm Marking of receive transducer cables Each transducer cable is identified with transducer type transducer part number cable number and transducer serial number It is possible to mount the receive transducers with the cables pointing to the stern or to t...

Page 124: ...ort side module is receive transducer number 1 The location of the transducer modules must be recorded during installation and written down in the cable identification table A Transmit transducer TX num ber 1 B Transmit transducer TX num ber 2 C Receive transducer RX num ber 1 D Receive transducer RX num ber 2 E TX cable number 1 F TX cable number 10 G RX cable number 1 H RX cable number 4 Kongsbe...

Page 125: ...de module is receive transducer number 1 The location of the transducer modules must be recorded during installation and written down in the cable identification table A Transmit transducer TX num ber 1 B Transmit transducer TX num ber 2 C Receive transducer RX num ber 1 D Receive transducer RX num ber 2 E TX cable number 1 F TX cable number 10 G RX cable number 1 H RX cable number 4 Cable layout ...

Page 126: ...ation 0 5 degrees receive transducer 8 cables 1 degree receive transducer 4 cables 2 degrees receive transducer 2 cables Table 2 Cable identification table Posi tion RX module number identification RX Unit Size of system Transducer serial number fill in Cable Receiver Unit Socket 1 1 RX 1 2 1 RX 2 2 deg 3 1 RX 3 1 4 1 RX 4 1 deg 1 2 RX 1 2 2 RX 2 3 2 RX 3 2 4 2 RX 4 0 5 deg Kongsberg EM 712 Instal...

Page 127: ... 1PPS If the Processing Unit has two CBMF boards the lower one must be used for 1PPS The CBMF board is equipped with an optocoupler at this input The input series resistor is tuned for a TTL signal Low level 0 6 V High level 3 2 V Optically isolated input signals Note The input signals must not be negative that is no RS 232 signals can be used for these inputs A Input from external system B Proces...

Page 128: ...401027 B Using 4 5 V input signal the input current will be as required 10 mA No additional resistance required An added resistor of 750 Ω and minimum 0 1 W must be used Kongsberg EM 712 Installation manual ...

Page 129: ...loyed on the same vessel The external synchronization connector is located on the CBMF board in the processing unit If the Processing Unit has two CBMF boards the lower one must be used for synchronization This is an optically isolated connection that requires 10mA current Input power and resistor value must be adjusted accordingly The connector is RJ45 type RJ45 connector pin layout Pin 3 and 6 i...

Page 130: ...712 enabling it to transmit Optical isolated input High Note To avoid ground loops and damage of the electronics caused by external connections all connections are optically isolated Optically isolated input signals Note The input signals must not be negative that is no RS 232 signals can be used for these inputs A Input from external system B Processing Unit input circuitry The input current must...

Page 131: ...ed Optically isolated output signals A Processing Unit output circuitry B External power C Input to external system The collector current must be approximately 10 mA A resistor must be used to tune the collector current depending on your voltage Power Resistor value Minimum effect 5 V 0 38 kΩ 0 1 W 12 V 1 08 kΩ 0 15 W 24 V 2 28 kΩ 0 25 W Cable layout and interconnections ...

Page 132: ...ry important that a high quality Ethernet cable is used You must use CAT 5E STP Shielded Twisted Pair quality or better Using a cable with lower bandwidth capacity will reduce the EM 712 performance D Display Port Display cable From Hydrographic Work Station to display C1 This is a commercial cable The display cable is often physically attached to the display and terminated in the computer end wit...

Page 133: ...cally attached to the keyboard and terminated in the computer end with a male PS 2 or USB connector Depending on the type of connector you must connect the keyboard to the PS 2 connector or an USB connector on the computer L Audio cable Not used M Audio cable Not used N USB interface connectors USB 3 0 From Hydrographic Work Station to external device s O USB interface connectors USB 2 0 From Hydr...

Page 134: ...onnector to RJ45 connector for RS 422 page 137 Clock synchronisation 1PPS using a coax cable page 138 External synchronisation page 139 Remote control overview page 140 Remote control page 142 Remote Control using K Rem page 143 Dummy plug for not using remote control page 144 Remote control of Transmitter Unit page 145 Remote control of Receiver Unit page 147 Kongsberg EM 712 Installation manual ...

Page 135: ... connector D Male 9 pin D connector Unless otherwise specified this cable must be provided by the installation shipyard Note that this cable does not support all the signals in the standard RS 232 specification Minimum cable requirements Conductors 2 x 2 x 0 2 mm Screen Overall braided Voltage 30 V Maximum outer diameter Defined by the plugs and or the cable gland We recommend using a shielded CAT...

Page 136: ...ond and may be sent on cables as long as 1500 meters A Local connection RJ45 connector B Connection on remote device Unless otherwise specified this cable must be provided by the installation shipyard Minimum cable requirements Conductors 2 x 3 x 0 2 mm Screen Overall braided Voltage 30 V Maximum outer diameter Defined by the plugs and or the cable gland We recommend using a shielded CAT 6A qualit...

Page 137: ...tor to the Processing Unit Two adapters and two standard Cat6 patch cables are provided with a standard delivery The adapter has RJ45 female connector at one end and 9 pin male D connector at the other end The wiring at the RJ45 side is fixed and the wire ends have crimp contacts to be placed in the desired position of the D connector without any tools A Local connection Processing Unit RJ45 conne...

Page 138: ...s equipped with a 1PPS signal input for clock synchronisation A Male BNC connector B Ground C 1PPS signal This cable must be provided by the installation shipyard The 1PPS one pulse per second signal is normally provided by a positioning system Kongsberg EM 712 Installation manual ...

Page 139: ... is located on the CBMF board of the processing unit The connector is RJ45 type A Local connection The connector is RJ45 type Note Pin 3 and 6 is used by Kongsberg Maritime only B Connection on remote device Unless otherwise specified this cable must be provided by the installation shipyard Minimum cable requirements Conductors 2 x 3 x 0 2 mm Screen Overall braided Voltage 30 V Maximum outer diame...

Page 140: ...it can be used to switch on off the Transmitter and Receiver Units in addition to the Processing Unit itself In this case the enclosed remote control dummy plug has to be inserted in the Remote Control connector in the Processing Unit A Remote switch and lamp optional B Processing Unit connector marked REMOTE CONTROL C Processing Unit connector marked 48VDC OUT D Transmitter Unit 1 connector marke...

Page 141: ...401027 B 141 K Receiver Unit 2 connector marked REMOTE ON OFF OUT Note The number of Transmitter Units and Receiver Units depends upon the chosen system configuration Cable layout and interconnections ...

Page 142: ...nnection male 9 pin D connector B Connection to remote lamp and on off switch C Female 9 pin D connector D Male 9 pin D connector Minimum cable requirements Conductors 3 x 0 5 mm Screen Overall braided Voltage 60 V Maximum outer diameter Defined by the plugs and or the cable gland This cable must be provided by the installation shipyard Kongsberg EM 712 Installation manual ...

Page 143: ... has been designed for this purpose K Rem A Local connection male 9 pin D connector B Connection at the terminal strip in Remote Control Unit K Rem C Female 9 pin D connector D Male 9 pin D connector Minimum cable requirements Conductors 3 x 0 5 mm Screen Overall braided Voltage 60 V Maximum outer diameter Defined by the plugs and or the cable gland This cable must be provided by the installation ...

Page 144: ... enclosed remote control dummy plug has to be inserted in the Remote Control connector in the Processing Unit Note If remote control is not used the enclosed remote control dummy plug has to be inserted in the Remote Control connector in the Processing Unit The Processing Unit will not work without this dummy plug Kongsberg EM 712 Installation manual ...

Page 145: ...want to switch on and off the Transmitter Unit from the Processing Unit A Processing Unit end male 4 pin Lemo connector Lemo part number FGG 3B 304 CLAD62Z Kongsberg Maritime part number 348015 B Transmitter Unit end male 9 pin D connector Processing Unit end Pin layout male 4 pin Lemo connector Solder side view Connects to 48 VDC OUT on the rear of the Processing Unit Cable layout and interconnec...

Page 146: ...ON OFF IN on the RIO P board at the bottom of the Transmitter Unit Minimum cable requirements Conductors 2 x 0 5 mm Screen Overall braided Voltage 60 V Maximum outer diameter Defined by the plugs This cable must be provided by the installation shipyard Kongsberg EM 712 Installation manual ...

Page 147: ...it and the Receiver Unit is required if you want to switch on and off the Receiver Unit from the Processing Unit A Transmitter Unit end male 9 pin D connector Connects to REMOTE ON OFF OUT at the bottom of the Transmitter Unit B Receiver Unit end male 9 pin D connector Connects to REMOTE ON OFF IN at the Receiver Unit Cable layout and interconnections ...

Page 148: ...148 401027 B Transmitter Unit end Pin layout male 9 pin D connector Connects to REMOTE ON OFF OUT on the RIO P board at the bottom of the Transmitter Unit Kongsberg EM 712 Installation manual ...

Page 149: ...eiver Unit end Pin layout male 9 pin D connector Connects to REMOTE ON OFF IN at the Receiver Unit Minimum cable requirements Conductors 2 x 0 5 mm Screen Overall braided Voltage 60 V Cable layout and interconnections ...

Page 150: ...150 401027 B Maximum outer diameter Defined by the plugs This cable must be provided by the installation shipyard Kongsberg EM 712 Installation manual ...

Page 151: ... Topics Performance specifications page 152 Interface specifications page 154 Weight and outline dimensions page 158 Power requirements page 160 Environmental requirements page 161 Alignment specifications page 164 Technical specifications ...

Page 152: ...spacing Equidistant Equiangle High Density Coverage sector Up to 140 Transmit beam steering Stabilized for roll pitch and yaw Receive beam steering Stabilized for roll Depth range from transducers 3 to approximately 3500 metres Pulse lengths 0 2 0 5 and 2 ms CW and FM chirp up to 120 ms Range sampling rate 15 kHz 5 cm at data output Source level 1 degree TX Up to 225 dB re 1 µPa ref 1 m 0 5 degree...

Page 153: ...creases at large depths caused by reduced angular coverage the need for dual swath decreases with depth In the Very Deep and Extra Deep modes long FM pulses are prioritized so dual swath is not available in these modes Reduced power output Mammal protect Maximum intensity is encountered in a thin wedge extending below the ship with an angular coverage of about 140 The intensity level may be lowere...

Page 154: ...aritime to interface position sensors Supported datagram formats for external clock The EM 712 supports the following datagram format from an external clock This datagram format is received using a serial communication line NMEA ZDA The NMEA ZDA datagram contains the universal time code UTC day month year and local time zone Supported datagram formats for heading information The EM 712 supports th...

Page 155: ...The EM 712 supports the following datagram format from a motion sensor These datagram formats are received using a serial communication line Kongsberg EM Attitude 3000 The EM Attitude 3000 is a proprietary datagram format created by Kongsberg Maritime for use with digital motion sensors It holds roll pitch heave and heading information The datagram contains a 10 bytes long message Supported datagr...

Page 156: ...requency modulated transmitter pulse FM also called chirp pulse In the FM mode the Doppler shift made by the movements of the survey vessel relative to the bottom causes a range error This error must be corrected The following motion sensors have specifications that fullfills Kongsberg Maritime requirements for doppler shift corrections Kongsberg Maritime Seapath series Applanix Pos MV Coda Octopu...

Page 157: ...er Interface for input of sound speed profile Ethernet or serial line Tide input Ethernet or serial line Single beam echo sounder depths Ethernet Output of all data normally logged to disk to Ethernet Output of depth below keel in NMEA DPT format serial line Output to autopilot in NMEA APB format serial line Technical specifications ...

Page 158: ...ducer module TX2 2 degrees Outline dimensions Length 490 mm Width 224 mm Height 118 mm Weight 50 kg with 5 cables Receive transducer module RX1 1 degree Outline dimensions Length 970 mm Width 224 mm Height 118 mm Weight 56 kg with 4 cables Receive transducer module RX2 2 degrees Outline dimensions Length 490 mm Width 224 mm Height 118 mm Weight 28 5 kg with 2 cables Processing Unit Make and model ...

Page 159: ... mm Weight 11 kg Hydrographic Work Station Make and model Hewlett Packard MP5810 The standard commercial computer has been configured to fit the operational requirements of the EM 712 Outline dimensions Depth 379 mm Width 338 mm Height 100 mm Weight 7 kg Approximately Display Manufacturer Isic http www isic systems com Model MD24 DuraMON WS 24 Outline dimensions Depth 68 mm Width 601 mm Height 408...

Page 160: ...sumption Less than 50 W Processing Unit Make and model Kongsberg Maritime EM PU Voltage requirement 100 to 250 Vac 47 to 63 Hz Maximum power consumption With two CBMF boards 125 W Hydrographic Work Station Make and model Hewlett Packard MP5810 The standard commercial computer has been configured to fit the operational requirements of the EM 712 Voltage requirement 100 240 VAC 50 to 60 Hz autosensi...

Page 161: ...humidity 5 to 95 relative non condensing Ingress protection IP rating IP22 Certificates IEC 60945 2002 and CORRIGENDUM 1 2008 IACS E10 2006 TX Unit Operational temperature 0 to 50 C Storage temperature 30 to 70 C Relative humidity 5 to 93 relative non condensing Ingress protection IP54 Vibration Frequency range 5 to 150 Hz Excitation level 1 g Shock Peak acceleration 15 g Duration 11 ms Half sine ...

Page 162: ...0 Operational temperature 0 to 50 C Storage temperature 20 to 70 C Relative humidity 5 to 95 relative non condensing Certificates IEC 60945 IACS E10 Ingress protection IP rating IP22 This IP rating is only applicable when the unit is mounted using the optional kit for 19 inch rack Display Manufacturer Isic http www isic systems com Model MD22 24 27 DuraMON WS 22 24 27 Operational temperature 15 to...

Page 163: ...401027 B 163 Certificates IEC 60945 IACS E10 Technical specifications ...

Page 164: ... 0 05 m Position z 0 02 m Pitch TX transducer 0 05 degrees RX transducer 0 20 degrees Roll TX transducer 0 20 degrees RX transducer 0 02 degrees Heading 0 10 degrees Relative heading between RX and TX transducer 0 05 degrees Flatness 0 2 mm The mounting structure must not deviate from a flat surface more than 0 2 mm Motion sensor alignment accuracy Position x 0 05 m Position y 0 05 m Position z 0 ...

Page 165: ...401027 B 165 Position sensor alignment accuracy Position x 0 05 m Position y 0 05 m Position z 0 02 m Waterline determination accuracy Position z 0 02 m Technical specifications ...

Page 166: ...e box is used to describe all kinds of cases wooden or cardboard boxes etc used to hold the unit Topics Transporting Kongsberg Maritime equipment page 167 Lifting units and transportation boxes page 168 Inspection of units and transportation boxes after arrival page 170 Specifications for storage prior to installation or use page 171 Unpacking instructions page 173 Specifications for storage after...

Page 167: ...lations must be investigated by the packer shipper before the unit is dispatched Procedure 1 Ensure that all local transportation is done according to the same specifications as for the initial delivery 2 Make sure that the box containing the unit is kept dry at all times and sheltered from the weather It must not be subjected to shocks excessive vibration or other rough handling The box will norm...

Page 168: ...unit before you attempt to lift it 2 Make sure that you have the relevant lifting apparatus required and that this equipment is approved and certified for the load 3 If you need to use a crane a Check the applicable weight certificate for the crane b Check the security of the lifting lugs c If the unit to be lifted is provided with dedicated lifting lugs make sure that all available lugs are used ...

Page 169: ...027 B 169 Note Due to the nature of Kongsberg Maritime s products and the extensive use of delicate electronic parts all units and boxes must be regarded and handled as fragile equipment Equipment handling ...

Page 170: ... or other mishandling 2 If external damage is detected open the box to check its contents Request that a representative of the carrier to be present while the box is opened so any transportation damage can be identified and documented 3 If a unit has been damaged prepare an inspection report stating the condition of the unit and actions taken Describe the damage and collect photographic evidence i...

Page 171: ...s a If a unit is damaged prepare an inspection report stating the condition of the unit and the actions taken Describe the damage and collect photographic evidence if possible Re preserve the equipment b If the unit is not damaged check the humidity absorbing material If required dry or replace the bags then re pack the unit according to the packing instructions 7 If a box has been opened make sur...

Page 172: ...he box used to transport and store such units are clearly marked for example Must not be transported or stored in temperatures below 5 C Other temperature limits may be used if applicable If a unit needs temperature protection the box to be used for storage and transportation must be lined on all walls base and lid using minimum 5 cm thick polyurethane or polystyrene foam Most system units can nor...

Page 173: ...pped from Kongsberg Maritime Note If the unit in question is not unpacked for immediate use you may consider storing it unopened in its original box However it may be useful to open the box to check its contents for damage and retrieve any accompanying documentation Do not use a knife to open cardboard boxes the contents may be located close to the surface and can then be damaged by the blade Proc...

Page 174: ...he carton is open carefully remove all loose packing and insulation material 7 Check for user manuals and other documents that may have been added to the carton during packing 8 Check also for special tools door keys etc Unpacking mechanical units Prior to installation or use mechanical units must be unpacked from their transport boxes It is important that this unpacking is done without inflicting...

Page 175: ... accordingly Note When you handle electronic circuit boards and modules you must beware of the dangers of electrostatic discharge ESD both to yourself and to the equipment In order to ensure safe transport and storage circuit boards and other electronic units will always be wrapped in a clear plastic protective bag and the bag will be sealed Procedure 1 Lift the unit in its bag out of the box Note...

Page 176: ...ducer must always be handled as a delicate item Wrongful actions may damage the transducer beyond repair Observe these transducer handling rules Do not activate the transducer when it is out of the water Do not lift the transducer by the cable Do not step on the transducer cable Do not handle the transducer roughly avoid impacts Do not expose the transducer to direct sunlight or excessive heat Do ...

Page 177: ...401027 B 177 7 Observe the handling rules for transducers Equipment handling ...

Page 178: ...ese must then be reconnected during the installation procedure Units containing batteries are marked Caution Units containing lithium or alkaline batteries must be handled separately and with care Such units are marked accordingly Do not attempt to recharge such batteries open them or dispose of them by incineration Refer to the applicable product data sheets or battery handling procedures for fur...

Page 179: ...401027 B 179 Note Unless otherwise specified transducers and hydrophones must not be stored in temperatures below 10 C and above 50 C Equipment handling ...

Page 180: ...4 waterline determination 165 ambient noise acoustic noise 28 anti fouling paints approved 56 International Marine Coatings 56 Jotun 56 approved anti fouling paints 56 approved anti fouling paints 56 International Marine Coatings 56 Jotun 56 audience this manual 7 auxiliary machinery acoustic noise 26 B blister transducer 37 block diagram 10 book purpose 7 target audience 7 bow thrusters acoustic ...

Page 181: ...nformation 154 heading information 154 motion information 155 position information 154 depth information datagram formats 154 depth rating transducer 161 description ambient noise 28 bow thruster noise 22 cavitation 21 22 26 electrical noise 26 28 flow noise 20 27 Hydrographic Work Station 14 Hydrographic Work Station rear panel 132 interference 27 machinery noise 26 origin in the vessel coordinat...

Page 182: ...unt transducer installation principle 38 functional diagram 10 G gondola transducer installation 36 GPS information datagram formats 154 grounding requirements sonar room 18 gyro information datagram formats 154 H handling transducers 53 heading information datagram formats 154 heading sensor alignment specifications 164 heating requirements sonar room 18 how to design manufacture and mount the st...

Page 183: ...erconnection cables 113 M machinery noise acoustic noise 26 main engine acoustic noise 26 mains power requirements 160 manual purpose 7 target audience 7 mechanical unit unpacking 174 minimum dimensions steel conduit 44 minimum requirements steel conduit 44 monitor environmental requirements 162 outline dimensions 159 power requirements 160 weight 159 motion information datagram formats 155 motion...

Page 184: ...allation 39 principle installation flush mounted 38 procedure designing manufacturing and mounting the steel conduit 44 installing the casings 42 installing the mounting frames 47 installing the Receiver Unit 64 installing the transducer into the mounting frame 49 installing the Transmitter Unit 60 lifting units and transportation boxes 168 preparing the transducer installation 39 transporting Kon...

Page 185: ...voltage 160 power consumption 160 shock 161 storage temperature 161 vibration 161 weight 159 RXU installation 64 S self noise acoustic noise 25 sensors interface specifications 154 serial line RS 232 cable specifications 135 RS 422 cable specifications 136 Serial Line adapter D connector to RJ45 137 wiring 137 shipyard cables description 105 shock RX Unit 161 TX Unit 161 signal characteristics clo...

Page 186: ...ing 79 81 83 operating temperature 161 outline dimensions drawing 71 73 75 77 preparing the installation 39 slamming 21 storage temperature 161 unpacking 176 weight 158 transducer blister design 37 transducer gondola description 36 transducer handling important rules 53 transducer installation gondola 36 transmit transducer cable identification table 122 cable marking 119 Transmitter Unit brief de...

Page 187: ...cifications 165 website download documents 8 weight display 159 Hydrographic Work Station 159 Processing Unit 158 RX Unit 159 specifications 158 transducer 158 TX Unit 159 wiring list of system interconnection cables 113 wiring diagram Hydrographic Work Station 113 Processing Unit 107 Receiver Unit 110 Remote Control Unit K Rem 98 topside 113 Transmitter Unit 108 worker skills requirements for ins...

Page 188: ... 2018 Kongsberg Maritime ...

Reviews: