background image

3

1306246-W2-D

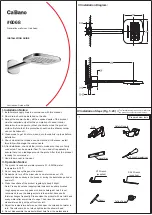
9.  Installation of the shower must be carried out in accordance with 

these  instructions  by  qualified,  competent  personnel.  Read  all 

instructions before installing the shower.

10. 

DO NOT

 switch the shower on if water starts leaking from the shower 

case. Isolate the electrical supply to the shower immediately.

11. 

DO NOT

 switch the shower on if the case appears to be damaged 

or  incorrectly  fitted.  Isolate  the  electrical  supply  to  the  shower 

immediately.

12. 

DO NOT

 increase the power setting or adjust the temperature 

control rapidly while using the shower.

13. 

DO NOT

 switch the shower off and back on while standing in the 

water flow.

14. 

DO NOT

 change the handset model. Fit only shower heads 

recommended by Mira and do no fit any additional device to restrict 

the water outlet flow. 

15. When adjusting the handset mode, point handset away from body 

and make sure that the water temperature has stabilised before 

continuing to shower.

16. Use caution when altering the water temperature, always check 

the temperature before continuing to shower.

17. Switch the shower off at the electrical isolating switch when not in 

use. This is recommended with all electrical appliances.

18. Installation of the shower must be carried out in accordance with 

these  instructions  by  qualified,  competent  personnel.  Read  all 

instructions before installing the shower.

19. Isolate the electrical and water supplies before commencing 

installation. The electricity must be isolated at the consumer unit 

and the appropriate circuit fuse removed, if applicable. Mains 

connections are exposed when the cover is removed.

20. 

DO NOT

 install the shower in areas with high humidity and 

temperature (i.e. Steam rooms and saunas).

21. 

DO NOT

 install the shower where it may be exposed to freezing 

conditions. Ensure that any pipework that could become frozen is 

properly insulated.

Summary of Contents for Mira Advance 8.7

Page 1: ...06246 W2 D Installation Guide These instructions must be left with the user THERMOSTATIC ELECTRIC SHOWER Mira Advance 8 7 and 9 8 kW For SPARES ADVICE or REPAIRS please call us free on 0800 001 4040 UK only ...

Page 2: ...uction concerning use of the appliance in a safe way and understand the hazards involved 2 Children shall not be allowed to play with the shower 3 DO NOT restrict the water flow from the shower outlet temporarily bending the shower hose or blocking the shower head while in use can cause a hot shot of water to be discharged 4 Cleaning and user maintenance shall not be made by children without super...

Page 3: ...et mode point handset away from body and make sure that the water temperature has stabilised before continuing to shower 16 Use caution when altering the water temperature always check the temperature before continuing to shower 17 Switch the shower off at the electrical isolating switch when not in use This is recommended with all electrical appliances 18 Installation of the shower must be carrie...

Page 4: ...he product or pipework is at risk of freezing during this period they should also be drained of water 27 If the shower is dismantled during installation or servicing then upon completion an inspection must be made to ensure all electrical connections are tight and that there are no leaks 28 This appliance is intended to be permanently connected to the water mains and not connected by a hose set 29...

Page 5: ...nstructions and recommendations Follow all warnings cautions and instructions contained in this guide and on or inside the shower This guide is also available in digital format from our website or by contacting customer services Electrical and electronic devices contain a range of materials that can be separated for recycling and used in new products This product should not be disposed of with you...

Page 6: ... showers be installed Domestic Household use in ordinary domestic premises Light Commercial Residential Setting e g Accommodation covering student let halls hotels guest houses hostels Heavy Commercial Public Setting covering sport leisure Public factory washroom etc Healthcare Use of a product in a residential care home health surgery hospital Products must be BEAB Caremark approved For domestic ...

Page 7: ...ed 1 x Compression Nut 2 x Fixing Screws 2 x Wall Plugs 1 x Cover Insert 1 x Olive OR 1 x Installation Guide 1 x User Guide 1 x Guarantee Card 1 x Mira Advance Standard 1 x Mira Advance Flex or Flex Extra Instantmatch by Whale Pump supplied separately Documentation 1 x Quick Start Guide 1 x Installation Template Pack Contents ...

Page 8: ...use Circuit Breaker 8 7 kW 40 Amps 9 8 kW 45 Amps Residual Current Device RCD 30 mA Supply Cable No larger than 16 mm Note Refer to current IEE regulations and BS 7671 to determine minimum cable size Isolation Switch 45 Amp Double pole with 3 mm contact separation Maximum Ambient Temperature 30 C Minimum Ambient Temperature 2 C Ingress Protection Rating IPX4 suitable for installation within Zone 1...

Page 9: ... on kW rating and the duration and frequency of use 8 7 kW 9 8 kW Load Profile XS XS Efficiency Class A A Efficiency 39 2 39 2 Daily Electricity Consumption kWh 2 159 2 157 Annual Electricity Consumption kWh 471 471 Sound Power Level dB 15 15 Standards and Approvals The Mira Advance complies with the requirements of the BEAB Care Mark Standard and the relevant directives for CE marking The BEAB Ca...

Page 10: ...hole in the wall provision must be made to prevent water ingress back into the wall structure Route cable and pipe supplies via the cut outs moulded in the case and cover DO NOT perform any unspecified modifications to the shower or its accessories Drilling fixing holes or making water or electrical entry points outside of the showers designed areas can lead to uncontrolled water ingress This coul...

Page 11: ...o the sides of the shower or use a sealant around the case Failure to do this may cause appliance failure To ensure the case and other components are not put under strain during installation always provide mechanical support when making plumbing connections Upon completion of the installation ensure connections and back case are not under any stress due to misaligned pipework or electrical cables ...

Page 12: ...e a pressure build up which affect the maximum static inlet pressure for the appliance and must not be fitted For Fluid category 5 double check valves are not suitable Refer to section Important Safety Information first 1 In a domestic installation the rating of the electricity supplier s fuse and the consumer unit must be adequate for the additional demand All Mira Advance electric showers are hi...

Page 13: ...t already provided 5 A separate permanently connected supply must taken from the consumer unit to the appliance through a double pole switch which has at least 3 mm contact separation The switch can be a ceiling mounted pull cord type within the shower room or a wall mounted switch in the applicable zone area 6 DO NOT exert strain on the terminal block Make sure that the electrical connections are...

Page 14: ...OVER ASSEMBLY GREY A BLUE A BROWN A GREEN B TERMINAL BLOCK RELAY PCBA BLACK A INLET CONNECTOR ASSEMBLY FLOW VALVE ASSEMBLY N L GREEN A BLACK B BLACK D BLACK C TANK ASSEMBLY RED A BROWN B Shower Unit Wiring Diagram Standard and Flex Product Only ...

Page 15: ... fixing holes Do not drill through the shower unit into the wall Plaster and brick dust will damage the internal components of the product DO NOT drill into buried cables or pipes Note Make sure that you mark a minimum of two fixing holes one at the top and one at the bottom THERMOSTATIC ELECTRIC SHOWER Mira Advance 8 7 and 9 8 kW Kohler Mira Limited July 2017 Installation Template 1327483 W7 A Op...

Page 16: ... the cover the service tunnel and the bungs Determine the cable and pipe supply either top or bottom or rear connection Turn the inlet connector to suit supply pipe Do not trap the green wire Complete any soldering required away from the appliance 3 4 ...

Page 17: ...tely 1 minute prior to connection 1 Min 1 Min DO NOT REMOVE TO FLUSH THE PRODUCT 5 Drill the fixing holes through the plastic case in the designated areas as required Route the signal cable to the shower drain pump if applicable Fix the appliance to the wall Use appropriate screws and wall plugs for fixing Note Make sure that the product is securely fixed to the wall 6 ...

Page 18: ...ant Priming the Shower Make sure that the electrical supply is isolated To prime the appliance push down and hold the air bleed button until water flows from the hose and water leaks from the air bleed button Do this for a minimum of 10 seconds and repeat this procedure 3 times Failure to prime the appliance will seriously affect the shower performance Note Water will leak from bleed button Carefu...

Page 19: ...trical cable into the case Firmly connect the conductors DO NOT exert strain on the terminal block N Blue or Black Green or Yellow Green L Brown or Red N L Refit the service tunnel Important Refer to set up before fitting the front cover ...

Page 20: ...ABLE WIRED PUMP MODE 1 2 3 4 5 6 7 8 BEAB CARE MODE OFF ON 43 DEG C 45 DEG C RESERVED 1 ECO RESERVED 2 BLE PUMP ENABLE WIRED PUMP MODE 1 2 3 4 5 6 7 8 BEAB CARE MODE OFF ON 43 DEG C 45 DEG C RESERVED 1 ECO RESERVED 2 BLE PUMP ENABLE WIRED PUMP MODE 1 2 3 4 5 6 7 8 BEAB CARE MODE OFF ON 43 DEG C 45 DEG C RESERVED 1 ECO RESERVED 2 BLE PUMP ENABLE WIRED PUMP MODE You must set the product up to ensure...

Page 21: ...755 678 ThebluetoothoperationoftheAdvanceFlexExtra J09N will only work with a Whale bluetooth transformer Pre vious Whale RF wireless transformers will not connect to the bluetooth Advance Important Information Regarding Bluetooth Range Correct operation of the shower and pump relies on the strength of the bluetooth signal between them You must install the Whale Pump and Bluetooth transformer as a...

Page 22: ...Hardwired Connection WIRED PUMP MODE set to ON or OFF depending which wired transformer used see transformer table If you are exchanging this Advance for a previous model J97 that is using a pump driver board 1 Remove and discard the driver board and its ribbon cable connections 2 Cut the connector block off the end of the 2 wires coming into the shower from the waste pump 3 Connect the two wires ...

Page 23: ...nnect to Wired Pump Relay PCB CN13 CN13 CN13 Brown Black Red Advance Relay Board Showing Hardwired Connection to the Transformer Configuration 1 Configuration 2 From Transformer TERMINAL BLOCK N L Brown CN13 White 3 wires signal cable connection to relay board 2 wires signal cable connection to relay board Caution Take care not to damage the relay board when making connections Important Make sure ...

Page 24: ...30Vac 50Hz 800mA Fuse T5A Duty Cycle 30min 60min This transformer is only for use with SDP021T Shower Drainage Pump Type 755 549 IP 45 30 C Max Class II Indoor use only F Jumper Layout See Instructions Post installation To perform any change to jumper settings the power supply must be switched off for 30 seconds prior to the change being made Off Delay Seconds 10 30 Gems Sensor Venturi Sensor Mira...

Page 25: ... the Start Stop light will show white rather than showing a flashing blue Status indication If an error code B is displayed Start Stop off with Status flashing yellow on pressing the Start Stop button the shower may not be paired correctly Unpair the shower see page 24 and repeat the steps above Bluetooth Pairing 1 2 3 4 5 6 7 10 30 60 1 2 Make sure that the BLE PUMP ENABLE switch is set to ON Tur...

Page 26: ...mp still on The light will flash blue Press the start button and hold until the light flashes red again The pump is now unpaired After unpairing and if required follow procedure for bluetooth pairing to pair 1 1 2 3 1 2 3 4 5 6 7 10 30 60 1 2 1 2 3 4 5 6 7 10 30 60 1 2 1 2 3 4 5 6 7 10 30 60 1 2 Some spare part renewal e g control PCB may require the shower and pump to be unpaired and then paired ...

Page 27: ... pressed 3 times for BEAB mode The white start stop and blue status light will pulse and shower will beep again After a few seconds the shower will beep again and the lights will go solid This will confirm flow and cold temperature 5 secs Turn on the power to appliance check Start Stop for white light x1 Push Start Stop to turn off appliance Pulsing start stop light and beep indicates that applian...

Page 28: ...e power to appliance check Start Stop for white light Note The shower will beep 3 times if set to BEAB mode 8 9 10 Start the shower to test for water flow The shower will beep once 3 times when set in BEAB mode and the white start stop light and orange status light green in BEAB Mode will pulse Wait until the lights go solid and the shower will beep again Push Start Stop to turn off appliance Puls...

Page 29: ...by a competent tradesperson and when doing so they should be aware of the following Isolate the electrical and water supplies before initially removing the cover Make sure Ribbon Cable is disconnected when removing the front cover and reconnect when maintenance is complete Mains connections are exposed when the cover is removed Refer to wiring diagram before making any electrical connections Make ...

Page 30: ...r minimum pressure information 3 Is the shower being connected to a waste pump TheAdvance Flex Extra J09N is designed to be wireless connected via Bluetooth to the Whale Bluetooth transformer or hardwired to other transformers Refer to both Mira and Whale Bluetooth Set Up and Hardwired connection information Note Faults with loss of communication or pairing can be due to installation issues if a B...

Page 31: ... Stop Status Code Cause Initial Action Flashing Flashing Red A No water supply Low pressure Blockage or restriction Confirm water turned on Check water pressure Check filter hose showerhead and bleed valve Flashing Red Yellow D Over temperature detected by the outlet thermistor Purge the flow valve 3 x 10 secs ensuring cold water coming from the showerhead Flashing Red Blue F Over temperature dete...

Page 32: ... Thermistor fault Check thermistor connection CN3 to relay board Contact customer services Flashing Red Blue E Flow Valve fault Contact customer services Flashing Red White H Cover PCB failure Contact customer services Off L Electrical Fault Check power to the shower Should the fault remain after the initial action press and hold the Start Stop button and note the Status light sequence Off Flashin...

Page 33: ...d 12 months between any two inspections Equipment Required The following equipment or suitable equivalent will be required in order for the tests to be performed Digital Multimeter 100 mm diameter plastic funnel Digital liquid thermometer accurate to 0 1º C 2 22 l min flow measure cup Pass Fail Criteria If the outlet water temperature measured in step 14 has changed by more than 1º C since the pre...

Page 34: ... clockwise 10 Switch on the electrical supply Start the shower and allow it to run for at least 10 seconds then record the supply voltage at the terminal block 11 Stop the shower and isolate the electrical supply 12 Refit the showerhead to the hose and reattach to its holder 13 Switch on the electrical supply to the shower and start the shower 14 Using a plastic funnel catch all the water flowing ...

Page 35: ...rom cover Hold a spanner or other suitable grips across flats of the metal connector Unscrew filter using another spanner as shown Clean or replace filter as necessary Refit filter making sure it is screwed fully home Do not overtighten Make sure all plumbing connections are sealed before restoring water supply Re prime appliance refer to Installation before restoring electricity supply Refit spla...

Page 36: ...nal Block Earth Wire Neutral Wire 1785 590 Relay Board 1785 591 Service Inserts 1643 277 Earth Wire Harness 1785 628 Pump Connector Male 1785 593 Cover Assembly Std 1785 594 Cover Assembly Flex 1785 595 Cover Assembly Flex Extra B B B 1785 592 Service Tunnel A 416 38 Clamp Bracket A 1643 149 Flow Valve Assembly 1785 596 Control PCB Screws 1785 597 Control PCB 1785 598 Control PCB Flex Extra with B...

Page 37: ...ncluding details of all measurement equipment used This form is available to download at www mirashowers co uk Date Not Operating Normal Operation Restricted Supply Date Signature Terminal Block Voltage V Inlet Water Temp ºC Inlet Filter Cleaned Terminal Block Voltage V Outlet Water Temp ºC Flow Rate l min Outlet Water Temp ºC Flow Rate l min Equipment Details make model serial number calibration ...

Page 38: ...38 1306246 W2 D Notes ...

Page 39: ...39 1306246 W2 D Notes ...

Page 40: ... Road Cheltenham Gloucestershire GL52 5EP 14648 Guarantee Your product has the benefit of our manufacturer s guarantee which starts from the date of purchase This guarantee only applies in the United Kingdom and Republic of Ireland Activating Your Guarantee Registering your guarantee is quick and simple To ensure your product is covered please register online Scan the QR code to activate your guar...

Reviews: