


KNIGHT D-SERIES SERVO HOIST OPERATION MANUAL
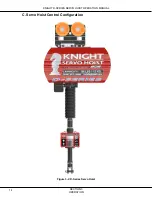
SECTION 3
OPERATION
16
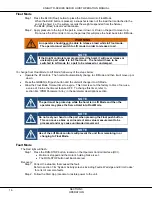
Float Mode
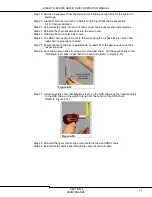
Step 1. Press the BLUE (Float) button to place the Servo Hoist into Float Mode.
When the BLUE button is pressed, a snapshot is taken of the load that is attached to the
end of the hoist (i.e. the system records the weight suspended from the fixture).
The BLUE (Float) indicator will illuminate.
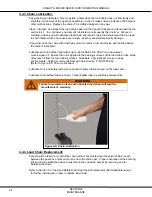
Step 2. Apply pressure to the top of the part to move it down or lift up on the part to move it up.
Do not use the lift controls to move the part as this will place the hoist back into Lift Mode.
WARNING
An operator should never be able to release a load while in Float mode.
The operator must switch to Lift mode in order to release a load.
NOTE
If the Knight controls team programmed the hoist, it will never release or
unclamp a part while it is in Float mode. The hoist will have to be
switched to Lift mode for a part to be released or unclamped.
To change from Float Mode to Lift Mode, follow any of the steps below:
Operate the lift controls. The hoist will automatically change to Lift Mode and then it will move up or
down.
Press the GREEN (Lift) push button and the unit will change into Lift Mode.
Allow the Float Mode Timeout timer to expire. This timer is set at the factory to 0ms of non-use,
a value of 0 turns the timeout feature OFF. To change this timer, refer to
section 6G. ‘tPRM Parameter Array’ in the parameter descriptions section.
NOTE
The part must be picked up while the hoist is in Lift Mode and then the
operator may place the Servo Hoist into Float Mode.
NOTE
Do not rest your hand on the part when pressing the Float push button.
This can cause a bias or an incorrect zero value measurement to be
processed and may cause unintended movement.
NOTE
Use of the Lift Mode controls will prevent the unit from remaining in or
changing to Float Mode.
Fault Mode
The Red light will flash.
Step 1. Press the RUN-STOP button, located on the Operator Control Interface (OCI).
Motion is stopped and the motor’s holding brake is set.
The RUN-STOP button will illuminate red.
Recovery:
Step 1. Correct the situation that caused the fault.
Refer to section 7.B. “System Activity screens including Faults, Warnings and Error Codes”
for a list of common faults.
Step 2. Follow the Start Up procedure to restore power to the unit.


