


KCH-16
10
●
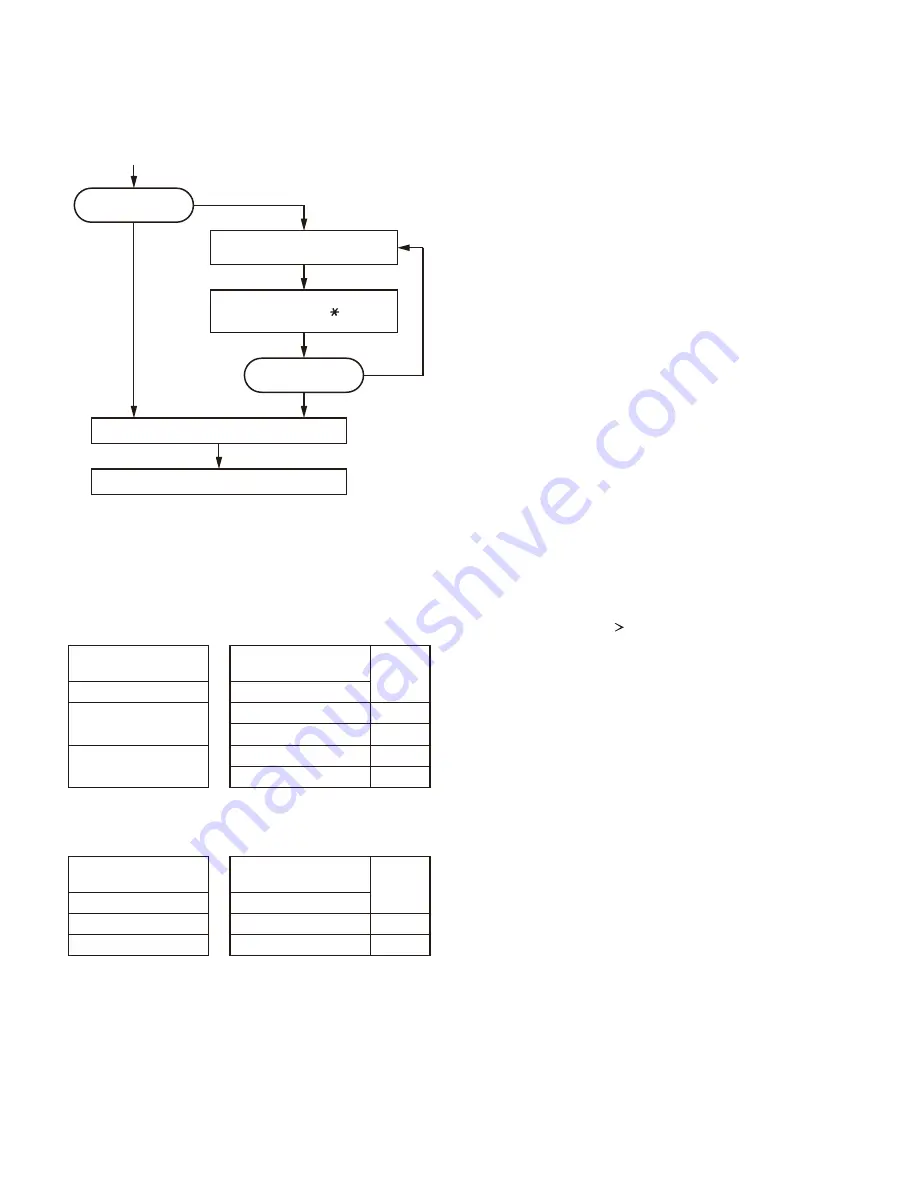
Flow Chart (Source transceiver)
[Power ON
Is Read password
set?
“CLONE LOCK”
is displayed.
Yes
Yes
[S]
No
No
Enter the password and then
press the [S] and [ ] keys
on the KCH-16.
Start the clone function
“CLONE MODE” is displayed.
Is password
correct?
●
Clone operation depending on hardware and
fi rmware versions (TK-5710/5710H only)
When Clone is executed between transceivers using dif-
ferent versions of hardware and fi rmware, the Clone opera-
tion is as follows.
• Cloning between transceivers using hardware version 1
Source transceiver
(Hardware version 1.0)
Target transceiver
(Hardware version 1.0)
Clone
operation
Firmware Version
Firamware Version
~V1.04
→
~V1.04
Yes
V1.05~V2.99
No
V1.05~V2.99
→
~V1.04
No
V1.05~V2.99
Yes
Yes : Cloning is possible
No : Cloning is not possible
• Cloning from hardware version 1 to hardware version 2
Source transceiver
(Hardware version 1.0)
Target transceiver
(Hardware version 2.0)
Clone
operation
Firmware Version
Firamware Version
~V1.04
→
F3.00~
No
V1.05~V2.99
→
F3.00~
Yes
Yes : Cloning is possible
No : Cloning is not possible
Note:
Under certain conditions, cloning cannot be performed even
if you are using a proper hardware and fi rmware combina-
tion. Refer to the FPU for more details.
10. Self Programming Mode
Write mode for frequency data and signaling etc. To be
used ONLY by the authorized service person maintaining the
user’s equipment. After programming, reset the FPU to the
“Self- Programming” disabled mode. Transceivers CANNOT
be delivered to the end-user in the self-programming mode.
The following setup items in the channels programmed
by the FPU can be changed using the self-programming
mode. The addition of new channels and the deletion of
channels that have already been programmed by the FPU
cannot be performed using the self-programming mode.
• RX Frequency
• TX Frequency
• Channel Type
• TX Mode (When the channel type is selected “MIXED”.)
• Channel Spacing
• RX Signaling
• TX Signaling
• RX NAC
• TX NAC
• Talkgroup List No.
Note:
The personality will be also changed when the abovemen-
tioned items are changed. (Refer to the FPU for the person-
ality details.)
10-1. Enter to the self programming mode
Press and hold the [ ] key while turning the transceiver
power ON. Ignoring whether the Read authorization pass-
word is set or not, “PASSWORD” appears.
If the Read authorization password is not set to the trans-
ceiver, “SELF PG MODE” is displayed on the LCD when the
[A] key is pressed while “PASSWORD” is displayed.
If the password is set to the transceiver, “SELF PG
MODE” is displayed on the LCD when you enter the correct
password while “PASSWORD” is displayed.
For the password input method, see “9. Clone Mode”
step 3 described on page 9.
Note :
This mode (self programming mode) cannot be set when it
has been disabled with the FPU.
10-2. Data writing
If the [C] key is pressed while Zone/Channel mode is
displayed, new data is written into memory. “WRITING” is
displayed while the transceiver is writing data.
REALIGNMENT


