20
Prueba de la cerradura
interior
Testing the operation of
the inside lock
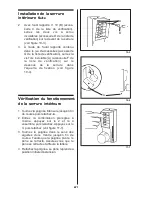
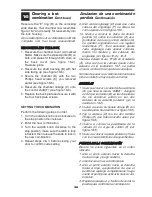
1. Turn the inside knob all the way until it
stops, then release it.
2. Enter the factory set combination:
depress buttons 2 and 4 simultaneously
(release), then depress button 3 (release)
(see figure 11-1).
3
.
Turn the knob clockwise to the stop
position. As the knob turns, the latch will
retract. Make sure the latch retracts fully
(flush with the latch face plate).
4. Release the knob. The latch will return to
the fully extended position.
1. Gire el pomo interior hasta el tope y
suéltelo.
2. Introduzca la combinación que viene de
fábrica: oprima los botones 2 y 4 al
mismo tiempo (lanzamiento); luego opri-
m
a
el botón 3 (lanzamiento)(véase la ilus-
tración 11-1).
3. Gire el pomo hacia la derecha hasta el
tope. El pestillo se replegará. Asegúrese
de que se queda totalmente replegado
(al ras con la placa de recubrimiento).
4. Suelte el pomo. El pestillo debe volver a
salir completamente.
11
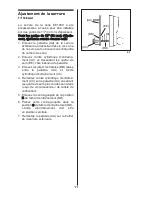
Instalacion de la cerradura del
lado de adentro
Continuación
Installing the inside lock
Continued
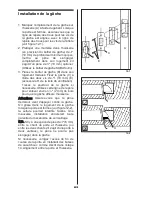
2. Use the #10 insert bit (B) included in the
accessory pack (item “C” on checklist) to
screw in the two anti-tamper spanner
type screws (A) (item “D” on checklist)
through the face of the inside lock (see
figure 10-3).
3. Use the torx anti-tamper tool bit
included in the accessory pack (item “G”
on checklist) to install the anti-tamper
torx-type screw (A) (item “F” on checklist)
through the bottom of the lock into the
angle bracket. (see figure 10-4).
2. Utilice la broca de inserción número 10
(B) que viene en el paquete de acceso-
rios (artículo “c” de la lista de verificación)
para introducir los dos tornillos invio-
lables para llave de tuercas (A) (artículo
“d” de la lista de verificación), a través de
la cara de la cerradura interior (véase la
ilustración 10-3).
3. Utilice la broca Torx que viene en el
paquete de accesorios (artículo “g” de la
lista de verificación) para instalar el
tornillo Torx inviolable (A) (artículo “f” de la
lista de verificación) en el soporte en
escuadra, atravesando la parte inferior de
la cerradura. Véase la ilustración 10-4.
10
Summary of Contents for SIMPLEX EE1000 Series
Page 23: ...Notes ...


