


13 Configuration – in setup program only
152
13.2.1
Establishing the connection to the device
First of all, you will see from the connection symbol on the menu panel that a device has not
yet been connected.
The following possibilities are available for connecting the device:
Via USB device interface
➥
USB connection established
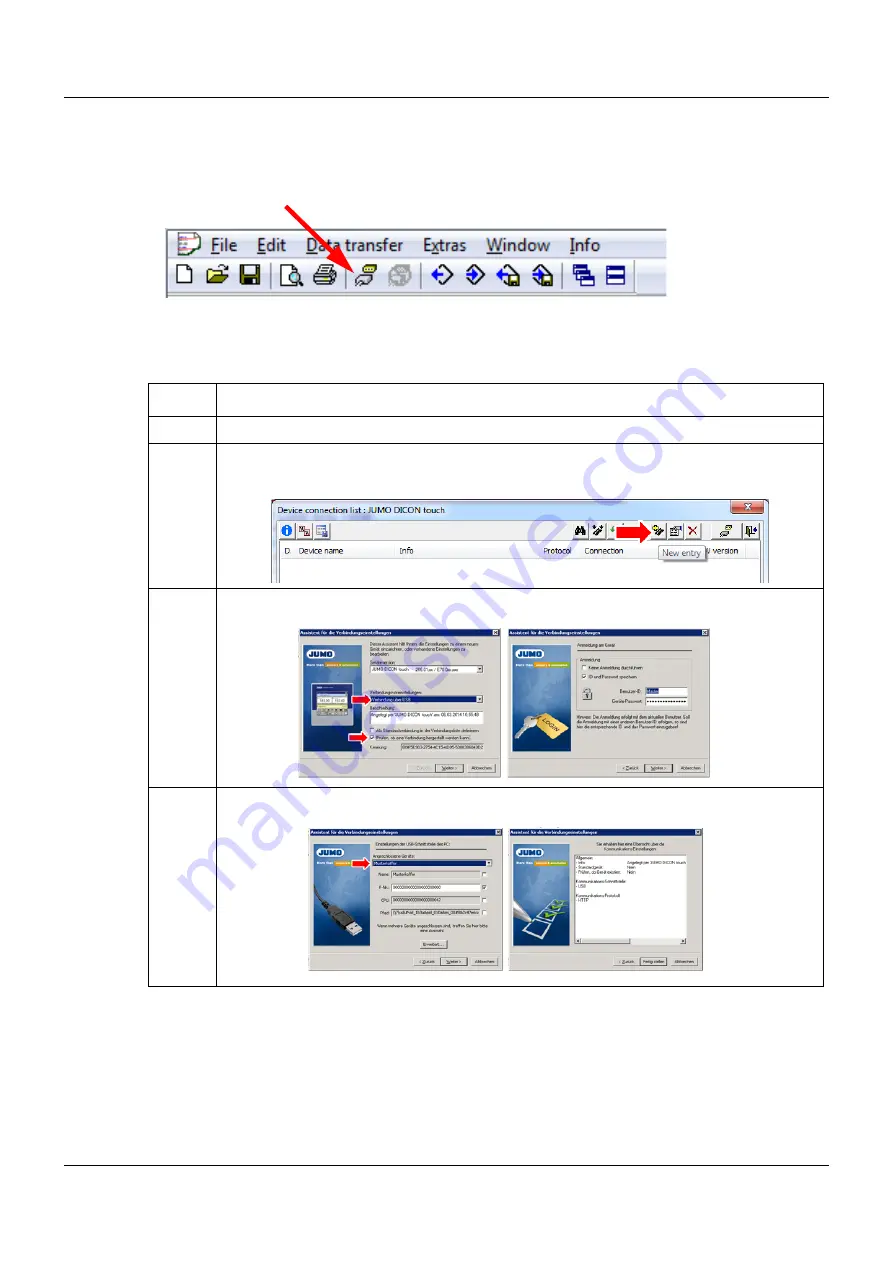
Step
Activity
1
Connect USB interfaces between the device and the PC
2
Click on
C
ONNECT
and the empty connection list will appear.
Click on
N
EW
ENTRY
3
Select Connection via USB and click
N
EXT
4
Select the USB connection and click Finish
Summary of Contents for DICON touch
Page 2: ......
Page 8: ...Table of contents 8 18 2 DIN 193 19 China RoHS 195...
Page 36: ...4 Electrical connection 36...
Page 44: ...5 Operation 44...
Page 56: ...9 Device info 56 9 5 Ethernet 9 6 PROFINET...
Page 58: ...10 Functional level 58...
Page 66: ...11 Parameterization 66...
Page 150: ...12 Configuration 150...
Page 172: ...14 Special functions 172...
Page 180: ...15 Online parameters 180...
Page 182: ...16 Error and alarm messages 182...
Page 187: ...187 18 Approvals approval marks 18 1 GL...
Page 188: ...18 Approvals approval marks 188...
Page 189: ...189 18 Approvals approval marks...
Page 190: ...18 Approvals approval marks 190...
Page 191: ...191 18 Approvals approval marks...
Page 192: ...18 Approvals approval marks 192...
Page 193: ...193 18 Approvals approval marks 18 2 DIN...
Page 194: ...18 Approvals approval marks 194...