PRESET MODE: GRAPHIC DISPLAY
10 | QUICK START
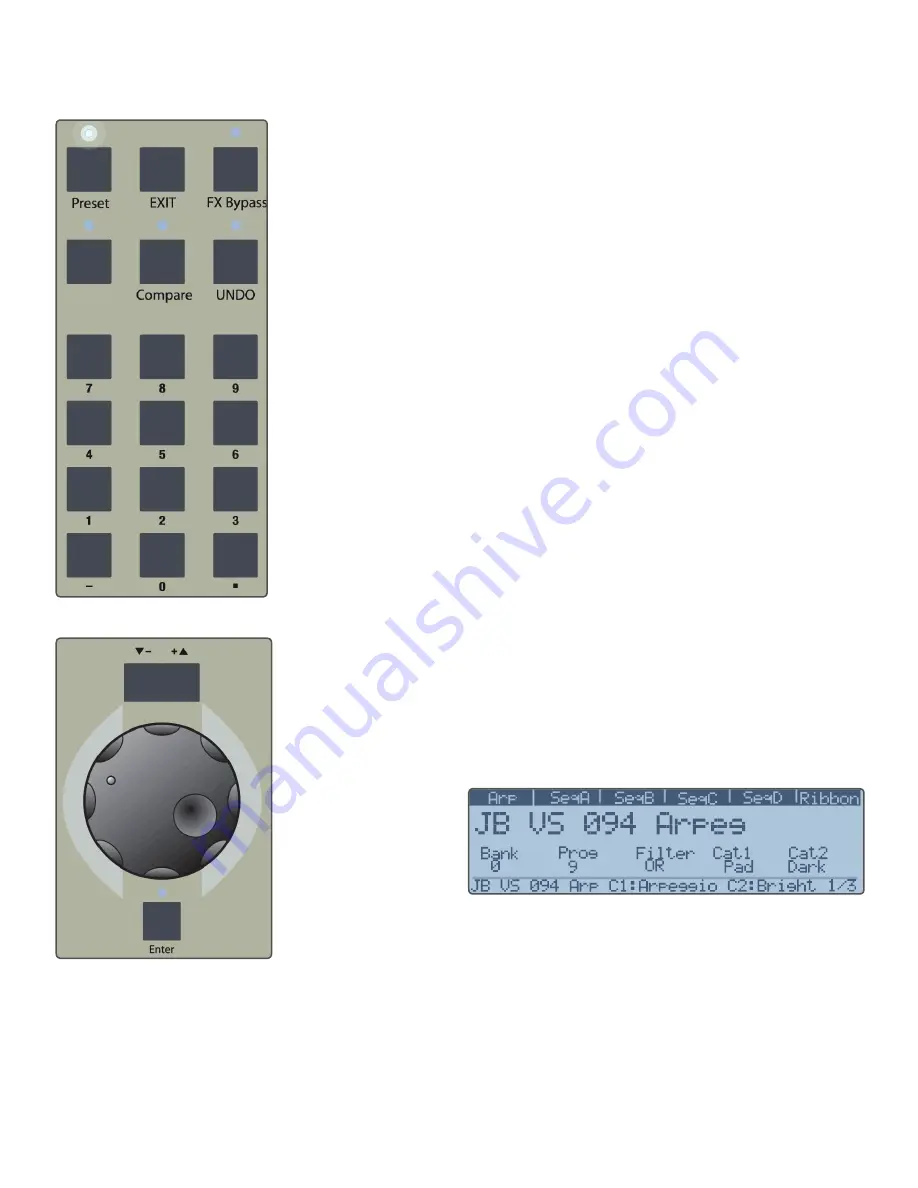
get a short message about the CF card, and the Preset
LED should be lit, as shown in Figure 2. If it isn’t, press the
Preset
button.
Figure 2.
Store
Numeric Keypad
Figure 3. Data Wheel
There are several ways to select presets:
3. Use the
Inc/Dec
buttons right above the
Data Wheel
as
shown in Figure 3. This automatically loads each preset
as you step one by one through the bank.
4. Use the
Data Wheel
to scroll through presets. When
you see the one you want, press
Enter
to load.
5. Use the keypad to directly enter a Preset number. You
must press
Enter
to load the preset.
6. Use the knobs below the Graphic Display to dial up dif-
ferent Presets or Banks. You must then press
Enter
to
load the preset.
A more convenient way to select various Banks is to use
the keypad, as follows:
Any number pressed on the keypad that is followed by the
decimal point button (dot) will be used as the selected Bank
number. Any number following that will be used to select
the Program number. If no new bank number is entered,
i.e., you do not press the dot, then any number entered will
be used as a Program number for the current bank. So, for
example, to select Bank 3, Program 12, you would press
3.12
then
Enter
.
Preset Mode: Graphic Display
Preset Mode is enabled when you press the
Preset
button
(above the numeric keypad) on, so that its LED is lit. This
must be on to select any presets. As soon as an edit is
made anywhere on the front panel, the Solaris will automat-
ically leave Preset Mode to allow for editing, so when you
want to play through the presets, make sure this
Preset
button is lit.
You must have a CompactFlash (CF) card inserted
to select presets!
For most all of the Graphic Display functions there will be
a pair of numbers on the lower right-hand corner. These
indicate which page of the current functional group you are
on, out of how many total pages there are for that functional
group. For Preset Mode, there are 3 such pages, shown as
1/3, 2/3, and 3/3. (You can read these as page 1 of 3, page
2 of 3, page 3 of 3.) You use the up/down buttons to the
left of the display to access these pages. Note: these are
always working in ‘wrap around’ mode.
Figure 4. Preset Mode, page 1
The first page of Preset Mode, as shown in Figure 4, dis
-
plays the preset name, MIDI Bank and Program number,
and the Category logic and Filtering. The bottom line of the
Graphic Display will always show you current information
when any knob is selected. The initial data displayed when
selecting a Preset is the preset name and the two pro-
grammed categories (if there are any programmed), shown
as C1: and C2:
Summary of Contents for Solaris
Page 1: ...User Guide Version 1 ...


