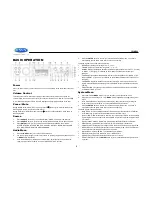
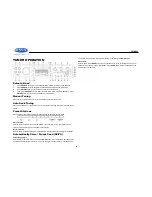
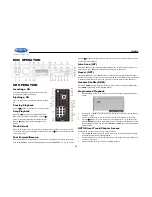
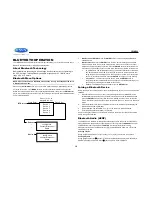
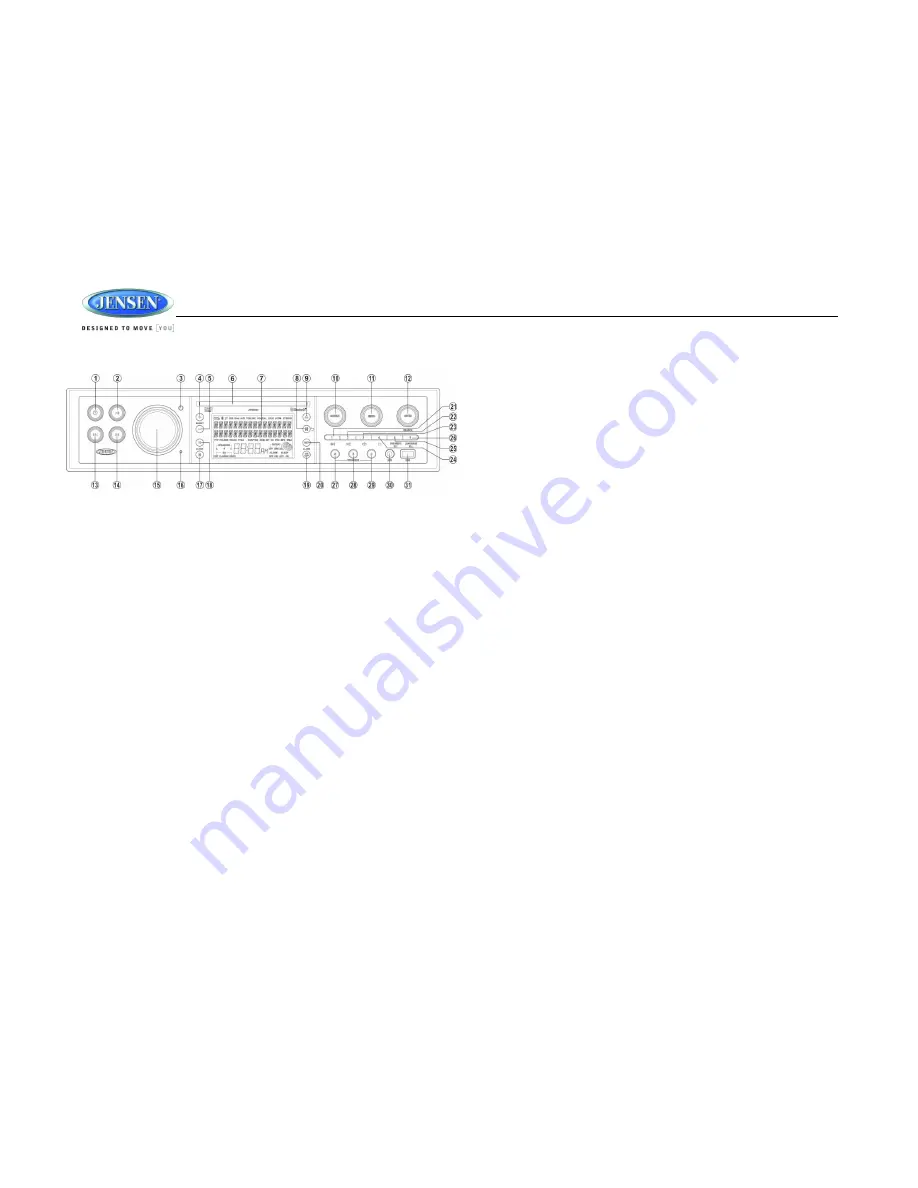
background image


JWM990 


5


BASIC OPERATION 


Power   

Press the power button (1) to turn the unit on. The unit will resume at the last mode (Tuner, Aux, 

etc.). 

Volume Control 

To increase the volume, rotate the volume encoder knob (15) clockwise. To decrease the 

volume, rotate the volume encoder knob (15) counter-clockwise. The maximum volume setting 

is 

“40”. While adjusting the volume, the LCD displays numerical representation of the level. 

Pause / Mute 

During RADIO / WB / COAX / OPTIC mode, press the 

|| 

button (2) to mute the audio output. 

Press again to restore the previous volume level. 

During USB / iPod / DVD / BT mode, press the 

|| 

button to pause playback. Press again to 

resume playback. 

Source 

1. 

Press 

SOURCE


button (10), the LCD will display “MODE” and enter mode selection. 

2. 

Press 

SOURCE

 button to cycle through the available modes and choose desired mode. 

3. 

Press 

ENTER 

button (12) to confirm the mode selection. Available modes include 

BLUETOOTH, FRONT AUX, REAR AUX, COAXIAL, OPTICAL, RADIO (AM/FM), USB, 
iPod, DISC (CD/VCD/DVD) and WEATHERBAND. 
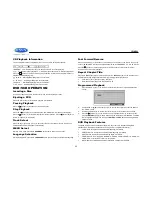
Audio Menu 

1. 

Press the 

MENU 

button (11) to access the audio menu.   

2. 

You can navigate through the audio menu items by pressing the 

|<< or >>| 

buttons (14, 13) 

or 

MENU

 button repeatedly.   

3. 

Once the desired menu item appears on the display, adjust that option by rotating the 
volume encoder knob clockwise or counter-clockwise within 5 seconds 

4. 

Press the 

ENTER 

button to confirm your selection and exit audio menu. The unit will 

automatically exit the audio menu after 5 seconds of inactivity. 

The following audio menu items can be adjusted:   


BASS: Adjus

t the Bass level range from “-7” to “+7”. 


TREBLE: Adjust 

the Treble level range from “-7” to “+7”. 


BALANCE: A

djust the Balance between the left and right speakers from “LEFT 7” (full left) 

to “RIGHT 7” (full right). “0” indicated an equal balance between the left and right 
speakers. 


FADE: Adjust the speaker fade between the 

rear and front speakers from “REAR 7” (full 

rear) to 

“FRONT 7” (full front). “0” indicated an equal balance between the rear and front 

speakers. 


LOUDNESS: Toggle the loudness on/off. When listening to music at low volumes, this 
feature will boost the bass/treble ranges to compensate for the characteristics of human 
hearing. 


EQUALIZATION: Choose one of the following pre-defined bass and treble curves: POP > 
CLASSICAL > ROCK > FLAT. 

System Menu 

1. 

Press and hold 

the 

MENU

 button (11) for 2 seconds to enter the system menu.   

2. 

Press the 

|<< 

or

 |>>

 buttons (13, 14) or 

MENU

 button repeatedly to navigate the system 

menu. 

3. 

Once the desired menu item appears on the display, adjust that option by rotating the 
volume encoder knob clockwise or counter-clockwise within 10 seconds. 

4. 

Press the 

ENTER 

button to confirm your selection and exit audio menu. The unit will 

automatically exit the audio menu after 10 seconds of inactivity. 

The following items can be adjusted: 


Beep On/Off: Turn the audible beep On/Off (heard when functions/buttons are selected). 

Note: Beep tone off will not affect the audible tone of the alarm clock. 


RCA out VARI/FIXED: When VARI is selected, the volume output of RCA out is adjustable 
by rotating the volume encoder knob. When FIXED is selected, the volume output of RCA 
out is fixed.


Weather ALERT ON/OFF: Determines if the weather band alert feature is activated. 


WB ALERT VOL (1/40-40/40): Set default volume for weather alert broadcasts. 


LO BAT ALERT (On/Off): Monitor voltage on ACC line and send alert when voltage is low. 


Bluetooth Device (Lock/Unlock, Disconnect/Connect, Delete): View, lock and delete from 
a list of previously paired mobile phone device models. 


Bluetooth Pair

: Choose “ENTER” to automatically pair a device. 


Bluetooth (On/Off): Choose “Bluetooth On” or “Bluetooth Off”. 


PRESET VOL:(1/40-40/40): Select an automatic turn-on volume. 


RESET <ENTER>: Press the 

ENTER

 button to return the JWM990 to factory default set 

up values. 

Summary of Contents for JWM990

Page 1: ...JWM990 MOBILE AUDIO SYSTEM Installation and Operation Manual...

Page 2: ...All related marks and logos are trademarks of Sirius XM Radio Inc All rights reserved Made for iPod and Made for iPhone mean that an electronic accessory has been designed to connect specifically to i...

Page 3: ...North American vehicle Protect the Disc Mechanism Avoid inserting any foreign objects into the slot of this player Failure to observe this may cause malfunction due to the precise mechanism of this u...

Page 4: ...nalized Disc Maintenance A dirty or defective disc may cause sound dropouts while playing Before playing wipe the disc using a clean cloth working from the center hole towards the outside edge Never u...

Page 5: ...ery cable If the cable is disconnected the computer memory may be lost Under these conditions use extra caution during installation to avoid causing a short circuit Selecting the Mounting Location Sel...

Page 6: ...ER 10 WHITE FRONT LEFT A SPEAKER 11 ORANGE RIGHT B SPEAKER 12 ORANGE BLACK RIGHT B SPEAKER 13 BROWN LEFT B SPEAKER 14 BLUE AMP REMOTE 12VDC 100mA 15 RED 12VDC SWITCHED 16 BLACK GROUND 17 VIOLET RIGHT...

Page 7: ...right speakers FADE Adjust the speaker fade between the rear and front speakers from REAR 7 full rear to FRONT 7 full front 0 indicated an equal balance between the rear and front speakers LOUDNESS T...

Page 8: ...of time In addition the visibility of the numbers on the LCD may decrease slightly The LCD display will return to normal when the temperature increases to a moderate range Brightness Press or buttons...

Page 9: ...tons to turn the corresponding speaker sets on or off SPK A SPK B or SPK C will appear on the display Reset The reset button should be activated for the following reasons initial installation of the u...

Page 10: ...ons for each AM and FM band Store a Station Select a band if needed then select a station Press and hold a 1 6 preset button for two seconds The present number will appear on the display Recall a Stat...

Page 11: ...o or more broadcast signals The most you will receive will be two or three and that is rare Is it possible I won t receive any stations Depending on where you are located there is a possibility you wi...

Page 12: ...selected track Repeat RPT Press the 3 RPT button 23 or RPT buttons on the remote control 20 to access the repeat function Press again to continuously repeat the selected track RPT ONE Press the third...

Page 13: ...r buttons or press the or buttons on the remote control 16 once for FORWARD X 2 Press and hold additional times for FORWARD X 4 X 8 X 20 or PLAY Press the button on the control panel 2 or remote contr...

Page 14: ...time for disc T 00 34 37 remaining playing time for disc 1 5 ENG English is the selected audio language out of 5 possible choices 5 1 CH The current language is recorded in 5 1 surround sound 1 4 ENG...

Page 15: ...umber of characters for MP3 file name and folder name 32 Maximum number of Characters of ID3 Tag ID3 Tag version 1 0 32 ID3 Tag version 2 x 32 MP3 Monitor Display After loading an MP3 disc or USB devi...

Page 16: ...er in each field 4 Press the button 17 on the remote control or highlight PLAY on screen and then press the ENTER button 5 to begin playback in the numbered order indicated To delete the list highligh...

Page 17: ...e iPod will pause and then enter sleep mode after 2 minutes While the iPod is connected the power cannot be turned on or off from the iPod itself NOTE The iPod will continuously recharge while in iPod...

Page 18: ...e ENTER button to temporarily remove the Bluetooth link The link can be re established through your phone menu by selecting the JWM990 for connection DELETE To delete a device from the list press the...

Page 19: ...button 10 to return to Bluetooth mode and resume mobile device audio playback NOTE If a Bluetooth device is disconnected due to the power being turned off or if the device is out of range the unit wi...

Page 20: ...Use 1 6 to access preset stations Enter track number to access track directly For track Number 10 use 10 followed by second digit Enter track number to access track directly For track Number 10 use 1...

Page 21: ...e viewing angle if available 24 AUD Access Audio Menu options Access Audio Menu options Access Audio Menu options Access Audio Menu options Access Audio Menu options 25 GOTO Select exact time track or...

Page 22: ...allows the selection of a new four digit code to use for security purposes Rating Select the parental control level for all DVD play The security password is required to make changes to this feature...

Page 23: ...0 2 4 or 6 Saturation Adjust the saturation of the screen from the following levels 12 10 8 6 4 2 or 0 Sharpness Adjust the sharpness of the screen from the following levels 8 6 4 2 or 0 Speaker Setu...

Page 24: ...er a bridge or when passing under high voltage lines Although AM is subject to environmental noise it has the ability to receive at great distance This is because broadcasting signals follow the curva...

Page 25: ...operate the equipment NOTE This equipment has been tested and found to comply with the limits for a Class B digital device pursuant to Part 15 of the FCC Rules These limits are designed to provide re...

Page 26: ...ASA Electronics Corporation www asaelectronics com www jensenrvdirect com 2014 ASA Electronics Corporation...

Reviews: