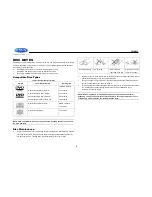
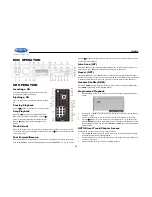


JWM990
16
BLUETOOTH OPERATION
The JWM990 includes built-in Bluetooth technology that allows you to connect this head unit to
Bluetooth-enabled devices for streaming audio playback.
About Bluetooth Technology
Bluetooth wireless technology is a short-range wireless radio protocol. Operating in
the 2.4 GHz range, it transmits audio and data at speeds up to 2.1 Mbit/s over a
range of up to 10 meters.
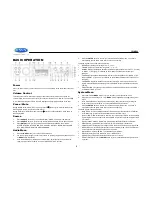
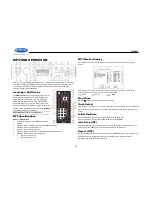
Bluetooth Menu Options
NOTE: Please note that some Bluetooth menu options are only available while the unit is
in Bluetooth Audio mode.
Press and hold
the
MENU
button (11) to enter menu adjustment mode. Repeatedly press the
>>|
or
|<<
buttons (14, 13) or
MENU
button to access the
“Bluetooth On/Off” menu function.
Rotate the volume encoder knob (15) to select BLUETOOTH ON, then press the
ENTER
button
(12) to turn the Bluetooth function On or Off. The following menu options are available when the
unit is in Bluetooth mode.
Bluetooth Pair <ENTER>
: Press the
ENTER
buttons to start pairing with a Bluetooth
enabled device.
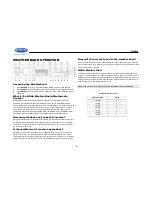
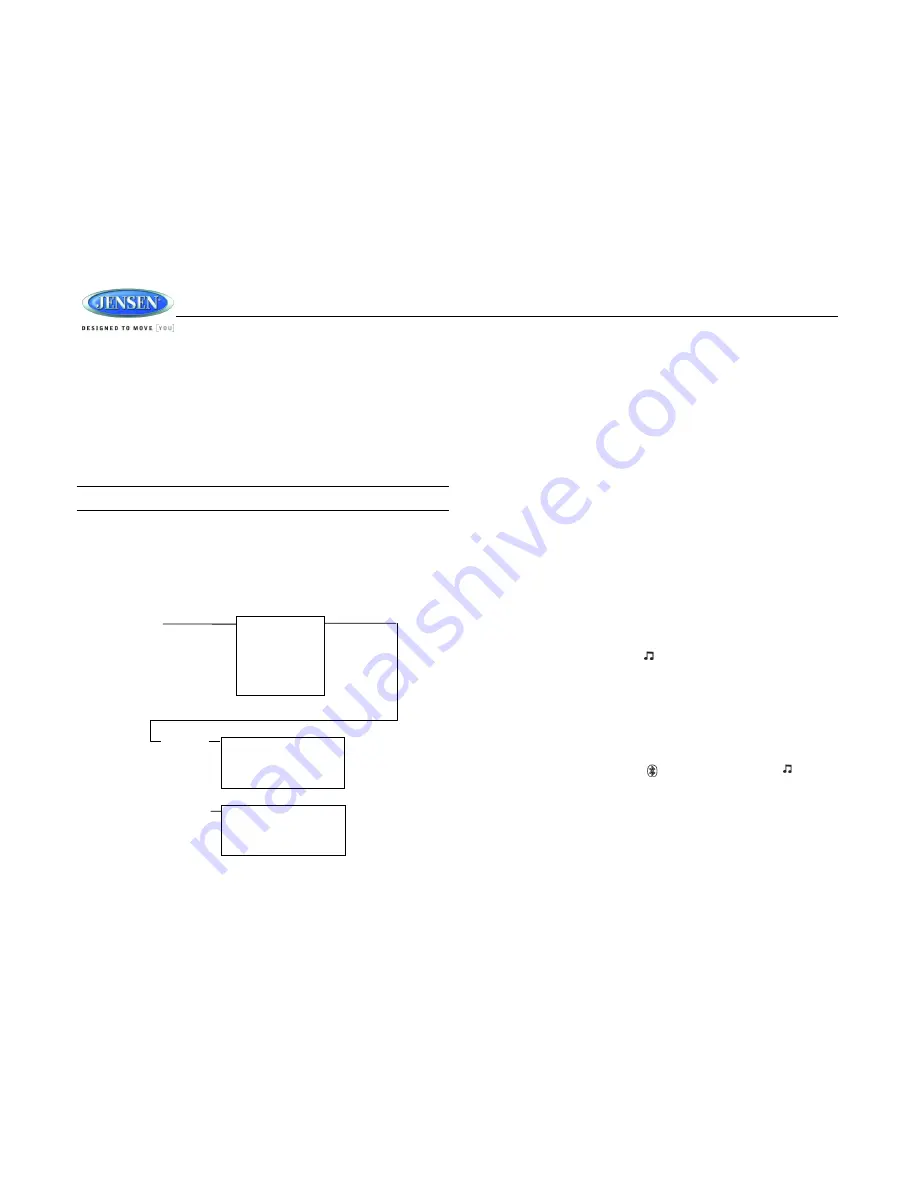
Bluetooth Device
: Press the
ENTER
button to view a list of previously paired mobile
devices models. Press the
>>|
or
|<<
buttons to view devices from the list. You cannot
delete a device that is actively connected. Press the
ENTER
button to select the device.
Press the
>>|
or
|<<
button to choose Lock/Unlock, Disconnect or Delete for this device.
LOCK/UNLOCK: The JWM990 can store up to 5 devices for Bluetooth connection.
The devices are stored in FIFO (First In First Out) order. To prevent a device from
being bumped from the list when more than 5 devices are used, you must lock the
device. To Lock/Unlock a device, press the
ENTER
to change Lock or Unlocked.
DISCONNECT: To disconnect a paired device, press the
ENTER
button to
temporarily remove the Bluetooth link. The link can be re-established through your
phone menu by selecting the JWM990 for connection.
DELETE: To delete a device from the list, press the
ENTER
button.
Pairing a Bluetooth Device
Before you begin, consult the owner’s manual for the Bluetooth device you want to pair with the
JWM990.
1.
Make sure the device is on and ready to receive a signal from the JWM990. With the
JWM990 in Bluetooth Audio mode, choose Bluetooth Pair from the JWM990 menu and
press the
ENTER
button to select ON. The unit is waiting to connect to a mobile phone
device. With the Bluetooth function of the mobile device turned on, search for a Bluetooth
device.
2.
When the Bluetooth device has completed its search, the mobile device will display the
Bluetooth device name (JWM990).
3.
Select JWM990. The BT AUDIO icon ( ) on the radio LCD will be displayed.
4.
Enter the pairing password (0000), if requested.
After connecting successfully, you will be able to listen to audio from your Bluetooth enabled
device through the JWM990.
Bluetooth Audio (A2DP)
The A2DP music is available for Bluetooth enabled phones when the phone is connected. To
access Bluetooth mode and play songs stored in your phone, press the
SOURCE
button (10)
until Bluetooth mode is selectable. Press
ENTER
(12) to enter the Bluetooth mode.
While in Bluetooth mode, the Bluetooth icon ( ) and the Bluetooth Audio icon ( ) will be
illuminated on the LCD.
Selecting Tracks
During playback, press the
>>|
or
|<<
/
button (14, 13) to play the previous or next track.
Pausing Playback
During playback, press the
||
button (2) to pause the Bluetooth audio playback
. “BT AUDIO
PAUSE
” will appear on the LCD. Press
||
button again to resume playback.
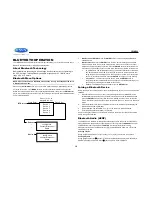
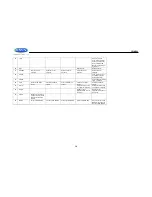
Device 1
Device 2
Device 3
Device 4
Device 5
BT Device
Press Enter
Device 1
…
…
…
Device 5
Lock/Unlock
Connect/Disconnect
Delete
Lock/Unlock
Connect/Disconnect
Delete
Press Enter
Use >>| or |<< to
Navigate the List