


4 HomeRunner RBI User Manual – Rev 1.03a
Initial Set Up and Configuration
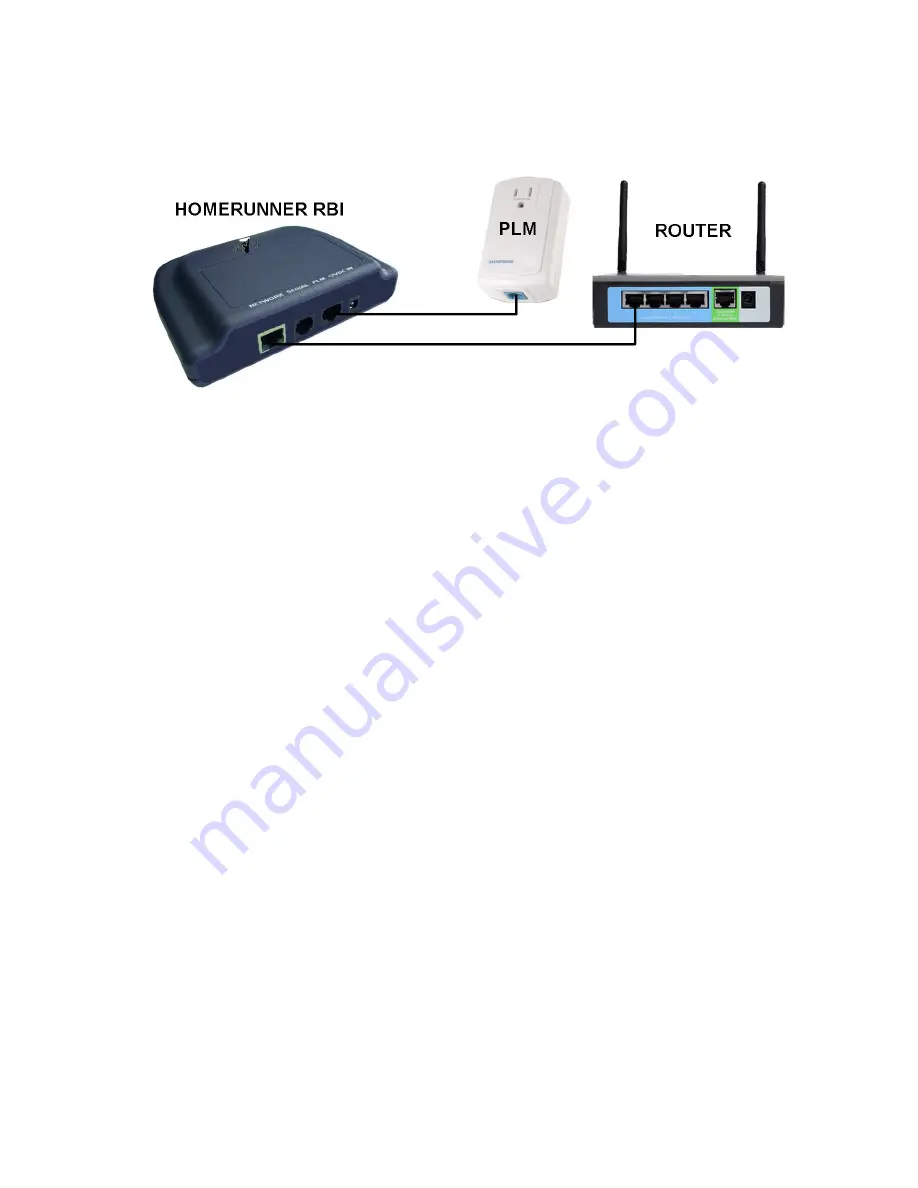
The following steps will guide you through the installation and initial configuration of the
HomeRunner RBI
.
1.
Connect the
HomeRunner RBI
’s
“Network”
jack to one of your router ports with the supplied
network cable.
2.
Connect the
HomeRunner RBI
’s
“PLM”
jack to the Insteon Power Line Modem with the
other network cable and plug the PLM into a nearby electrical outlet.
3.
Wait 5 – 10 seconds for the green and yellow “SEND” and “RECV” LEDs to turn on.
4.
For applications that don’t require the PLM (neither Insteon or X-10 are used), plug a 9 -12
Volt DC power adapter into the Power In jack.
5.
Install the
HomeRunner RBI
application from the included CR-ROM into the default folder
(C:\HomeRunnerRBI) or select a different location if you prefer.
6.
Double-click the
HomeRunner RBI
icon on your desktop or select it from the Start Menu to
launch the
HomeRunner RBI
application.
7.
Press
“Ctrl+T”
on your keyboard (or double-click the bottom edge of the
HomeRunner RBI
screen) to display the
HomeRunner RBI
toolbar.