


15 HomeRunner RBI User Manual – Rev 1.03a
Advanced Editing
Button positions can be adjusted in 1 pixel increments using the
arrow keys
while in Edit Mode.
Holding down an arrow key will continue to move the button until released. For coarse adjustments,
holding the
Ctrl
key will cause each press of an arrow key to move the selected button 5 pixels.
Clicking
Ctrl+G
will display a grid for visual aid. Grid spacing and color can be adjusted under
System Settings
.
Multiple buttons can be edited simultaneously for changing font characteristics, button size, etc. First
select the various buttons to be edited by holding down the Ctrl key and clicking each button or by
dragging the mouse over the desired buttons (the dotted line bordering the selected buttons will
move). Then right click one of the selected buttons and click
“edit”
to access the Multi-Edit field.
The title bar of the Multi-Edit field will indicate the number of buttons selected. Any changes made
will affect all selected buttons.
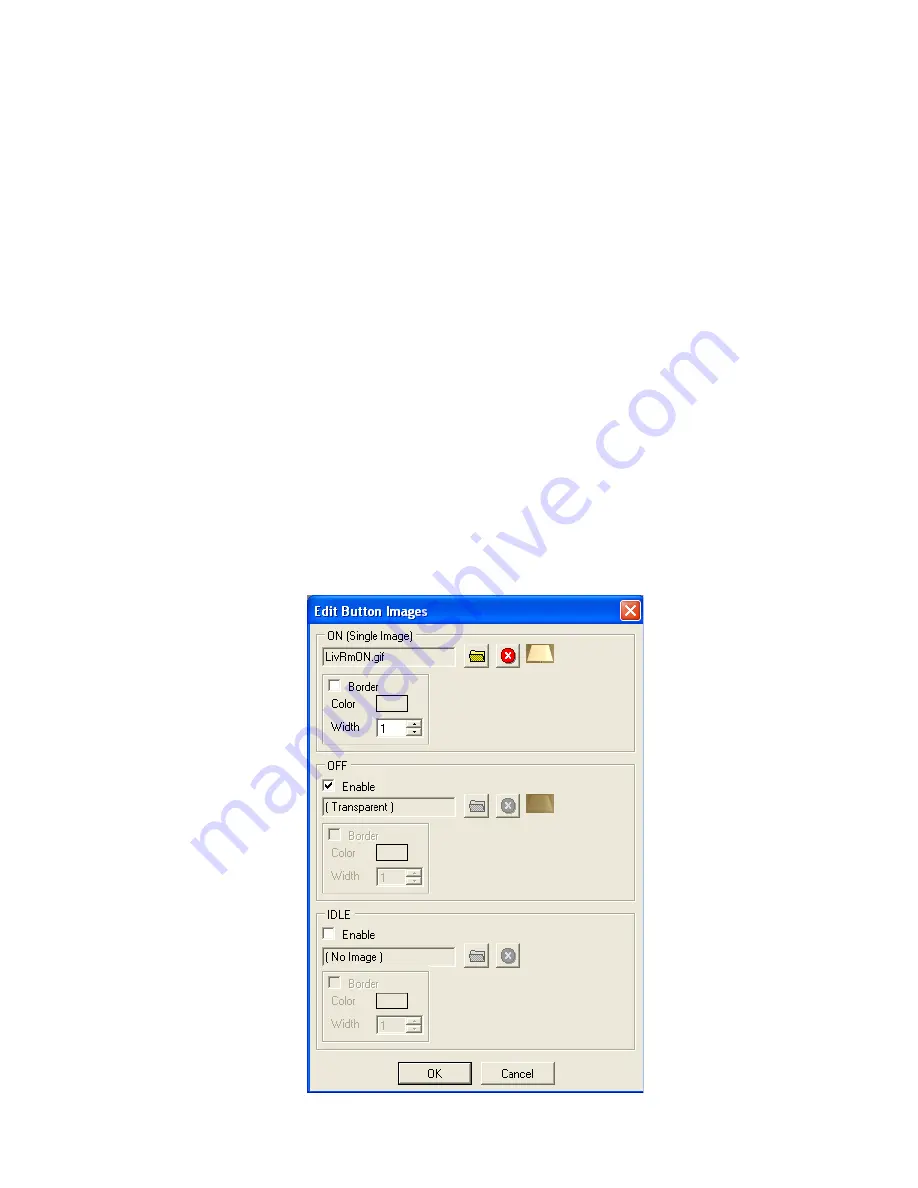
Transparent button images can also be copied to the clipboard and edited in a graphics program
(Photoshop, Paint, etc.) to create alternate images to indicate on/off states. First select the button in
Edit Mode, then click the
“Copy Image to Clipboard”
button in the Edit Button field. Next, open
your graphics program, click File - New and paste the clipboard image. Modify the pasted image as
desired, then Save As a different name to your “Buttons” folder. Then select the new button image as
one of the multi-state button images. The image shown below is a lamp shade that is part of a
background image defined as a transparent button. The photo was taken with the lamp off. The
transparent button image was then copied to the clipboard, edited to appear on by increasing contrast
and brightness, then saved as “LivRmON.gif” in the \Buttons folder and selected for the ON image.