background image

1

Introduction

Thank you for choosing the Javelin J360i Card Printer.
This manual guides you to efficient start up and operation of your new Card Printer.

Printer Features

The following shows the main functional features found on your J360i Printer.

2

Installing the print driver software and setting driver options

Printing with the J330i/m printer requires the Windows printer driver and your card 
design/issuing software or printer command level programming through the printer 
interface.

The printer can be used with any Windows 2000, Windows server 2003, Windows XP or 
Windows Vista software application program, using the drivers provided on CD with the 
printer.

This section contains information on the printing of a sample card in colour
(using the 5-panel colour ribbon YMCKO and the Windows printer driver).

Note:

If updating the printer driver from a previous version, before installing the updated

printer driver, always update the firmware to the correct version first. Then delete the 
existing version from your PC using the add/remove programs in Control Panel.

Installing the print driver

To install the printer driver automatically on all operating systems, use the Javelin
Install Wizard.

Note:

Ensure that you have administrative privileges to perform this installation, or contact

your IT department.

The Install Wizard will walk you through the appropriate installation steps. The Wizard will:

Automatically launch when the driver CD is inserted.

From the main menu of your documentation CD, select ‘INSTALL DRIVER’. The Install 
Wizard will walk you through the appropriate steps.

Delete previous versions of the driver and clean up any necessary registry entries. You
must select ‘Remove’ from the install options to remove any previous driver versions.

19

Summary of Contents for J330i

Page 1: ...User s manual J330i J330m NBS Technologies December 2008 Rev D C R ...

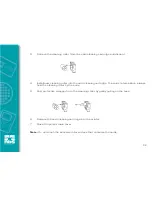
Page 2: ...ective plastic bag Remove carefully and peel off tape before installation A loud CLICK will indicate the cartridge is correctly installed 3 Prepare card output hopper Grab the sides of the hopper and slide out 4 Loading ribbon Turn on the power to the printer and raise the printhead Ribbon loading involves the placement of the ribbon onto the supply and take up spindles As soon as the ribbon is in...

Page 3: ...lever This item can be operated by the user to set the card thickness and to prevent more than one card feeding into the printer at the same time and causing a jam There are 4 positions to set the card thickness control Slide the lever to set the gauge The second position down is the normal position 30mil 0 76mm 7 Starting to print cards Install the Windows driver on your PC connect the interface ...

Page 4: ...Setting the card thickness control Loading cards Card output hopper Large feeder extension kit Installing the print driver software and setting driver options Connecting the printer to your computer Connecting power Printing a test card 3 Printing a Card 23 Setting printer properties Printing a sample card Printing one card at a time 4 Cleaning 27 Cleaning the printer When to clean How to clean Cl...

Page 5: ...cal Specifications 40 General specifications Ribbon specifications Card specifications Bar codes Fonts Card dimensions Bi directional communications interfaces Mechanical specifications Electrical Environmental Options Appendix A Magnetic Card Stripe Encoder 43 Introduction Media loading orientation Sample encoding program Magnetic encoder cleaning When to clean How to clean ISO standard encoding ...

Page 6: ...ntactless smart cards Media loading orientation for contactless smart cards Printing on MIFARE contactless smart cards Printing on UHF RFID contactless smart cards Appendix C Connecting to a Network 49 Printer sharing External print server Internal print server Appendix D Accessories Supplies 51 Ribbons Cards Accessories Appendix E Warranty Information 55 Printers Printheads Supplies Spare parts 6...

Page 7: ... J360i Printer 2 1 Introduction Thank you for choosing the Javelin J330i m card printer This manual guides you to efficient start up and operation of your new card printer Printer Features The following shows the main functional features found on your printer 7 CARD CLEANING CARTRIDGE CARD GAUGE CONTROL LCD DISPLAY PANEL BUTTON RIBBON SUPPLY SPINDLE PRINTHEAD RIBBON TAKE UP SPINDLE OUTPUT HOPPER M...

Page 8: ...tor power switch and interface connectors on the rear panel 8 10 100 BASE T CONNECTOR ETHERNET SWITCH NETWORK STATUS ACTIVITY LED ETHERNET ADAPTOR STATUS LED THESE ARE ON THE OPTIONAL ETHERNET ADAPTOR POWER SWITCH POWER CONNECTOR USB CONNECTOR DB 9 CONNECTOR LOCATION FOR SMART CARD STATION OPTIONAL LCD DISPLAY PANEL BUTTON ...

Page 9: ...Scrolling REMOVE RIBBON THEN CLOSE HEAD Scrolling EMPTY FEEDER PRESS BUTTON Scrolling LOAD CLEANING CARD IN FEEDER Scrolling PRESS BUTTON TO CONTINUE Scrolling FEED LONG CLEANING CARD IN EXIT Scrolling CLEANING PRINTER Scrolling ENCODING ERROR printing stops Blinking INVALID MAGNETIC DATA encoding stops Scrolling REMOVE RIBBON Fixed Errors Printer will not operate OUT OF RIBBON Blinking MECHANICAL...

Page 10: ...to all sides The printer should never be operated while resting on its side or upside down Electric Shock Caution Limit AC power supplied to the printer to 110 230 volts 60 50 Hertz Limit excess current draw to 16 amps or less using an associated circuit breaker or other such device Never operate the printer in a location where operator computer or printer can get wet Personal injury could result ...

Page 11: ...ccurred during shipment If any damage is apparent file a claim with the shipper Please ensure that you have a clean and nearly dust free environment for proper operation and storage of the printer Make sure the following items are included with your printer If any items are missing please contact your dealer 11 Quick Start Driver Documentation CD Ribbon Cleaning Cartridge USB Power Cables Cleaning...

Page 12: ... cover 2 Remove the cleaning cartridge warning tape 3 Release the printhead carriage by pushing the printhead carriage latch to the left and raise the printhead carriage It will remain open at about a 45 angle 4 Remove the printhead protection pad Keep the pad as well as the other packing material and the shipping carton in case the printer is shipped or moved PROTECTION PAD WARNING TAPE ...

Page 13: ...ution DO NOT TOUCH the printhead or the electronic components on the printhead carriage Discharges of electrostatic energy that accumulate on the human body or other surfaces can damage the printhead or other electronic components used in the printer Note Avoid any direct contact with the printhead to prevent transfer of oils or contamination Outside of normal operation only the NBS approved clean...

Page 14: ...h any exposed metal parts Use of an anti static wrist strap or comparable anti static protection is required Note During normal operation with power connected and turned on the ribbon would automatically synchronise when the printhead is restored to its fully down position The ribbon would be identified and the corresponding parameters sent to the driver Since power is not connected at this point ...

Page 15: ...r 2 Open the printer s main cover and locate the area where the card cleaning cartridge will be installed initially this area was covered by a warning tape 3 Locate the slot at the rear of the card cleaning cartridge mounting location 4 Hold the card cleaning cartridge by the extended handle so the large arrow on the top is pointing away from you With the cartridge at about a 30 angle pointing dow...

Page 16: ...l 2 Slide the card thickness control to the position corresponding to the following Highest position 50 mil 1 27 mm to 60 mil 1 52 mm 2nd position 30 mil 0 76 mm to 50 mil 1 27 mm Normal setting 3rd position 20 mil 0 51 mm to 40 mil 1 02 mm Lowest position 10 mil 0 25 mm to 20 mil 0 51 mm Note The overlap in settings above accommodates variations in environmental conditions especially humidity and...

Page 17: ...ds of different thicknesses Note Do not bend cards or touch print surfaces as this can reduce print quality The surface of the cards must remain clean and dust free Always store cards in an enclosed container Ideally use cards as soon as possible Note For cards with magnetic stripe refer to Appendix A for loading instructions Note To reduce contamination and ensure better print quality minimise th...

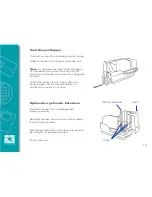
Page 18: ...equired to change its position When the printer is not in use slide the hopper back into it s closed position to protect the printer from dust Optional Large Feeder Extension This item is used for increasing card feeding capacity Carefully remove card cover by forcing away from the pivot points Slide feeder extension into place and secure by using the 3 screws supplied Clip in the door 18 DOOR FEE...

Page 19: ...CKO and the Windows printer driver Note If updating the printer driver from a previous version before installing the updated printer driver always update the firmware to the correct version first Then delete the existing version from your PC using the add remove programs in Control Panel Installing the print driver To install the printer driver automatically on all operating systems use the Javeli...

Page 20: ...apter directly above the USB Connector this may not be present on your printer If your printer includes the optional Ethernet Adapter as well as the standard USB connection use either the supplied USB cable or a standard Ethernet cable to connect the printer to a corresponding port on the computer or network Important Do not use both USB and Ethernet connections at the same time Important Intermit...

Page 21: ...inter s power switch in the OFF O position Depending on your local AC voltage plug the appropriate power cord into the printer s power connector and a grounded AC power source connection To turn the printer on set the printer s power switch to the ON position Caution If the power cord appears damaged in any way or if the power cord will not securely plug into the printer s power connector or the A...

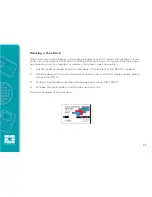
Page 22: ...onnected to your computer or network but power must be applied 1 Set the printer s power switch on the back of the printer to the OFF O position 2 While pressing the printer s front panel button next to the LCD display panel switch the printer ON 3 Hold the panel button until the LCD display panel reads SELF TEST 4 Release the panel button and the test card will print This is an example of the tes...

Page 23: ...application software program used for printing cards Note In the following description of setting printer properties only those properties and options that are suitable for being set by the user are described The user should not make selections or set parameters unless they are specifically described in this section Preferences settings can configure the printer for landscape wide or portrait tall...

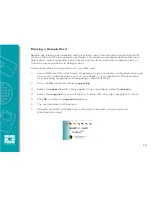
Page 24: ...Launch Microsoft Word software Depending on your computer configuration this may be done by double clicking an icon on your desktop or by clicking the Windows start icon selecting programs and navigating to Microsoft Word 2 Go to the file menu and choose page setup 3 Select the paper size tab choose card Under orientation select landscape 4 Select the margins tab and set the top bottom left and ri...

Page 25: ...strictions do not apply full colour printing is permitted edge to edge in both directions 8 Once you are ready to print go to the file menu and select print 9 If the printer was not selected as the default printer go to the file menu select print setup and choose Javelin J330i m card printer from the printer names list Then close the print setup dialog box 10 The printer will feed in a card and st...

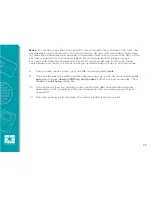
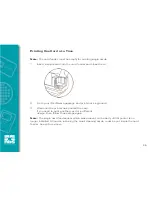
Page 26: ...oftware package and print your single card 3 Wait until the printer has printed the card If you need to print another card of a different design then follow these steps again Note The single card feed sensor which was present on the early J330i printer is no longer installed All cards including the small cleaning cards must be put inside the card feeder See picture above ...

Page 27: ...rinter NEVER use a high pressure air compressor to remove particles in the printer Cleaning the Printer Clean your printer using pre saturated cleaning cards provided The regular use of these cards will clean and maintain important parts of your printer that cannot be reached including the printhead transport rollers and optional magnetic encoder station When to Clean When the LCD Panel displays t...

Page 28: ...lose the printhead carriage For details see chapter 2 The LCD panel will display the message EMPTY FEEDER PRESS BUTTON 4 Open the card feeder cover and remove cards from the card feeder The last card is difficult to remove leave it in place Press the panel button on the front of the printer The card remaining in the feeder will be ejected The LCD panel will then display the message LOAD CLEANING C...

Page 29: ... do a thorough cleaning but may be performed if no long cleaning cards are available To restore the display to READY you will need to perform a complete cleaning process using both short and long cleaning cards from step 2 above through step 9 below 8 The long cleaning card will automatically feed into the printer and the printing process will continue The LCD panel will again display the message ...

Page 30: ...n printhead by moving an alcohol moistened swab tip or impregnated head cleaning pen side to side across the printhead elements Only use moderate force To reorder swabs or pens please refer to the media list on the Windows drivers and user documentation CD supplied with this printer 4 The swabs and pens can also be used in a similar manner to clean the optional magnetic encoding head Caution Never...

Page 31: ...on of the card cleaning cartridge is described in chapter 2 and is not repeated in detail here Replace the cleaning roller each time you install a new ribbon How To Replace the Cleaning Roller 1 Open the main cover and locate the card cleaning cartridge 2 Gently remove the card cleaning cartridge Lift the handle end and then pull it away from the printer Note Before replacing the card cleaning car...

Page 32: ...aning cartridge To avoid contamination always hold the cleaning roller by the ends 5 Peel protective wrapper from the cleaning roller by gently pulling on the tape 6 Replace the card cleaning cartridge into the printer 7 Close the printer main cover Note Do not touch the adhesive roller surface that contacts the cards 32 ...

Page 33: ...new card PRINT HEAD OPEN 1 Check that printhead carriage is closed and latched MECHANICAL 1 Check that you are using the correct card type see technical ERROR specifications 2 Check that card thickness control lever is properly adjusted see loading cards in chapter 2 3 If 2 cards are fed into the printer at the same time Open cover and remove card cleaning cartridge empty the card feeder and pull ...

Page 34: ...nt supply of cards Possible Cause Dust inside the printer and or dirty cleaning roller Solutions Perform a cleaning of the printer see chapter 4 Replace cleaning roller see chapter 4 EXAMPLE 2 There are non printing horizontal lines white on the card surfaces Possible Cause Ribbon cartridge is not correctly positioned Solutions Ensure that the ribbon is properly rolled onto the ribbon cores of the...

Page 35: ...head Solution Perform a cleaning of the printhead see chapter 4 EXAMPLE 4 Printing shows blurry printed image Possible Cause Ribbon cartridge may not be correctly positioned Solution Check that the ribbon is properly rolled onto the ribbon cores of the cartridge Replace ribbon cartridge making sure it locks in place and print again Possible Cause Ribbon may not be synchronised on the correct colou...

Page 36: ... Possible Cause Printhead elements may be scratched or burnt Solution Call your Javelin dealer or NBS customer service for printhead replacement information EXAMPLE 6 Only one panel of a colour ribbon prints Possible Cause Using the wrong type of ribbon Solution Use only Javelin encoded i series ribbons for full colour printing Note For optimum print quality always keep the main cover and the card...

Page 37: ...s functioning properly and the Ethernet adapter has detected the presence of the network It does not mean the Ethernet adapter has an IP address or is attached to a printer queue 2 If the LED is rapidly flashing green 9 times sec the Ethernet adapter has not detected the presence of a network cable To solve the problem Verify that the network cable is appropriate for the network and has an RJ 45 c...

Page 38: ...the following The printer attached to the Ethernet adapter device is malfunctioning Turn the printer power off wait 10 seconds then turn the printer back on If the Ethernet adapter still fails the POST the Ethernet adapter has a hardware problem that can be fixed only by replacing or returning the unit Contact technical support for repair or replacement information 5 If the LED is alternately flas...

Page 39: ...d 3 If the LED is flashing green a 100Base link is established and network activity has been detected 4 If the LED is solid orange a 10Base link is established 5 If the LED is flashing orange a 10Base link was established and network activity has been detected Network activity detected by this LED does not mean the activity is data for the print server The activity is all activity on the network s...

Page 40: ... technology featuring RFID Note i series printers require the use of Javelin encoded i series ribbons for full colour printing For more information about card media and ribbons available from NBS Technologies please refer to appendix D Card Specifications Types PVC or composite Card width length ISO CR 80 ISO 7810 2 125 54 mm x 3 375 86 mm Option magnetic stripe ISO 7811 Card thickness 10 60 mil 0...

Page 41: ...plain card for magnetic stripe card Contact Location for smart card ISO standard 7816 41 2 125 0 002 in 53 98 0 050 mm 3 375 0 01 in 85 72 0 25 mm Radius 0 125 in 3 18 mm 0 009 0 033 in 0 23 0 84 mm 0 623in 15 82mm min 0 218in 5 54mm max 0 0 115in 2 92mm max 0 0 115in 2 92mm max 0 782 in 19 87 mm 0 403 in 10 25 mm 0 757 in 19 23 mm 1 124 in 28 55 mm ...

Page 42: ...ss B CE UL and CUL approved Environmental Operating temperature 60 F to 86 F 15 C to 30 C Operating humidity 20 to 65 non condensing Storage temperature 23 F to 158 F 5 C to 70 C Storage humidity 20 to 70 non condensing Ventilation reasonably dust free air environment Options Built in Ethernet network communications Three track magnetic stripe encoder standard and reverse Smart card contacts stati...

Page 43: ...tting Media Loading Orientation The magnetic encoder may be installed with the read write head positioned below the card path Magnetic card stripe encoder upgrade kits are also available When loading cards with magnetic stripes into the card feeder please ensure that the magnetic stripe is down and nearer to the rear of the printer Also available are printer models with the magnetic read write hea...

Page 44: ...D panel displays the message ENCODING ERROR at an increasing frequency How to Clean 1 Leave power on 2 Press and hold the front panel button for a few seconds 3 Open the main cover and release the printhead carriage latch raise the printhead carriage and remove the ribbon Close the printhead carriage 4 Close the main cover 5 Open the card feeder cover and remove any cards 6 Insert a pre saturated ...

Page 45: ...meric 40 ASCII 48 62 3 210 BPI Numeric 107 ASCII 48 62 Bits per inch Except the character Including Start Stop and LRC characters Also note that these 3 characters are automatically managed by the magnetic encoder according to the ISO standard norms Note Refer to the card printer programmer s manual for complete programming information 45 ...

Page 46: ... Cards Contact smart cards have a pad of contacts on the surface of the card that connect to the circuitry embedded into the card Data to be encoded onto the smart card and data read from the smart card can interface via a connector on the printer s rear panel contact station or encoding decoding can be performed by logic on the printer s main PCBA contact encoder The printer responds to commands ...

Page 47: ...act Station Smart Card Interface When a command to the printer interface sends a card to the smart card contact station the printer connects the smart card contact station to the female DB 9 connector on the rear of the printer An attached external smart card programmer can be used to program smart card chips The following table shows the smart card contact points DB 9 Pin Smart Card Contact Point...

Page 48: ... Orientation for Contactless Smart Cards Orientation is not important unless the card is to be printed see below Printing on MIFARE Contactless Smart Cards Be sure the printing on either side of the card will not cover the smart chip area By looking at an unprinted card very carefully it is possible to see the chip location see below If you print in this area results will be unsatisfactory Printin...

Page 49: ... to an Ethernet network in three ways Printer Sharing In printer sharing the printer is connected locally to the host computer and configured to be shared to other client computers Client computers connect to the printer over the network through the host computer 49 ...

Page 50: ...and passing them to the printer Client computers connect to the print server over a network Internal Print Server Similar to an external print server except the print server is integrated into the printer This removes the need for a separate power supply and separate device drivers This is the simplest way to network a printer 50 ...

Page 51: ...NCODED INTELLIGENT RIBBONS Each i series ribbon includes a cleaning roller Full colour ribbons NBS part no 61134501 Five panel YMCKOi 200 cards 61134503 Five panel YMCKOi 330 cards 61134512 Half panel YMC plus full panel KOi 450 cards Two panel ribbons 61134509 Black dye sub overlay KdOi 500 cards for monochrome photos 61134510 Black resin overlay KrOi 500 cards for text and bar codes Note Y Yello...

Page 52: ...r ABS cards 61131152 Blue PMS 287C 61131102 Red PMS 1795C 61131153 White 61131103 Green PMS 348C 61131104 Blue PMS 2935C 61131106 White 61131111 Gold 61131112 Silver 61131121 Scratch off 840 cards sold in multiples of 100 rolls Varnish overlay ribbons 350 cards applied using printer 61131701 Clear 61131702 Genuine secure Hand applied peel n stick laminate patches 61152270 World globe hologram 500 ...

Page 53: ...old cards 9104523 121 Plain white security cards with embedded security star opacity mark 9104523 122 Plain white security cards with lock key colourshift ink image PVC 10 mil 0 25 mm and 15 mil 0 38mm 92000003 10 mil self adhesive cards 9104523 114 10 mil plain white cards 9104523 117 15 mil cards with writeable backs PVC Composite 60 40 30 mil 0 76 mm 9104524 101 Plain white cards 9104524 103 Pl...

Page 54: ... J360i 61100914 Cleaning Kit Short cards 50 Swabs 25 61100915 Short cleaning cards 100 61100916 Cleaning swab kit 25 61100919 Long cleaning cards 50 61100912 Adhesive cleaning roller 5 61100918 Card cleaning cartridge 61100923 Cleaning pens 12 54 ...

Page 55: ...in the user s manual has caused defects in the thermal printhead for which a warranty claim is made SUPPLIES These are warranted to be free from defect in material and workmanship provided the user has complied with storage handling and usage guidelines established for supplies used with NBS Javelin printers SPARE PARTS All parts maintenance kits options kits and accessories are warranted to be fr...

Page 56: ...CA SURREY GU1 1RU UNITED KINGDOM Tel 1 800 565 9033 or Tel 44 0 1483 563 200 1 952 912 9423 Fax 44 0 1483 511 189 Fax 1 952 912 9439 Email technical support nbstech com Email technical support nbstech com Web www nbstech com HOW TO RETURN YOUR PRINTER If you have purchased your printer from an NBS distributor please first contact them on their return procedures Alternatively contact the appropriat...

Page 57: ...received including interference that may cause undesired operation Note This equipment has been tested and found to comply with the limits for a class A digital device pursuant to Part 15 of the FCC Rules These limits are designed to provide reasonable protection against harmful interference when the equipment is operated in a commercial environment This equipment generates uses and can radiate ra...

Page 58: ...uplicated in full or in part by any person without written approval from NBS While every effort has been made to keep the information contained within current and accurate as of the date of publication no guarantee is given or implied that the document is error free or that it is accurate with regard to any specification NBS reserves the right to make changes for the purpose of product improvement...

Reviews: