
29
www.janome.com
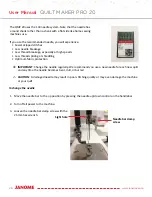
User Manual
QUILT MAKER PRO 20
The QMP 20 uses the 134 needle system. Note that the needle has
a round shank rather than a shank with a flat side like home sewing
machines use.
If you use the recommended needle, you will experience:
• Fewer skipped stitches
• Less needle breakage
• Less thread breakage, especially at high speeds
• Less thread splicing or shredding
• Optimum fabric protection
Â
IMPORTANT: Change the needle regularly. We recommend you use a new needle for each new quilt
and any time the needle becomes bent, dull, or burred.
U
CAUTION: A damaged needle may result in poor stitching quality or may even damage the machine
or your quilt.
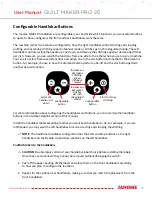
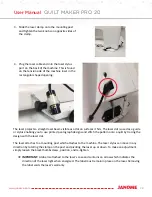
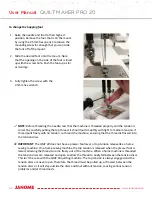
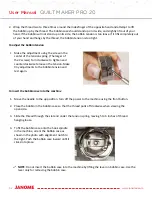
To change the needle
1. Move the needle bar to the up position by pressing the needle up/down control on the handlebar.
2. Turn off all power to the machine.
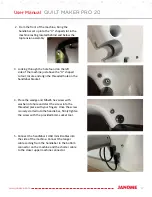
3. Loosen the needle bar clamp screw with the
2.5mm hex wrench.
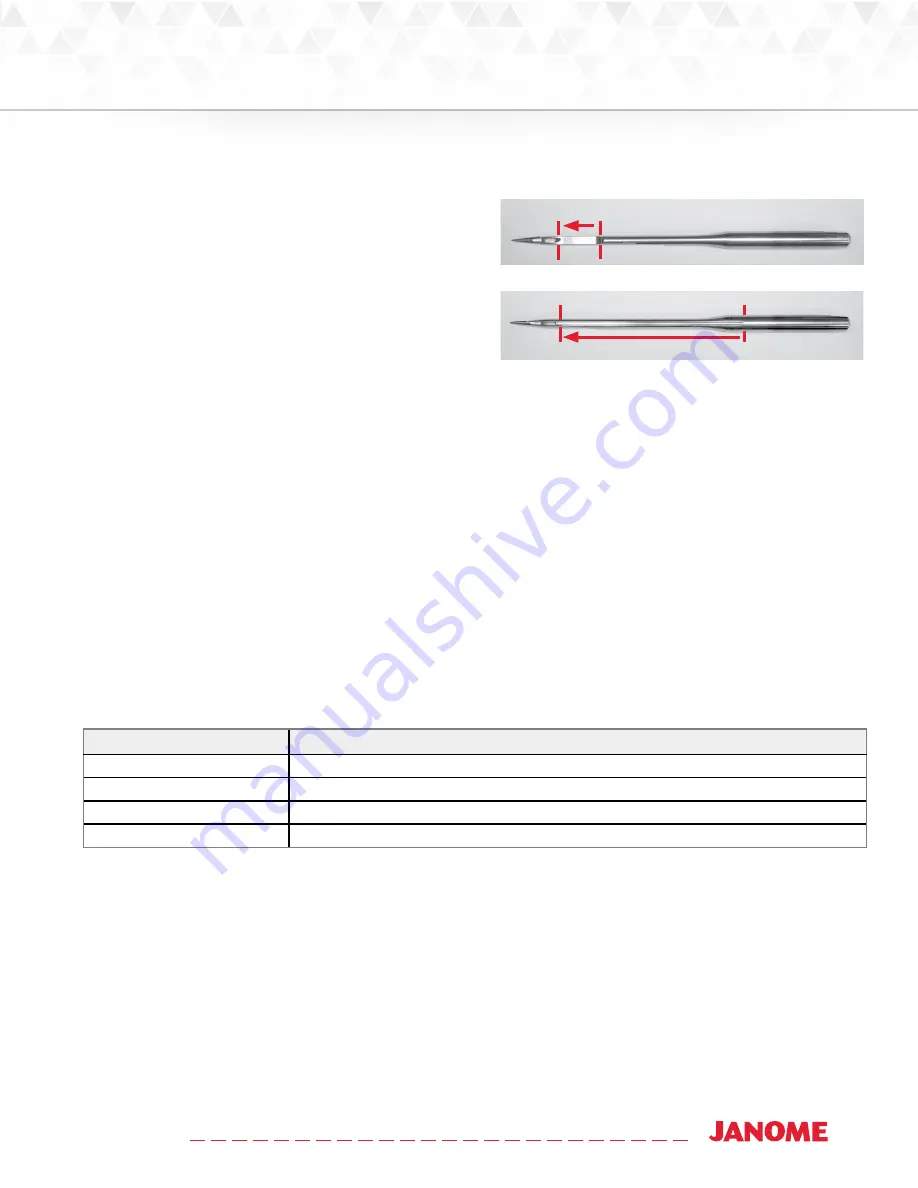
Scarf at back of needle just above eye
Long groove at front of needle - shoulder to eye
4. Remove the old needle by pulling it down. Discard the old needle in a safe way.
5. With the scarf of the needle (indentation at the
back of the needle just above the needle eye)
facing the rear of the machine and the long
groove down the front of the needle facing the
front of the machine, push the needle all the
way up into the needle bar until it stops. Check
the sight hole in the needle clamp to verify that
the top of the needle can go no farther up.
U
CAUTION: Check the needle to confirm it is fully inserted. The needle bar has a sight opening
above the needle bar clamp screw. Make sure the needle is touching the top of the sight opening.
If it isn’t, the machine timing will be off and it may be possible for the needle to collide with
internal parts, causing damage not covered by warranty.
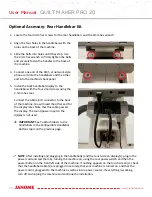
6. Carefully tighten the needle bar clamp screw.
U
CAUTION: Although you can use your fingers to tighten the needle bar clamp screw, we recommend
that after finger-tightening the screw, you use the 2.5mm hex wrench to tighten it just a bit more.
The QMP 20 runs at very high speeds and this ensures the needle will not loosen while quilting.
However, do not over tighten the needle clamp screw, as this may strip the threads of the screw.
Stripped threads are not covered under the warranty. It may also become difficult to insert the
needle properly into the needle bar. Once the screw no longer turns freely by hand, gently turn
the screwdriver until the screw is tightened snuggly.
Needle Size
Thread Size
12 and 14
monofilament, 100 wt. silk, 60 wt. polyester, mylar
16
monofilament, mylar, 100 wt., 80 wt., 60 wt., 50 wt., 40 wt. silk, polyester and cotton thread
18
40 wt. cotton and polyester, 30 wt. cotton and polyester
19 and 21
Any thread 30 wt. and heavier such as 12 wt., 19 wt., 30 wt.
QUILTING TIP: A size 16/100 needle will accommodate most threads and fabrics. Heavier threads, such
as top stitch and some decorative threads, require a larger needle such as 18/110 or 21/130. Lofty batts
and heavier fabrics such as denim, canvas, or densely woven fabric may also require a larger needle.
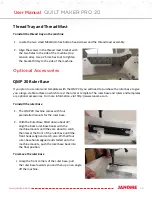
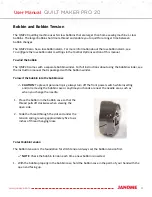
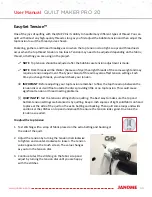
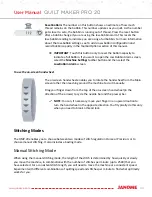
Hopping Feet
Your machine comes with two hopping feet: a closed-toe (comes installed) and an open-toe foot. Use the
closed-toe foot for everyday quilting and ruler work, and use the open-toe foot when you need greater
stitch visibility (such as when you are micro quilting).
Summary of Contents for Quilt Maker Pro 20
Page 1: ...USER MANUAL Version 1 0 Janome America Quilt Maker Pro 20...
Page 77: ......
Page 78: ......


