35
www.janome.com
User Manual
QUILT MAKER PRO 20
1
2
12
11
10
3
5
4
6
8
9
7
1
10
3
5
4
6
8
9
7
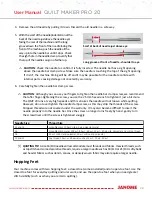
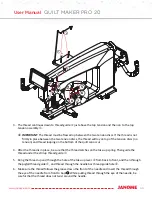
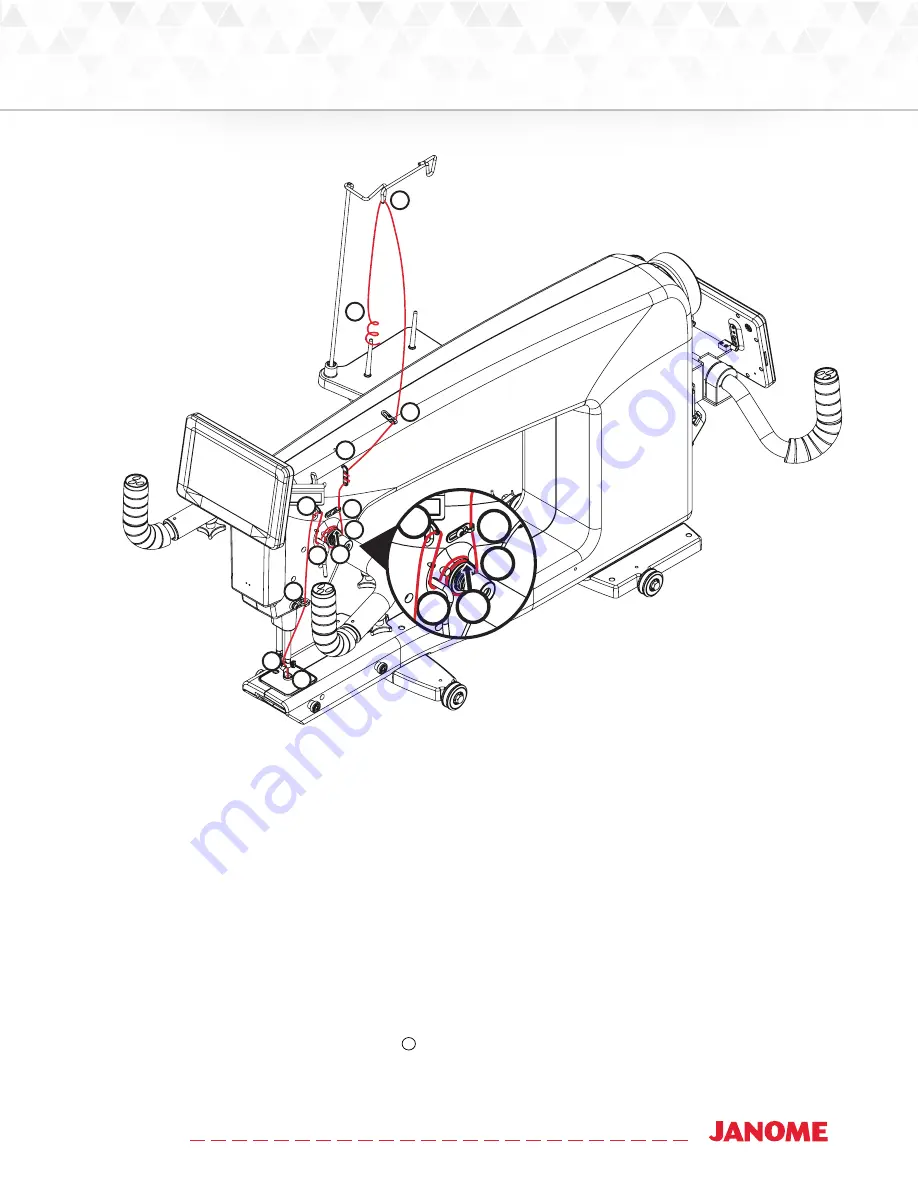
3. The thread continues down to thread guide
just above the top tension and then on to the top
tension assembly
.
Â
IMPORTANT: The thread must be flossed up between the two tension discs. If the thread is not
firmly in place between the two tension discs, the thread will lay on top of the tension discs (no
tension) and thread looping on the bottom of the quilt can occur.
4. After the thread is in place, be sure that the thread catches on the take-up spring. Then guide the
thread under the stirrup thread guide
.
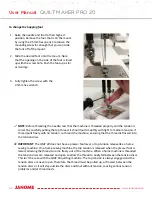
5. Bring the thread up and through the hole of the take-up lever
from back to front, and then through
the pigtail thread guide
, and thread through the needle bar thread guide hole
.
6. Make sure the thread follows the groove down the front of the needle and insert the thread through
the eye of the needle from front to back . While pulling thread through the eye of the needle, be
careful that the thread does not twist around the needle.
11
Summary of Contents for Quilt Maker Pro 20
Page 1: ...USER MANUAL Version 1 0 Janome America Quilt Maker Pro 20...
Page 77: ......
Page 78: ......

