Jabiru Aircraft
Pty Ptd
Aircraft Service Manual
Jabiru J230-C
REVISION
0
Dated : Feb 2006
Issued By: RAS
Page: 64 of 171
L:\files\Technical_manuals\J230_J430\J230.J430_Work_files\J230-C_Tech_Rev_1.doc
Print Date: 14/01/2009 4:41:00 PM
6.5.3
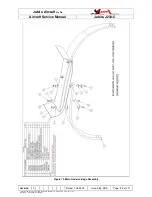
NOSE GEAR INSPECTION AND REPAIR
1.
Inspect steel tube and attachments for dents and straightness.
2.
Inspect rubber spring assembly for damage or perishing of the rubber, or
delamination of the rubber from the aluminium spacers between the rubber
blocks.
3.
Inspect aluminium wheel yoke for damage or bending.
4.
Inspect bolts/nuts for torque – see torque values Table 2.
5.
Repairs to the welded nose leg assembly beam must be referred to JABIRU
AIRCRAFT Pty Ltd or our approved local agent.
6.5.4
NOSE WHEEL SPEED FAIRING REMOVAL AND INSTALLATION
1.
Remove the machine screws around the forward and rear sections of the fairing
and remove the front section.
2.
Loosen the axle nuts and remove the rear section.
3.
Reverse the preceding steps for installation.
6.6
NOSE WHEEL
6.6.1
NOSE WHEEL REMOVAL AND INSTALLATION
1.
Weight or tie-down tail of aircraft to raise the nose wheel off the floor.
2.
Remove nose wheel axle bolt.
3.
Pull nose wheel assembly from yoke.
4.
Reverse the preceding steps to install nose wheel. Tighten axle bolt.
6.6.2
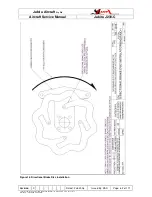
NOSE WHEEL DISASSEMBLY
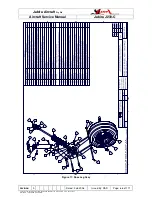
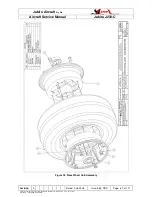
Completely deflate tyre and break tyre beads loose at wheel rim. Refer to Figure 18.
WARNING
Injury can result from attempting to separate wheel halves with the tyre inflated.
Avoid damaging wheel flanges when breaking beads loose as a scratch, nick or
gouge may cause wheel failure.
1.
Remove through-bolts and separate wheel halves.
2.
Remove wheel hub.
3.
Remove tyre and tube from wheel halves.
4.
Remove bearings.

