


LIP-8012E & LIP-8024E Gigabit Phone
User Guide
5
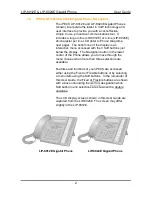
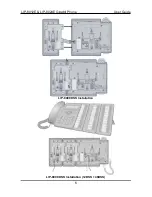
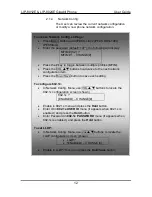
Gigabit phone (shown). Up to 2(without LIP-8048DSS)
or 4(with LIP-8048DSS) consoles can be chain-link
connected to the phone.
1.5.4
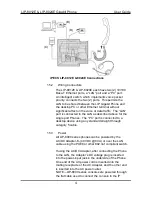
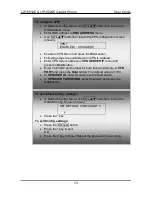
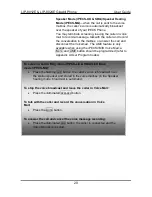
Wall Mount
The LIP-8000 series phones can be wall mounted as
needed. The following instructions describe how to
perform a wall mount installation. For more information
on installing your LIP-8000 series phone, refer to the
iPECS Hardware Description and Installation
Manual
.
1.6
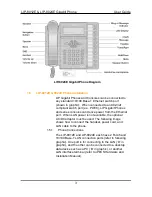
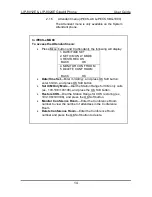
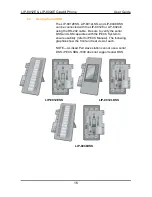
DSS(Direct Station Select) Console Installation
A DSS console can be installed with the LIP-8000E series
phone as shown in Figure. Up to 3 consoles may be daisy
chained as shown using the flat cable provided. Keep in
mind the following conditions when installing LIP-8000
DSS consoles.
1.
The AC/DC adapter must be used for LIP-8048DSS.
2.
Up to two (2) LIP-8012LSS and/or LIP-8012DSS can be
installed with LIP-8000E Phone.
3.
The LIP-8048DSS must be separately powered.
The available DSS is as follows:
1) LIP-8012DSS
2) LIP-8012LSS
3) LIP-8048DSS
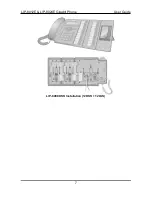
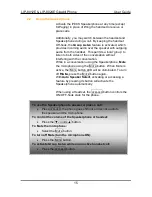
•
Mark and drill two (2) 7mm holes for plastic wall anchors.
•
Insert the two (2) anchors into the holes and insert and tighten
the each screw leaving about 2.5 mm (1/8-inch) of the screw
exposed.
•
Slide the LIP-8000 phone over the screws and assure the
phone is secure.
•
NOTE—It may be necessary to remove the phone and tighten
or loosen the screws for a secure mounting.