CloudSync Features and Examples
Page 32
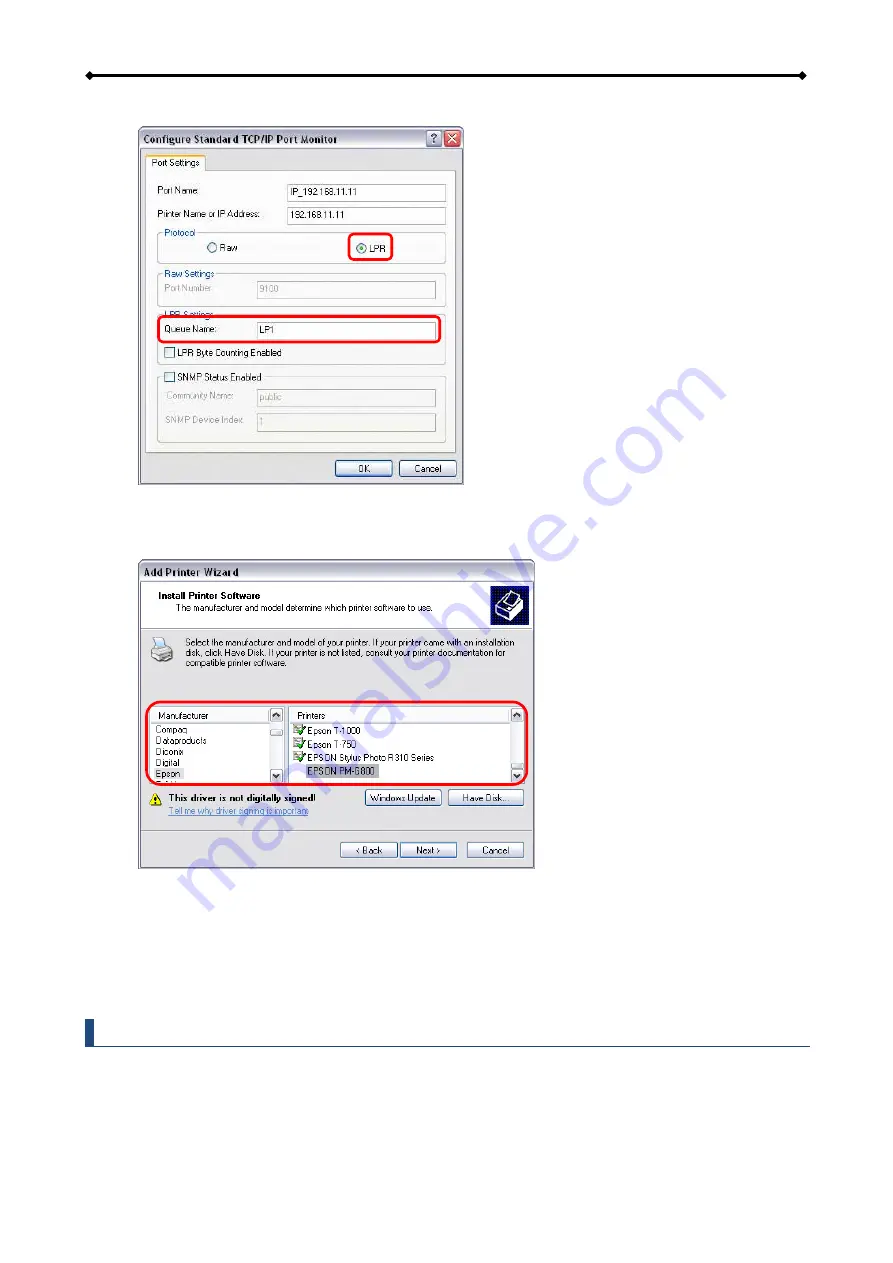
10. Select “LPR” and enter the queue name “LP1”, then click
OK
to confirm it.
11. Click
Finish
to complete the TCP/IP Wizard and close the dialog.
12. After clicking
Next
, a pop-up window will appear asking for a driver. Select your printer
model from the list or browse for the corresponding driver on your local drive.
13. In the next few steps, you will be able to give the printer a name, set it as default printer,
add a description and print a test page. It is not necessary to share the printer with other
network users, because it can be installed on other computers in the same way as seen in
the previous steps.
14. Once you have completed the wizard set-up your printer should be properly installed and
ready to print.
Note
Not all USB printers support LPR/LPD printing, therefore, your printer may not be compatible
and the installation might fail. Multi function "All-in-One" printers and GDI/host-based printers
are not supported.


