21
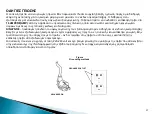
WARNING!
Before performing any maintenance to your treadmill, always unplug the power cord from the surge
protector.
CLEANING:
Routine cleaning of your TREADMILL will extend the life of your treadmill.
WARNING!
To prevent electrical shock, be sure the power to the treadmill is OFF and the unit is unplugged from the
wall electrical outlet before attempting any cleaning or maintenance.
AFTER EACH WORKOUT:
Wipe off the console and other treadmill surfaces with a clean, water dampened soft
cloth to remove excess perspiration.
USE NO CHEMICALS.
WEEKLY:
Use of a treadmill mat is recommended for ease of cleaning. Dirt from your shoes contacts the belt and
eventually ends up underneath the treadmill. Vacuum underneath the treadmill once a week.
DECK LUBRICATION:
The walking belt has been pre-lubricated at the factory. However, it is recommended that
the walking board be checked periodically for lubrication to ensure optimal treadmill performance. Every 10 days or 10
hours of operation, lift the sides of the walking belt and feel the top surface of the walking board as far under as you
can reach. If you feel signs of silicone, no further lubrication is required. If it feels dry to the touch, lubrication is
needed. Ask your retailer or call Service line for the type of silicone.
TO APPLY LUBRICANT TO THE WALKING BOARD
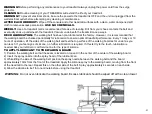
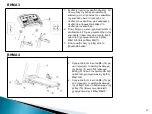
1) Position the walking belt so that the seam is located on top and in the center of the center of the walking board.
2) Insert the spray nozzle into the spray head of the lubricant can.
3) While lifting the side of the walking belt, position the spray nozzle between the walking belt and the board
approximately 10cm from the front of the treadmill. Apply the silicone spray to the walking board, moving from the front
of the treadmill to the rear. Repeat this on the other side of the belt. Spray approximately 4 seconds on each side.
4) Allow the silicone to 'set' for one minute before using the treadmill.
WARNING:
Do not over-lubricate the walking board. Excess lubricant should be wiped off with a clean towel
Summary of Contents for ENERGETICS PR 40.1
Page 1: ...1 ENERGETICS PR 40 1 ENGLISH MANUAL...
Page 23: ...23...
Page 25: ...25 ENERGETICS PR 40 1 GREEK MANUAL...
Page 26: ...26 1 2 3 50 120 4 service 5 6 7 8 9 10 aerosol spray 11 off 12 13 14 15 2 x 1 16 17 0 18 19...
Page 27: ...27 GROUNDED PIN GROUNDED OUTLET Figure Grounding methods 16 AMPERE AMP 220 240 volt...
Page 29: ...29 1 2 2 3 1 2 1 2 3 1 allen 6 16 3 M10x50 7 M10 10 2...
Page 30: ...30 3 4 1 2 allen 5 17 4 4 M8x15 8 4 M8 11 3 2 3 1 15 5 6 4 M5x12 9 2 15 18 19 1 4 M6x10...
Page 31: ...31...
Page 32: ...32 clip start 3 2 1 0 1 0...
Page 44: ...44 1 2 3 4 1 2 2 1 2 3 3 30 40...
Page 45: ...45 1 2 6 4 3 3km 5 1 20 18 24 3...
Page 46: ...46 Allen 1 2 3 4 4 km h 5 2 Allen...
Page 47: ...47 A B C...
Page 48: ...48 O 12 60 30...
Page 49: ...49...
Page 52: ...52 ENERGETICS PR 40 1 ROMANIAN MANUAL...
Page 73: ...73 A B C...
Page 74: ...74...
Page 77: ...77 ENERGETICS PR 40 1 BULGARIAN MANUAL...
Page 78: ...78 1 2 3 50 120 4 5 6 7 8 9 10 11 off 12 13 14 15 2 1 16 17 0 18 19...
Page 79: ...79 16 AMPERE AMP 220 240 W...
Page 81: ...81 1 2 3 1 2 1 2 3 1 allen 6 16 3 M10x50 7 3 M10 10 2...
Page 82: ...82 3 4 1 2 5 17 4 M8x15 8 M8 11 3 2 3 1 15 5 4 M5x12 9 6 2 15 18 19 1 4 M6 10...
Page 83: ...83...
Page 84: ...84 clip start 3 2 1 0 1 0...
Page 90: ...90 BMI 30 26 BMI 30 19 BMI 25 BMI 19...
Page 96: ...96 1 2 3 4 1 2 1 2 3 30 40...
Page 97: ...97 1 2 6 4 3 3 5 1 15 3 18 24...
Page 98: ...98 Allen 1 2 3 4 4 5 Allen...
Page 99: ...99 A B C...
Page 100: ...10 0...
Page 103: ...10 3 ENERGETICS PR 40 1 TURKISH MANUAL...
Page 124: ...12 4 A B C...
Page 125: ...12 5...

