10
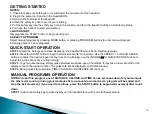
GETTING STARTED
NOTES:
1
. Check to make sure nothing is on or will hinder the movement of the treadmill.
2
. Plug in the power cord and turn the treadmill ON
.
3.
Stand on the foot rails of the treadmill.
4.
Attach the safety key clip to part of your clothing.
5.
Put the safety key into the safety key hole in the console, and then the treadmill will be on start/ready status.
6.
You have two options to start your workout:
A.
QUICK START
Simply press the START button to begin working out.
B.
SELECT A PROGRAM
Select manual program by pressing MODE button or pressing PROGRAM buttons to enter manual program,
8 training goals or 3 user programs.
QUICK-START OPERATION
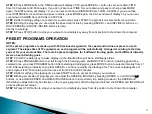
STEP 1:
Attach the Safety key to wake display up; the treadmill then will be on start/ready status.
STEP 2
: Press the START button to begin belt movement after count-down. Use the SPEED +/- or QUICK SPEED
buttons to adjust the desired speed at any time during training; use the INCLINE
∧
/
∨
or QUICK INCLINE buttons to
adjust the incline at any time during training.
STEP 3:
To get a pulse reading, simply grasp stainless steel pick-ups on handrails. It may take a few seconds for the
display to reach the actual number. The pulse rate will be displayed on PULSE window.
STEP 4:
During quick-start operation, TIME, CALORIE and DISTANCE will count up.
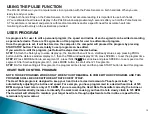
NOTES: Under this program, one of DISTANCE, CALORIE and TIME can be set count-down for your workout,
the others will count up during your workout, after one count-down reach zero, program will be ended and
stop the belt movement, if you need to continue, press the START button to begin belt movement after count-
down.
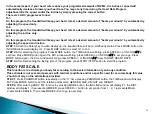
STEP 1:
Attach the Safety key to wake display up; the treadmill then will be on start/ready status.
MANUAL PROGRAMS OPERATION
Summary of Contents for ENERGETICS PR 40.1
Page 1: ...1 ENERGETICS PR 40 1 ENGLISH MANUAL...
Page 23: ...23...
Page 25: ...25 ENERGETICS PR 40 1 GREEK MANUAL...
Page 26: ...26 1 2 3 50 120 4 service 5 6 7 8 9 10 aerosol spray 11 off 12 13 14 15 2 x 1 16 17 0 18 19...
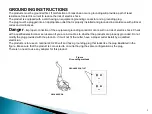
Page 27: ...27 GROUNDED PIN GROUNDED OUTLET Figure Grounding methods 16 AMPERE AMP 220 240 volt...
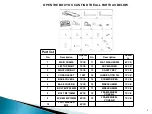
Page 29: ...29 1 2 2 3 1 2 1 2 3 1 allen 6 16 3 M10x50 7 M10 10 2...
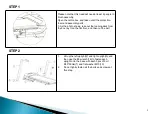
Page 30: ...30 3 4 1 2 allen 5 17 4 4 M8x15 8 4 M8 11 3 2 3 1 15 5 6 4 M5x12 9 2 15 18 19 1 4 M6x10...
Page 31: ...31...
Page 32: ...32 clip start 3 2 1 0 1 0...
Page 44: ...44 1 2 3 4 1 2 2 1 2 3 3 30 40...
Page 45: ...45 1 2 6 4 3 3km 5 1 20 18 24 3...
Page 46: ...46 Allen 1 2 3 4 4 km h 5 2 Allen...
Page 47: ...47 A B C...
Page 48: ...48 O 12 60 30...
Page 49: ...49...
Page 52: ...52 ENERGETICS PR 40 1 ROMANIAN MANUAL...
Page 73: ...73 A B C...
Page 74: ...74...
Page 77: ...77 ENERGETICS PR 40 1 BULGARIAN MANUAL...
Page 78: ...78 1 2 3 50 120 4 5 6 7 8 9 10 11 off 12 13 14 15 2 1 16 17 0 18 19...
Page 79: ...79 16 AMPERE AMP 220 240 W...
Page 81: ...81 1 2 3 1 2 1 2 3 1 allen 6 16 3 M10x50 7 3 M10 10 2...
Page 82: ...82 3 4 1 2 5 17 4 M8x15 8 M8 11 3 2 3 1 15 5 4 M5x12 9 6 2 15 18 19 1 4 M6 10...
Page 83: ...83...
Page 84: ...84 clip start 3 2 1 0 1 0...
Page 90: ...90 BMI 30 26 BMI 30 19 BMI 25 BMI 19...
Page 96: ...96 1 2 3 4 1 2 1 2 3 30 40...
Page 97: ...97 1 2 6 4 3 3 5 1 15 3 18 24...
Page 98: ...98 Allen 1 2 3 4 4 5 Allen...
Page 99: ...99 A B C...
Page 100: ...10 0...
Page 103: ...10 3 ENERGETICS PR 40 1 TURKISH MANUAL...
Page 124: ...12 4 A B C...
Page 125: ...12 5...


