Troubleshooting and Diagnostics
—
Chapter 7
107
6820 Series 80-Column Printer User’s Manual
Printer Mechanism Alignment
If head jams are occurring, the alignment of the printer mechanism may
need correction.
Open the printer top cover, then install a ribbon cartridge (see page 16)
and position the print head to the far left toward the green thumb wheel.
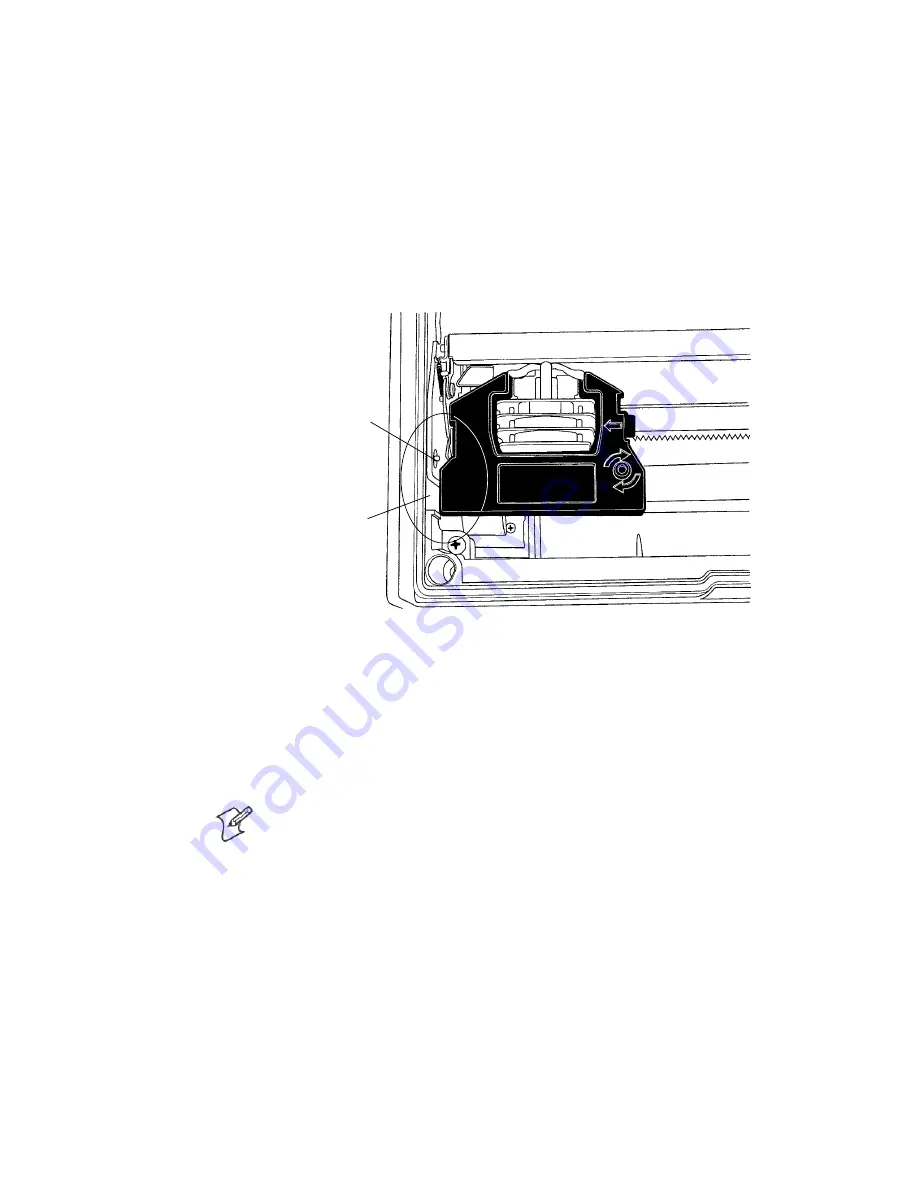
Observe the area between the print head and the printer cavity (circled in
the following illustration). If the ribbon cartridge touches the pivot frame
or press nut, the printer mechanism needs realignment.
Press nut
Pivot frame
This illustration shows the print head to the far left in the printer.
1
Loosen the four screws that hold the mechanism in place using a Phil-
lips screwdriver (see the following illustration).
2
Realign by pushing the printer mechanism to the right,
away from the
green thumb wheel.
3
Push on the right side of the printer mechanism to the back as far as it
will go.
Note
: In this position, the right back edge of the printer mechanism may
touch the pivot frame. The left side must NOT touch the pivot frame.
Summary of Contents for 6820 Series
Page 1: ...6820 Series 80 Column Printer User s Manual ...
Page 4: ...iv 6820 Series 80 Column Printer User s Manual ...
Page 12: ...Contents xii 6820 Series 80 Column Printer User s Manual ...
Page 16: ...Before You Begin xvi 6820 Series 80 Column Printer User s Manual ...
Page 110: ...Control Code Definitions Chapter 5 94 6820 Series 80 Column Printer User s Manual ...
Page 120: ...Bluetooth Adapter Chapter 6 104 6820 Series 80 Column Printer User s Manual ...
Page 146: ...Troubleshooting and Diagnostics Chapter 7 130 6820 Series 80 Column Printer User s Manual ...
Page 168: ...Cross Reference Tables Appendix B 152 6820 Series 80 Column Printer User s Manual ...
Page 172: ...Printer Font Test Jobs Appendix C 156 6820 Series 80 Column Printer User s Manual ...
Page 184: ...Index 168 6820 Series 80 Column Printers User s Manual ...


