


TruVision IP Thermal Camera Configuration Manual
67
3. Enter the quota percentage for snapshots and recordings. Modify the values for
each in
Percentage of Snapshot
and
Percentage of Record
.
4. Enter the quota percentage for snapshots and recording to allocate the storage
capacities to the camera.
5. Click
Save
to save changes.
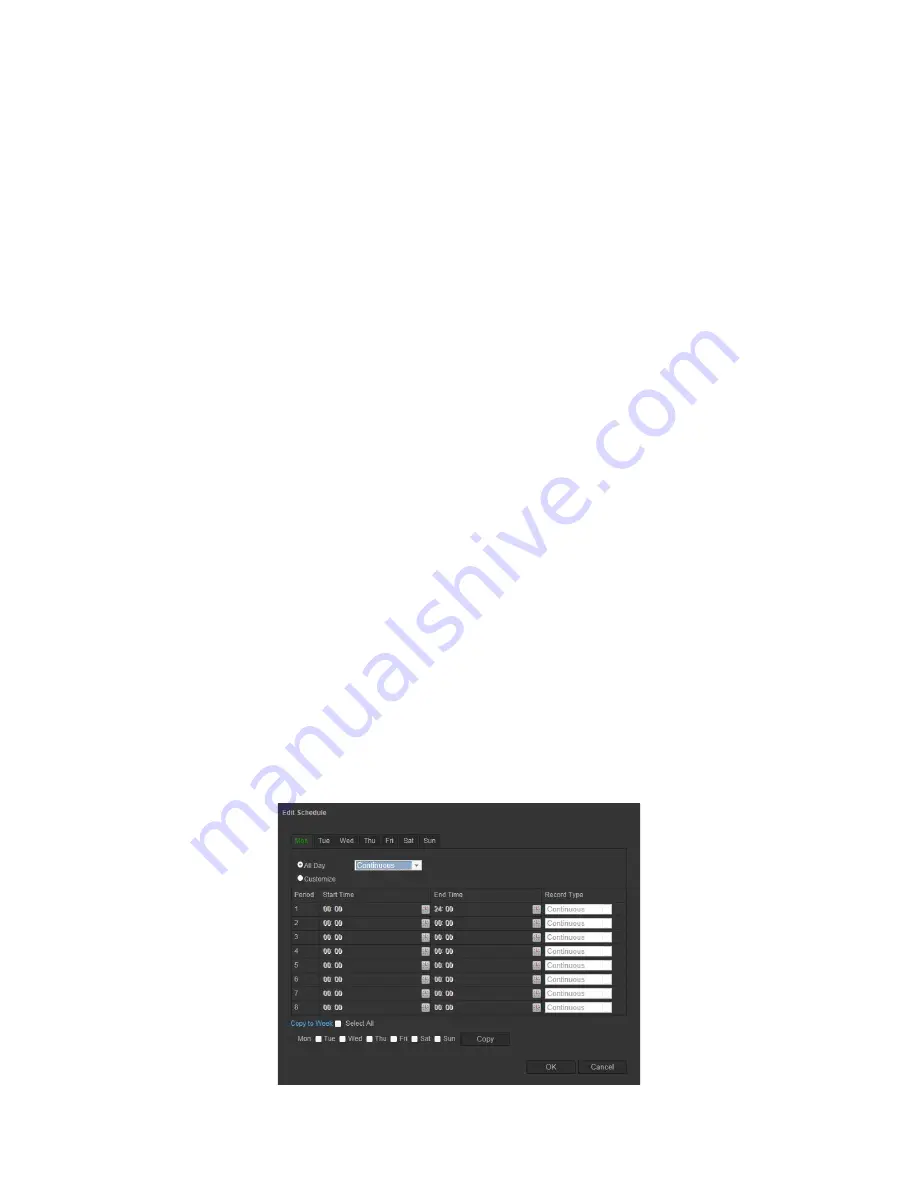
Recording schedule
You can define a recording schedule for the camera in the “Record Schedule” window.
The recording is saved on the SD card in the camera or on a NAS. The camera’s SD
card provides a backup in case of network failure. The SD card is not provided with the
camera.
The recording schedule applies to all alarm types.
Pre-record time
The pre-record time is set to start recording before the scheduled time or event. For
example, if an alarm triggers recording at 10:00, and the pre-record time is set as 5
seconds, the camera starts to record at 9:59:55. The pre-record time can be configured
as No Pre-record, 5 s, 10 s, 15 s, 20 s, 25 s, 30 s, or Not Limited.
Post-record time
The post-record time is set to stop recording after the scheduled time or the event. For
example, if an alarm triggered recording ends at 11:00, and the post-record time is set
as 5 seconds, the camera records until 11:00:05. The post-record time can be
configured as 5 s, 10 s, 30 s, 1 min, 2 min, 5 min, or 10 min.
To set up a recording schedule:
1. From the Configuration panel, click
Configuration
>
Storage
>
Record Schedule
.
2. Click the
Enable Record Schedule
box to enable recording.
Note:
To disable recording, deselect the option.
3. Click
Edit
to edit the recording schedule. The following window appears:


