INOXPA C-TOP Installation, Service & Maintenance Manual Download Page 3


ED. 2010/11 

1.Safety 

1.


Safety 

1.1. 


INSTRUCTION MANUAL 

This instruction manual contains the basic instructions that must be followed during installation, commissioning and 
maintenance work.  
The information given herein is based on the most up-to-date data available. 
INOXPA reserves the right to modify this instructions manual without having to give prior notice.


1.2. 


COMISSIONING INSTRUCTIONS 

This instruction manual contains both essential and useful information in order that your valve be properly handled and 
maintained. 
Not only should the safety instructions set forth in this chapter be obeyed, but all those special measures and recommendations 
that have been added to other chapters herein must also be observed. It is extremely important that these instructions be kept 
in a set place near the installation. 

 
1.3. 


SAFETY  


1.3.1.  


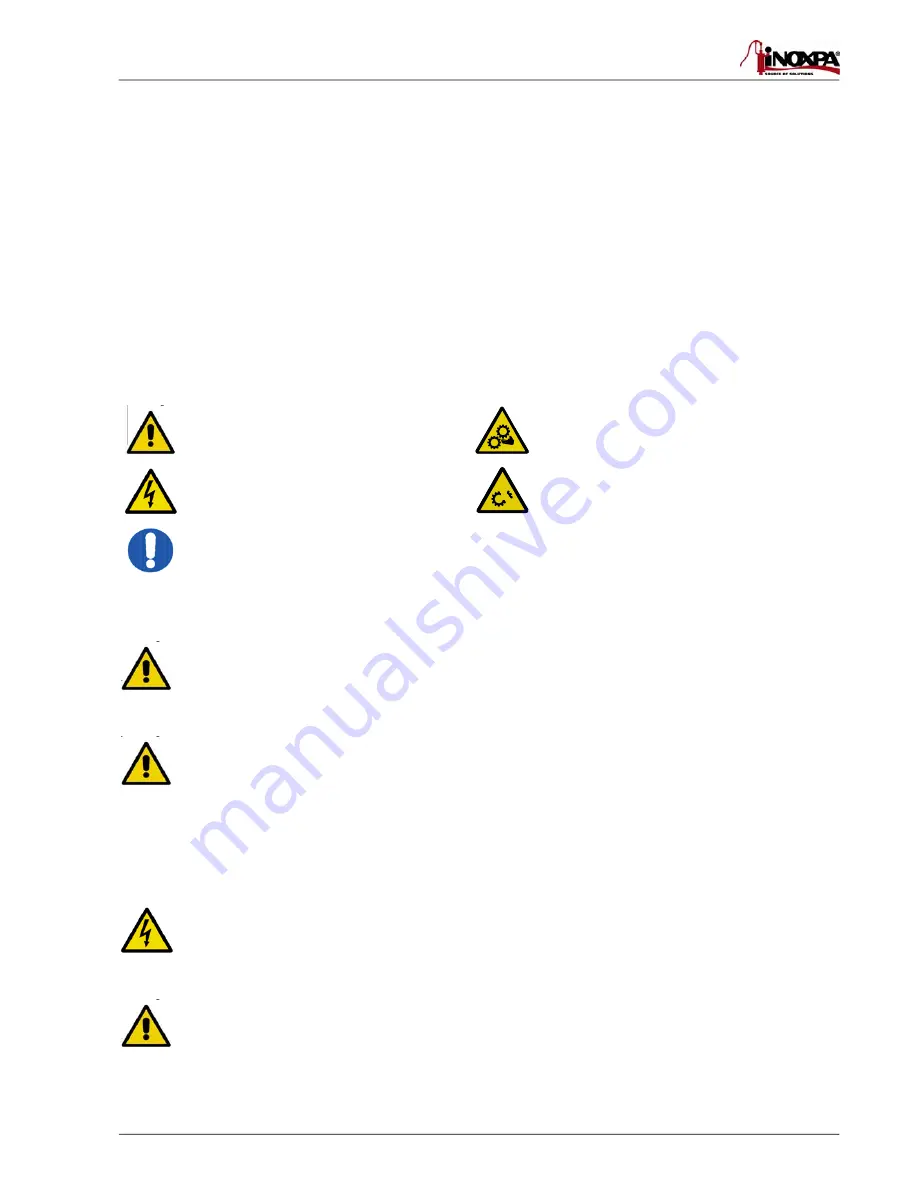
Warning signs 


Danger for people in general 


Danger of injury caused by rotating parts 
of the equipment. 


Danger! Electricity 


Danger to the proper operating of the 
machine. 


Obligation to ensure safety at work. 


1.4. 


GENERAL SAFETY INSTRUCTIONS 


Please read the instruction manual carefully before installing and commissioning the control head. 
Should you have any doubts or queries, contact INOXPA. 


1.4.1.  


During the installation procedure 


Your must always bear in mind the 

Technical Specifications

  set forth in Chapter 8.


The installation and use of the C-TOP control head must always be carried out in accordance with 
health and safety rules that are to be applied. 


Before putting the valve / actuator into operation, check to make sure that it has been correctly 
assembled and that the shaft has been perfectly aligned. Incorrect alignment and/or excessive force 
applied during the securing of the control head may give rise to serious mechanical problems in the 
same. 


During the installation procedure, all the electrical work must be carried out by duly authorised 
personnel. 


1.4.2.  


During operation 


You must always bear in mind the 

Technical Specifications


 set forth in Chapter 8. The limit values that 

have been set must NEVER be exceeded. 
 
NEVER touch the valve and/or pipes that come into contact with  the liquid whenever the valve is in 
service. If it works with hot products, there is a risk of getting burned. 


Summary of Contents for C-TOP

Page 1: ...TENANCE INSTRUCTIONS C TOP control head INOXPA S A c Telers 54 Aptdo 174 E 17820 Banyoles Girona Spain Tel 34 972 57 52 00 Fax 34 972 57 55 02 Email inoxpa inoxpa com www inoxpa com Original Manual 10...

Page 2: ...what repeal 73 23 CEE Directive and are conforms with UNE EN 60204 1 2006 and UNE EN 60034 1 2004 EMC Directive 2004 108 EC what repeal 89 336 CEE Directive nd are conforms with UNE EN 60034 1 2004 D...

Page 3: ...nsure safety at work 1 4 GENERAL SAFETY INSTRUCTIONS Please read the instruction manual carefully before installing and commissioning the control head Should you have any doubts or queries contact INO...

Page 4: ...instructions could carry the following risks Serious operational failure of the machine plant Specific maintenance and fault repair procedures The threat of electrical mechanical and chemical risks Th...

Page 5: ...very 7 4 2 Delivery and unpacking 7 4 3 Identification 7 4 4 Positioning 7 4 5 Fitting the head 9 4 6 Electrical connection 11 4 7 As interface electric connection 11 4 8 Pneumatic connections 14 5 Co...

Page 6: ...es This element incorporates the following functions in a single element pneumatic and electrical control of the valve position indicators with feedback possibility of communication by AS Interface bu...

Page 7: ...ion 8 2 of the chapter entitled Technical Specifications for further information 4 4 POSITIONING The purchaser or user will be responsible for assembly installation commissioning and operation of the...

Page 8: ...t SCN1011 for multi way valves along with the head The bracket adapter must be fitted in such a way as to be properly aligned with the pneumatic actuator rod Failure to observe this recommendation cou...

Page 9: ...e upper part of the pneumatic actuator carefully screwing it until it is well secured Use a conventional 17mm spanner for C TOP with proximity detectors a conventional 7 mm spanner for C TOP with micr...

Page 10: ...raise the detector screw anti clockwise to lower the detector 6 Adjust the height of the position indicators with a screwdriver 7 Make sure all of the connections both the air and electrical connecti...

Page 11: ...olenoid valve Double Effect drives V3 third solenoid valve MixProof drives Detectors signal outputs to the control panel or PLC S1 Open valve detector position Green LED S2 Closed valve detector posit...

Page 12: ...Inlet 4 Switch 4 8 0V 9 Outlet 3 Solenoid 3 10 Inlet 3 Switch 3 11 0V 12 Outlet 2 Solenoid 2 13 Inlet 2 Switch 2 14 0V 15 Outlet 1 Solenoid 1 16 Inlet 1 Switch 1 17 18 n c Program By default the direc...

Page 13: ...ing heads DESCRIPTION CODE C TOP DETECTORES 24V DC 2E 3D AS I V9721 2384001AS C TOP DETECTORES 24V DC 3E 2D AS I V9721 3284001AS C TOP DETECTORES 24V DC 3E 3D AS I V9721 3384001AS 1 AS i 2 AS i 3 n c...

Page 14: ...the following heads DESCRIPTION CODE C TOP DETECTORES 24V DC 0E 2D AS I V9721 0284001AS C TOP DETECTORES 24V DC 1E 1D AS I V9721 1184001AS C TOP DETECTORES 24V DC 1E 2D AS I V9721 1284001AS C TOP DETE...

Page 15: ...e compressed air pressure at the head inlet is that which is indicated in the Technical Specifications in Chapter 8 Control the possible air leaks before fitting the cover Check to make sure that all...

Page 16: ...Adjust the height of the detectors Check to see that the detectors microswitches are working properly AIR LEAK The air is continuously leaking from inside the head Check all of the pneumatic connecti...

Page 17: ...ies are free from dirt Monitor the concentration of cleaning solutions it could give rise to deterioration in the base or the head cover In order to remove any remains of cleaning products ALWAYS rins...

Page 18: ...7 PSI differential pressure Run minimum 3 mm maximum 70 mm ELECTRICAL SPECIFICATIONS Protection IP 65 67 according to EN 60529 Supply voltage DC 24V or by means of AS i bus AC 24 110 220V Connections...

Page 19: ...cuit board Factory pre wired electrical connections Electrical connection brought about via an 8 pole terminal 1 2 3 0 2 microswitches 24V DC 2 1 2 3 AS i BUS 3 0 2 proximity detectors 24V DC Control...

Page 20: ...ITION NAME MATERIAL QUANTITY 7 Bull plug stainless 1 7a Bull plug plastic 1 12 Cover PC 1 13 Base PPO GF 1 14 Block Aluminium 1 14a Solenoid valve 3 2 Aluminium 1 14b Cable gland M16 plastic 1 14c Bla...

Page 21: ...UANTITY 7 Bull plug stainless 1 7a Bull plug plastic 1 12 Cover PC 1 13 Base PPO GF 1 14 Block Aluminium 1 14a Solenoid valve 3 2 Aluminium 1 14b Cable gland plastic 1 14c Blank plate M16 Aluminium 1...

Page 22: ...CA PTY LTD INOXPA USA Inc ROUIBA JOHANNESBURG SANTA ROSA Tel 213 21856363 21851780 Tel 27 117 945 223 Tel 1 7075 853 900 Fax 213 21854431 Fax 27 866 807 756 Fax 1 7075 853 908 e mail inoxpalgerie inox...

Reviews: