InisBofin Insert Boiler Multi-fuel Stove
20
correct position, fire cement
should be used to make a tapered
seal between the clay liner and
the adaptor to ensure any
condensate or rain will flow into
the flue and not down around the
stove body. The extension piece of
flue is now pushed fully up onto
the closure adaptor to allow for
the stove to be positioned into
the proper position. Please note
that the extension pipe must fit
OVER the bottom end of the closure
adaptor pipe. The stove facade
should be offered up to the stove
at this point to ensure proper
depth placement of the stove. Now
pull the extension pipe down
through the stove and using some
fire cement fit the flue collar to
the end of the extension pipe and
when fully sealed, push the flue
collar up into position and bolt
into place.
Check that the joints are all
fully sealed with fire cement and
haven’t being damaged during
fitting. The stove can now be
plumbed as per the section below
on central heating system.
Finally fit the facade onto the
stove ensuring that the damper
mechanism is free and clear in
operation. Once the liner is fully
fitted to the stove, vermiculite
infill can be used to fill in
around the liner down to the
stove. All pipe work should be
fully lagged to prevent excessive
heat loss from the system
.
Method 2
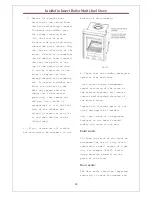
The fire surround will usually
need to be removed to fit the
stove and facilitate plumbing of
the stove. To aid rapid heating of
the water it may be beneficial to
place some fibre glass around the
boiler of the stove when
installing the stove. The stove is
placed in position and the facade
is placed on the stove to check
that the depth of the stove into
the recess is right. A straight
section of solid fuel flue pipe
approx. 6”-8” long with a flexible
liner adaptor on the top of it
should be mounted to the bottom of
the flexible liner and fully
tighten the holding screws on the
adaptor. Push the flexible liner
and straight pipe section down the
chimney and pull down onto the
flue collar. The flexible liner
MUST fit into the adaptor on the
straight flue piece not over it.
Using some fire cement mount the
flue collar onto the bottom of the
straight pipe section and bolt the
flue collar into place with the
two bolts provided. Check that the
joints are all fully sealed with
fire cement and haven’t been
damaged during fitting in place.
Finish the installation of the

