background image

InisBofin Insert Boiler Multi-fuel Stove 


11 


changed if needed. Also check the 

seal on the door glass for 

tightness and seal integrity.


Shutdown: 

If the stove is to be unused for a 

prolonged period of time, for 

instance over the summer months, 

the stove and chimney should be 

fully cleaned and a light oil like 

“WD40” applied to all moving parts 

and all surfaces within the stove 

to displace moisture. The damper 

may be left slightly open to 

facilitate a little air movement 

through the stove and avoid 

moisture build up. Avoid excess 

opening of the damper as this will 

result in excess heat loss through 

the stove up the chimney. After a 

prolonged period being unused, 

inspect the chimney before use to 

ensure no blockage has occurred. 

Also ensure that the air vent to 

the room of the stove is clear. 


Trouble shooting 

NOTE

: Excessive fume 

emission to the room must 

not be tolerated. 


Fire burns very rapidly and 

refuelling periods are not being met: 

1 Chimney draught is very high, 
chimney damper may be required.  

2 Fuel load too small for damper    
setting. 

3 Door seals are worn. 

4 Adjust the damper to a lower               
setting for proper fire control. 

Fire will not burn properly: 

1 Chimney draught is too low  

2 Damper is closed 

3 Chimney height too low, 

flue/chimney seals leaking 

4 Chimney blocked, damaged 

5 Ash covering all air ways into 
firebox 

6 Fuel is wet 

7 No permanent air vent present in 
room. 

Stove emits fumes: 

 1 Chimney blocked 

 2 Door seals require replacing 

 3 Excess down drafts in chimney 

 4 Chimney draughts below 25Pa when 

warm. 

 5 Extractor fan affecting stove. 


Some/all radiators not heating: 

1 Check that the fire is burning at 

full output  

2 Check that the pipe stat for the 

heating is not set too high or too 

low. (Typical range of 

temperatures 55*C-60*C) 

3 Check if the system needs 

balancing and that the radiators 

are turned on. Check that a system 

link isn’t preventing flow to the 

Summary of Contents for InisBofin

Page 1: ...InisBofin Insert Boiler Multi fuel Stove 1 InisBofin Insert boiler User and Installation Manual ...

Page 2: ...g the stove 7 Refuelling 8 Continuous Burning 8 Ash Clearance 9 Stove cleaning maintenance 9 Troubleshooting 11 Stove Dimensions 13 Stove installation Manual Health Safety notices 14 Air requirements 15 Stove Preparation 16 Chimney 16 Hearth Fire Surrounds 18 Stove Fitting 19 Central Heating System 22 Pre Firing check 27 First Firing and commissioning 27 Exploded view and parts list 28 ...

Page 3: ...ions require that whenever a new or replacement fixed solid fuel or wood biomass appliance is installed in a dwelling that a carbon monoxide alarm MUST be fitted in the same room as the appliance Inis Stoves also recommend that a fire alarm is fitted and that regular checks to be sure the alarms are operational for the proper protection for you your family and your home PROVISION OF A CARBON MONOX...

Page 4: ...hen the hand tool faces downward at 45 degrees the riddling grate is in the closed position This position is used when burning wood Fig 2 When the hand tool is raised fully up at 45 degrees the grate is in the open position and this position must be used when burning manufactured solid fuels and peat To riddle the grate use the riddling hand tool and gently oscillate the riddler back and forth Avo...

Page 5: ...dhere to the curing procedure described below as over firing the stove before the paint has cured will lead to fading of the paint and this is not covered by your warranty When the stove is used for the first number of times the process of curing the paint will occur To do this a small fire using only kindling wood should be started for approximately 30 minutes allow the stove to cool slightly the...

Page 6: ...y 7 Care should always be taken when emptying the ash pan of the stove Hot ashes should never be put in a plastic dust bin bag or container Ideally empty the ash pan when the ashes are cold 8 Inis Stoves is dedicated to the principal of using renewable fuels in all our stoves Using wood as fuel goes a long way in reducing your home s carbon footprint and also reduces our dependence on imported ene...

Page 7: ... in sulphur with leads to acid attack of the stove flues and chimney Petroleum also has low ash content which will damage the stove grate and other parts of the stove in a very short period of time Examples of these fuels are Calco and Superblend Using any fuel containing Petroleum coke will invalidate your warranty To find a complete list of approved solid fuels for use in closed appliances pleas...

Page 8: ...excessive smoking and will help to keep the stove and the glass clean Once the new fuel is well alight the damper can be adjusted down to an appropriate setting Continuous burning The InisBofin insert boiler stove is capable of continuous burning making overnight burning possible at a reduced output To achieve overnight burning open the damper fully and fill the firebox with a full charge of fuel ...

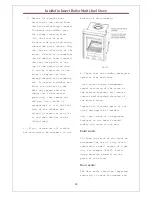
Page 9: ...ed to clean the stove weekly or fortnightly Inspect on a regular basis the condition of the door seal and if found to be worn replace it immediately Only clean the stove when it is fully cold A Pair of gloves should be used when cleaning the stove and care should be taken to avoid injury as a number of the stove components are quite heavy As per figure 5 below to remove the baffle assembly for cle...

Page 10: ...rewdriver to lift the left side of the riddler bar slightly forward as you lift it and then the bar can be lifted away 3 Fig 6 Vacuum out all visible ash thoroughly Re assembly is the reverse of dis assembly Fig 6 4 Check that the riddler mechanism operates free and clear Inis Stoves highly recommends annual servicing of the stove as the service engineer will ensure correct and thorough cleaning o...

Page 11: ...ion to the room must not be tolerated Fire burns very rapidly and refuelling periods are not being met 1 Chimney draught is very high chimney damper may be required 2 Fuel load too small for damper setting 3 Door seals are worn 4 Adjust the damper to a lower setting for proper fire control Fire will not burn properly 1 Chimney draught is too low 2 Damper is closed 3 Chimney height too low flue chi...

Page 12: ... blackens excessively If the stove is fitted correctly and the correct lighting and operation of the stove is adhered to blackening of the glass should always burn off after a period of full output A poor draught and or the use of wet or improper fuel will often lead to excessive glass blackening Often clean glass operation will be attained with a little experience of operation Using a ceramic coo...

Page 13: ...ide alarm sounds open all windows and doors close down the stoves and leave the room After it has been deemed safe to re enter the room only after the fire has gone out it MUST be established as to the reason why the alarm sounded before any attempt is made to re light the stove ...

Page 14: ...and Safety precautions Please ensure that the installation of the stove complies with all the requirements of the relevant Health and safety at work acts applicable Some materials used in fire cement are caustic and contact with the skin should be avoided In case of contact with the skin wash with plenty of cold water If any structural work is required for installation please take note of the poss...

Page 15: ...ir current traversing through normally occupied areas of the room Care must also be taken to ensure that the vent cannot be blocked by object left against the wall outside or debris like leaf litter etc A larger vent is required if there is an appliance like an extractor fan or tumble drier in an adjoining room To ascertain if more venting is required these appliances should be operated together a...

Page 16: ...s are clear and lift away Take great care not to drop the door as it is quite heavy and the door glass can easily be broken Façade removal The facade is removed See Fig 8 by unscrewing of the two screws on both sides of the façade at floor level gently but firmly lift the facade approx 5mm by holding towards the left and right sides of the façade along the top to avoid deforming the facade in the ...

Page 17: ...rt J All chimneys and flues used must be sealed for the best possible performance The draught in the chimney must be at least 25 Pa when warm and must not suffer from down draughts and if there is an excessive draught in the chimney a draught stabiliser should be fitted If any doubt exists please contact a chimney expert If it is an existing chimney that has been is use with an open fire the chimn...

Page 18: ... fire proofing expert advice should be sought before any work begins The stove must be placed onto a fire proof hearth of at least 12mm in depth that is flat and level The stove positioning and hearth size are governed by building regulations for class 1 appliances As can be seen below in Fig 9 the minimum sizes of the opening are shown with minimum hearth thickness The hearth must extend at least...

Page 19: ...to the chimney Method 1 is to use a closure pipe adaptor section and an extension piece Method 2 is to line the chimney with a suitable 6 liner for solid fuel and connecting to the stove with a solid section connector Method 1 The fire surround will usually need to be removed to fit the stove and facilitate plumbing of the stove To aid rapid heating of the water it may be beneficial to place some ...

Page 20: ...on Once the liner is fully fitted to the stove vermiculite infill can be used to fill in around the liner down to the stove All pipe work should be fully lagged to prevent excessive heat loss from the system Method 2 The fire surround will usually need to be removed to fit the stove and facilitate plumbing of the stove To aid rapid heating of the water it may be beneficial to place some fibre glas...

Page 21: ...the section below on central heating system Finally fit the facade onto the stove ensuring that the damper mechanism is free and clear in operation Once the liner is fully fitted to the stove vermiculite infill can be used to fill in around the liner down to the stove All pipe work should be fully lagged to prevent excessive heat loss from the system Method 1 ...

Page 22: ...t An unvalved heat sink radiator must be used to dissipate heat in the event of a pump failure where the Domestic hot water tank is hot This radiator must be at least 1kw in capacity If there isn t a domestic water tank in the system an unvalved heat sink radiator of a least 1 5kw must be provided The Domestic water tank must have a capacity of at least 135 litres and be an indirect type Where the...

Page 23: ...InisBofin Insert Boiler Multi fuel Stove 23 Typical 2 pipe connection piping layout Typical 3 pipe connection piping layout ...

Page 24: ...InisBofin Insert Boiler Multi fuel Stove 24 Typical 3 pipe connection piping layout ...

Page 25: ... and return on any particular circuit MUST be cross connected for the stove to operate correctly Even when using all four connections to pipe the stove The gravity circuit and the central heating system MUST be cross connected for each to work correctly The gravity flow to the domestic water tank heat sink radiator must be as ...

Page 26: ... systems are operated using just one stat placed on the flow from the stove The main issue with using just one stat is that the water coming back to the stove can be very cold and this leads to a lot of condensation in the boiler but until that cold water flows through the stove and often through a considerable length of piping to get to the stat the pump keeps operating The user will most often h...

Page 27: ...all pieces of kindling leaving the door ajar taking care that the smoke is being drawn up through the stove and out the chimney Maintain the small fire for at least a half hour to properly set the sealing materials without cracking them from excess heat After the paint has been cured as described in the user section the system should be brought up slowly to full operating temperature and a full ch...

Page 28: ...procket c w set screw 6 1 Façade c w 2 set screws 17 1 Hand tool 28 2 Firebox side plates L R 7 1 Firebar 18 3 Ex air blanking plate c w 8 screws 31 1 External Air coupling Not shown 8 1 Firebox side casting L 19 1 Door latch roller pin assem 32 1 Door seal kit Not shown 9 1 Firebox side casting R 20 1 Stove boiler chassis 33 1 Glass seal kit Not shown 10 1 Firebox side casting rear 21 1 Flue coll...

Reviews: