


O P E R A T I O N S
Operating from the Front Panel
02_03
LDC-3926339
19
C H A P T E R
2
9a
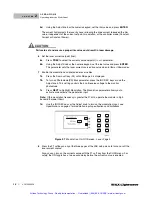
Using the INC/DEC keys, Adjust knob, or keypad, enter the optical power setpoint
value.
The module divides the measured photodiode current by the CalPD value to calculate the
laser optical power. The current source automatically adjusts the laser drive current to
keep the calculated laser power at the Pset value.
9b
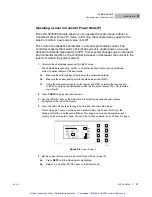
Select CalPD and adjust it to the calculated value. If the correct CalPD is not known,
see
Setting Constant Photodiode Current Mode (Ipd)
on page
20
.
The photodiode responsivity, CalPD, is used to convert photodiode current to optical
power of the laser diode.The CalPD units are mA/mW. The correct responsivity value
(CalPD) must be set for the constant power mode to properly operate.
10
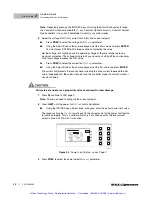
Enable the photodiode bias.
10a
Press the Down soft key (F4) until LAS page 3 is displayed.
10b
To turn on Photodiode (PD) Bias parameter, press the INC/DEC keys or use the
Adjust knob. The PD Bias parameter will toggle between on and off. This setting
controls the 5 volt reverse voltage to the monitor photodiode.
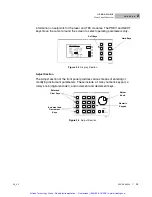
Figure 2.10
Laser Page Three
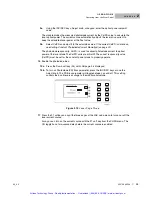
11
Press the F1 softkey on any of the three pages of the LAS setup menu to turn on or off the
laser current source.
Also, you can turn on the current source with the F1 soft key from the CHAN menu. The
ON toggle has a two-second delay before the current source is enabled.
Artisan Technology Group - Quality Instrumentation ... Guaranteed | (888) 88-SOURCE | www.artisantg.com