


The StellarMate Plus Manual
115 / 227
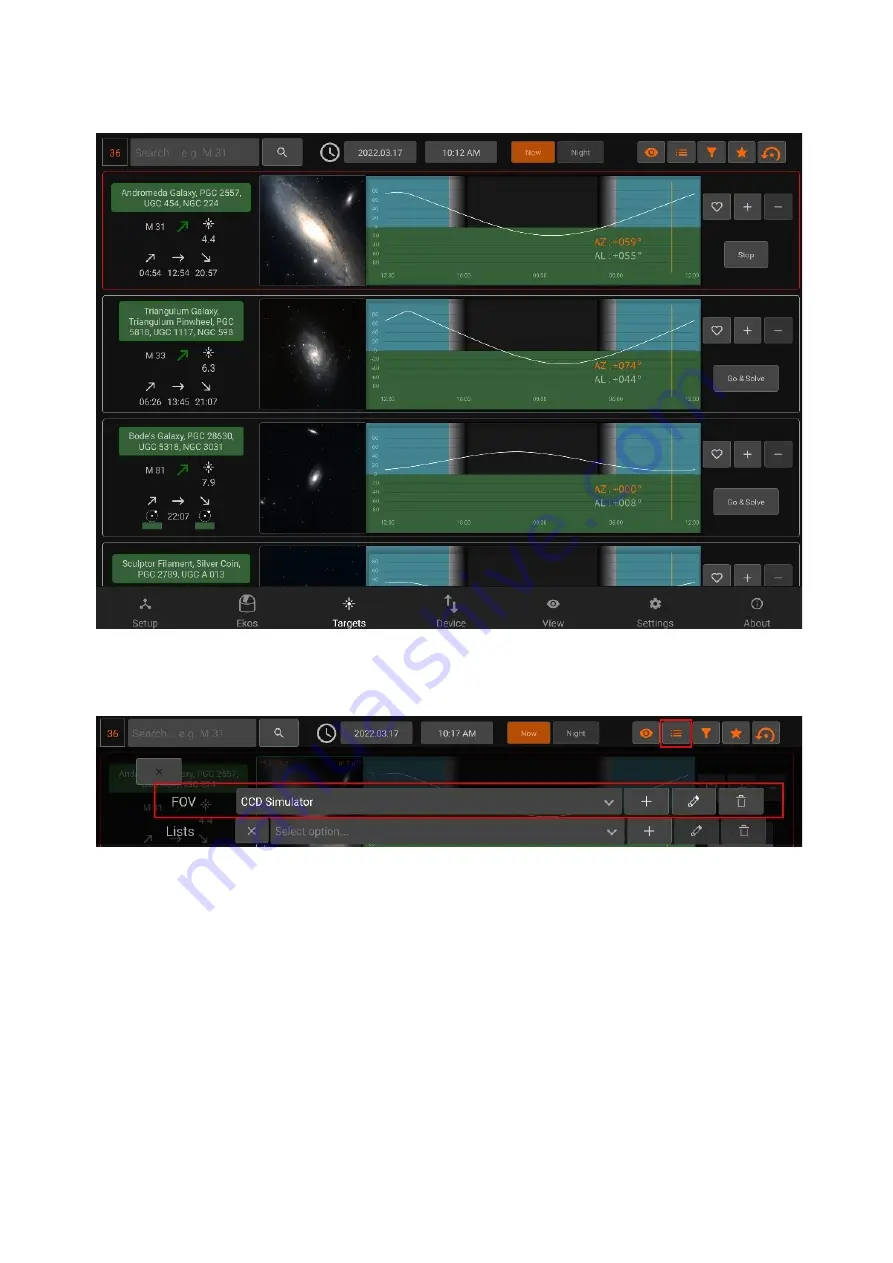
Framing Assistant
To open the framing assistant, make sure to have selected an
FOV Profile
and press
Go
& Solve.
StellarMate will command the mount to slew to the target location. This is indicated by a
magenta border around the target. Once Slew is complete, the alignment process begins
which is indicated by a yellow border. A red border indicated alignment error or alignment
is not within threshold. Please wait until the solver iterates to center the target exactly in the
center of the sensor. Once this is done, the border turns to Green. Now that the plate
solving is complete, you may proceed to use the Framing Assistant tool that helps you in
adjustment the orientation of the camera to match your desired orientation either manually
or automatically if a rotator device is detected.
Once the status turns to green (1), press the image (2) to open the
Framing Assistant
Summary of Contents for Stellar Mate Plus
Page 50: ...The StellarMate Plus Manual 50 227 First Capture First Rotation...
Page 51: ...The StellarMate Plus Manual 51 227 Second Capture...
Page 52: ...The StellarMate Plus Manual 52 227 Second Rotation Third Capture...
Page 109: ...The StellarMate Plus Manual 109 227 Search Results...
Page 114: ...The StellarMate Plus Manual 114 227...
Page 123: ...The StellarMate Plus Manual 123 227...
Page 160: ...The StellarMate Plus Manual 160 227 2 WiFi Infrastructure Bluetooth...
Page 186: ...The StellarMate Plus Manual 186 227 4 Web Manager 5 Network Manager 6 Device Manager...
Page 219: ...The StellarMate Plus Manual 219 227 6 Select the MicroSD card you wish to write your image to...


