The information contained in this document is the property of Automatic Systems and is confidential. The recipient shall refrain from using it for any purpose other than the use of the products or the
execution of the project to which it refers, and from communicating it to third parties without Automatic Systems’ prior written agreement. Document subject to change without notice.
BL3x-MT-EN-08
page
38/59
5.9.
Installing the tip support
5.9.1. Standard tip support
•
The arm tip support is supplied as an option for arm lengths up to 5.00 metres, and as standard
equipment from 5.01 metres.
•
The tip support must be fixed onto a flat and level concrete base by means of four rawlbolts
following the instructions of plan Nr CH2656. Its role is to assure the rigidity of the arm and
maintain its tip when in the closed position.
•
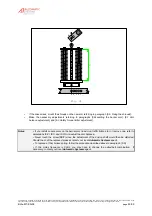
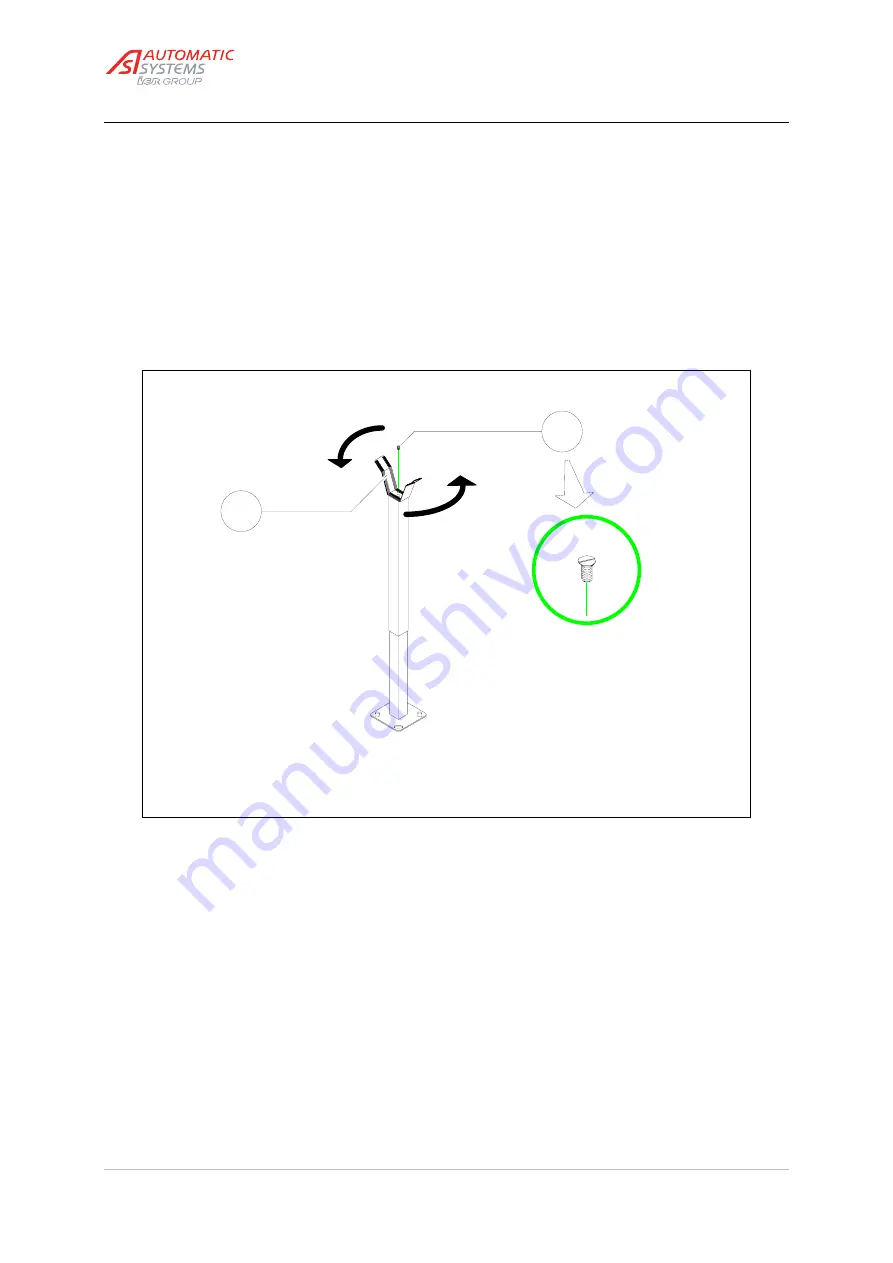
If required, adjust the height of the tip support as follows:
21:2
Fig. 21
21:1
--
Remove the screw (
21:1
).
--
Rotate the fork (
21:2
) of the tip support in either direction so that the arm tip just rests on it
when the arm is locked in the closed position.
--
Fix the screw (
21:1
) again.
--
Align the arm in the tip support, if necessary by rotating the barrier on its sealing frame.
Tighten the nuts (
9:7
) firmly to lock the barrier on the concrete base.


